No More Hounds in the Kitchen?

little dog hawise and girl LilYou may have noticed that posting has been light the last few weeks. I have had a sinus headache to end all headaches that leaves me with little energy to do anything but sleep. After many meetings with my Ear Nose, and Throat doctor, he referred me to an allergist. Today I suffered through nearly four hours of the arcane prick tests to determine that I'm allergic to dust mites and dogs.

So the blog is not going away, but the hounds and I are renegotiating terms. Little Hawise will no longer be allowed to sneak into our bedroom and might be bathed more often. Big dog Devie is going to have to give up her couch soon for a washable bed.

Posting may continue to be uninspired or few and far between as we tackle a few home improvement projects that should ease my allergies - removing carpet upstairs and the basement drop ceiling. I'm trying out some medicines too.

Hopefully soon I will feel like my usual self again. In the meantime, thanks for your patience!

Great Grandma's Apple Butter {Recipe}

My Great Grandma Davis, mother of my father's mother Joyce, was an old school home cook. She grew a large garden and Grandpa fished to feed themselves fresh and cheap food. Grandma later used her kitchen experience to serve as a school cook for many years in the decades where everything was prepared from scratch on site. Because Grandma lived into her nineties, I grew up knowing her. I remember eating a breakfast of biscuits and jams at her house in Missouri as a very young child. Sadly, she died before I was interested in food and could learn from her depth of home cooking knowledge.

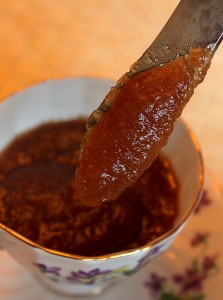
great grandma's apple butter recipeI do know that Grandma put up everything she could, including apple butter. For years, I hesitated to remake her recipe because I was afraid I could live up to her version. But for you, dear blog readers, I sifted through recipe cards at my parents' house and pulled out Great Grandma's Apple Butter.

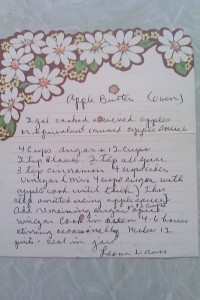
Just reading Grandma's handwriting stirs up sentimental feelings of opening birthday cards and Christmas gifts lovingly addressed by her hand. Click on the card image to see it larger. I love that she simply wrote 'seal in jars' as if every woman of her day would know exactly how to do that. I consulted the National Center for Home Food Preservation to find the proper canning time.

I suspect I will never alter this recipe because there is a certain nostalgia in making apple butter exactly as my great grandmother did. Not knowing Leona, however, you might want to substitute some brown sugar for the white and change the spices. Ground ginger would play nicely with the other flavors, as would nutmeg. I did reduce quantities and update the recipe to make it slow cooker friendly.

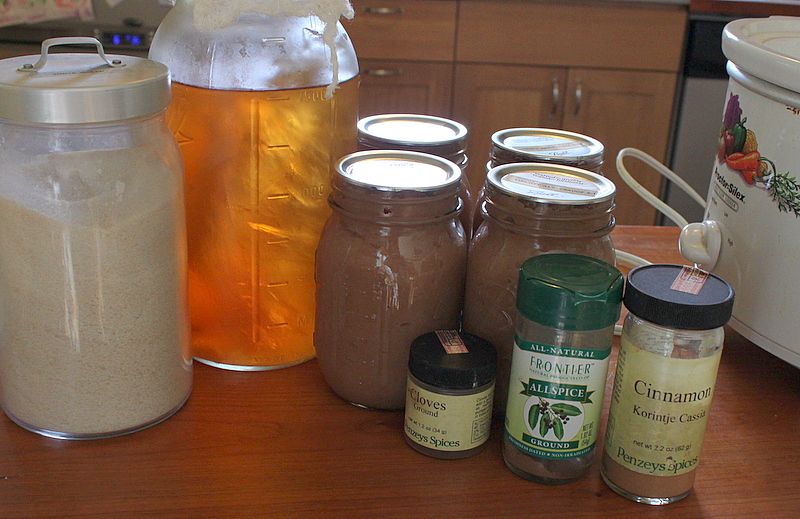
My father made this recipe a few years ago and noted that he would prefer less vinegar. I think the iteration I made with Liberty Pink applesauce and homemade cider vinegar had a perfect balance. We suspect that the variety of apple makes all the difference and you may wish to taste before adding all the vinegar.

great grandma's handwritten apple butter recipeingredients for apple butter recipe


[print_this]

Great Grandma's Apple Butter Recipe

makes 6 half pints

4 pints applesauce, or 8 cups stewed and pureed apples

3 cups granulated white sugar

1/2 teaspoon ground cloves

1/2 teaspoon ground allspice

1 teaspoon ground cinnamon

1 cup cider vinegar

1. Stir all ingredients in a slow cooker or oven safe pan.

2. Cook on high uncovered, or 200 degrees F, for 4-6 hours, or until reduced by half.

3. Fill jars leaving 1/4 inch head space. As the apple butter is very thick, jiggle the jars or stir with a chopstick to release any air pockets.

4. Wipe rims and place two part lids on jars. Place in water bath canner and process for 5 minutes.

5. Remove jars from water and allow to cool for 12 to 24 hours. Prepare and store for up to one year.

[/print_this]


More Davis/Tayse family recipes:

Rhubarb Crunch

Gingersnaps


Why There's Vanilla Brewing {Friday Five}

1) While making cereal snack mix for the annual family camping trip, I saw the recipe on the box for chocolate/peanut butter covered in powdered sugar snack mix. (These mixes have names but they are trademarked and silly.) 2) I had to make it too, despite not exactly possessing most of the ingredients. I subbed chocolate bar pieces for the chips and almond butter for peanut butter.

3) Then I realized the vanilla extract jar ran dry two days ago.

4) But I found vanilla beans in the spice drawer and ran to the computer to search how to make vanilla extract at home. I dumped vodka and beans in a jar leftover from canning apple butter.

5) In four weeks I can make chocolate/peanut butter cereal mix with vanilla. You can bet I made it without vanilla for this trip. This is how I get into trouble in the kitchen: one project leads to another to another. Am I the only one? PS. The CSCC Taste the Future giveaway ends Tuesday.

Homemade Pizza {Recipe}

tossing pizza doughHomemade pizza sometimes begins with the suggestion from Alex that we order in. I remind him that we always regret the greasy crusts. Other times, we have an abundance of vegetable odds and ends in the fridge and pizza sounds like a good way to use them up.

Or we want a fun meal to make with friends or family. One of our recent pizza parties including dough tossing by Alex's brother Ben, a pizza maker at Whole Foods.

Whatever the reason, when pizza making time comes, we have our routine down to a science.

A pizza stone is a must. Careful direction to kids and newbies during the 'decorating' phase is necessary, as too much sauce is a surefire beginning of an unpleasant soggy crust. We use a wooden paddle to shimmy the dough into the oven but a large thin cutting board dusted with cornmeal works fairly well.

Finally, and this is the hardest, the oven door must stay shut during cooking.  The perfect pizza is cooked at consistently high temperature and every opening loses massive amounts of heat.

We can cook only one or two pizzas at a time in our single oven. We start with Lil's pizza (cheese, basil, and capers) and then make one to please the adults in the crowd. After each comes out and rests, we serve slices family-dinner style on a big cutting board in the middle of the table. The oven stays on as other guests make their individual pizzas, sharing pieces as they are ready.

Delivery just can't compete!

home pizza cooking with paddle and stone

Pizza Crust Recipe for 4 10-inch pizzas

1 package (2 ¼ teaspoons) active dry yeast 1 cup warm water 3 cups all purpose flour, or a mix of bread flour and whole wheat flour 4 tablespoons olive oil 2 1/2 teaspoons salt

  1. Dissolve yeast in water in a medium bowl.
  2. Stir in flour, olive oil, and salt.
  3. Mix until well combined, at least 20 strokes. Add more flour if necessary until dough does not stick.
  4. Cover with saran wrap or a towel and let rise for 30-60 minutes, until double in bulk.
  5. If making pizzas immediately, follow assembly steps below. Dough can be portioned and frozen in individually wrapped pieces at this point. To use after freezing, allow to thaw completely and rise a little more before shaping and topping. Allow 3-4 hours at room temperature or allow to thaw in the fridge overnight.

Quick Pantry Pizza Sauce makes approximately 3 cups, enough for 6-8 pizzas

1 tablespoon olive oil ½ medium onion, diced 2 cloves garlic, minced 1 15 ounce can diced tomatoes 2 6 ounce cans tomato paste 1 tablespoon balsamic vinegar 2 tablespoons fresh oregano, minced (or 1 teaspoon dried) 2 tablespoons fresh basil, minced (or 1 teaspoon dried) ½ teaspoon salt, to taste ½ teaspoon black pepper, to taste

1. Heat olive oil in a heavy bottomed pan. Add onions and garlic and cook on medium low heat until onions are translucent, about five minutes. 2. Add remaining ingredients. Cook until sauce is thick and herbs are wilted, about 15 minutes. 3. Use on pizza. Leftovers can be stored in the fridge for one week or in the freezer in an air tight container for up to 6 months.

Assemblyhomemade cheese pizza

1. Heat oven to 450 degrees F. Heat baking stone in oven if you have it. 2. Punch down dough and divide into four equal pieces. 3. Form a ball with one piece. Press it into a small round. Gently thin the center by holding it perpendicular to the ground and pressing with your thumbs together while turning the dough like a steering wheel. Continue to stretch into a bigger round by moving your thumbs out from the center. 4. Place the dough on a paddle, thin cutting board, or the back of a cookie sheet dusted in cornmeal. Do not press the dough onto the surface. 5. Spoon no more than ¼ cup tomato or pesto sauce onto the dough. Spread the sauce with the back of a spoon evenly across the dough. 6. Top with toppings. If toppings are too thick, the bottom of the dough will burn before the top is thoroughly cooked. Try to keep them evenly spread and not too thick. 6. Slide pizza from the cornmeal covered surface by wiggling it gently onto the baking stone in the oven. 7. Close the door and leave it shut for 7 minutes. Check to see if cheese is melted as desired. Try to minimize door openings to keep oven hot. 8. When pizza is done, remove from oven and allow to cool 3-5 minutes before cutting. Keep stone in oven to keep cooking more pizzas!

One final suggestion: If you have leftover dough but not enough to freeze, try topping a final pie with thinly sliced apple, a dusting of cinnamon and bit of shredded cheddar cheese. If you can resist it as dessert, it is the perfect breakfast pizza, warm or straight from the fridge.

How do you 'za?


Added to Hearth and Soul

Scenes with Anna {Friday Five}

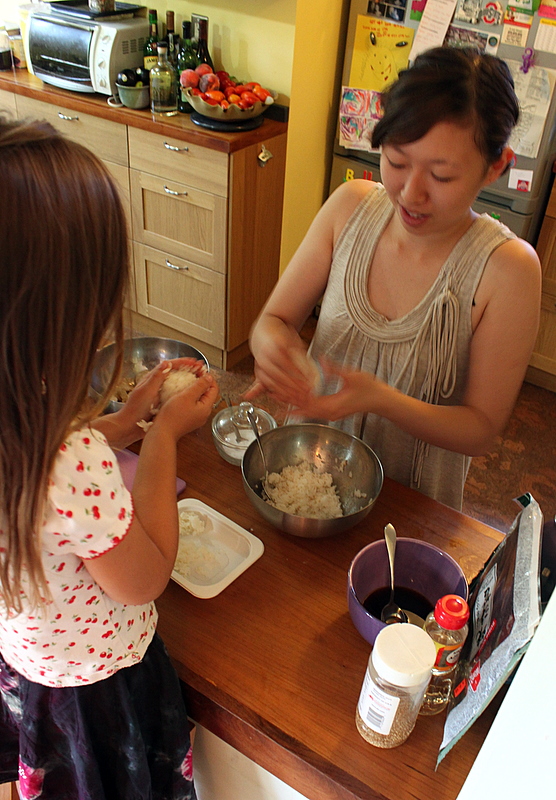
Our 20 year old Japanese exchangee, Anna, left for Japan this morning. We'll remember her stay as a busy time filled with lots of cooking and dining. Here are five images from her visit: Japanese student making rice ballsAnna making rice balls for us.

Anna eating dirty frank's ohioana hot dogThere's nothing more American than eating an Ohioana hotdog from Dirty Franks!

Japanese student at the WildsAnna with giraffe at the Wilds.

Child's Lemonade StandLil insisted on holding a lemonade stand and Anna helped her.

Anna's Watercolor of LilI will measure and frame this watercolor for Lil's room. I'll miss most the beautiful drawings Anna made.

Bitter Cucumbers {Friday Five}

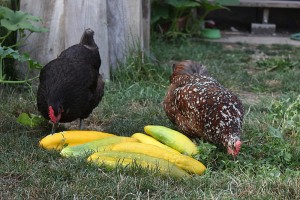
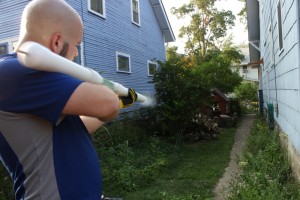
Lots of awesome things happened around the homestead today: we pickled homegrown peperoncini peppers, filled the basil jar with dried basil, made stuffed sausage, put cabbage into a crock for sauerkraut, and brined pork belly. In the evening I convinced Alex to clear out the cornichon cucumber patch because they were past their prime. What happened with the excess cukes? Witness the unscripted madness: bite bitter cucumberposing with cucumbersbludgeoning a cucumber

1) Take a bite to confirm it's bitter. The cuke is indeed sharper than my grandmother talking about health insurance coverage.

2) Pose for goofy pictures with cucumber props.

3) Practice bludgeoning.

feeding chickens cucumbersfiring cucumber from air gun

4) Give the chickens a snack. 

5) Fire up the air cannon. What?! Your family doesn't have a pneumatic potato gun?

Sparks {Friday Five}

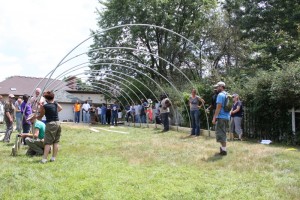
On my mind these days: growing power hoop house building1) Hoop Houses - I was honored to meet Will Allen and attend workshops with his staff last weekend. I now know how to build a hoop house and can't wait for some land on which to build. I'll share more about the Growing Power way soon.

2) Better Living Through Chemistry - I am 20 days into another sinus infection. Yes, I had surgery on my headbone back in January but bad luck resulted in a persistent infection again. Here's hoping that two z-packs back to back and prednisone will knock the wind out of these nasty bugs.

3) Pinterest - Making visual bookmarks is fun! Let's follow each other.

labo Japanese studentshappy japanese exchange students

4) 115 Japanese Visitors - Today I volunteered to welcome 100 Japanese students and their chaperones to Ohio State. Tomorrow I return to lead an orientation group and on Saturday to send them off around the state to stay four weeks with host families. Lil, Alex, and I will welcome Anna, pictured above on the right with shiny pink shoes, to our home from August 5 - 18!

5) Ohio's Greatest Places - We want to show Anna the best and most unusual Ohio has to offer. In line with our desire to find new experiences in the old hometown, we plan to visit Amish country, the Wilds, a taco truck, the state house, Flying J and Swainway farms, and Serpent Mound. What else should be on our list?

What are you thinking about?

Carolina Chocolate Drop Cookie {Recipe}

On Monday, my aunt sent an email telling the Columbus Tayses that the old timey band the Carolina Chocolate Drops were coming to Dayton tonight, July 1, for a free performance during CityFolk Fest. Moments after the news hit my inbox, my Mom called. "Did you hear? Where will we stay?" There was no hesitation - this band is a family favorite and we had to go. Lil and I have been buzzing with anticipation. We love the dance-able tunes, especially because so many reference food.

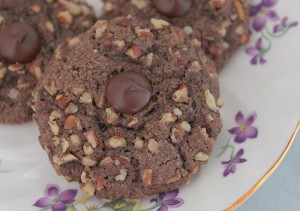
carolina chocolate drop cookie recipe"Doesn't Carolina Chocolate Drop sound like the name of a cookie?" I asked my girl while we were counting down the days to the concert. She agreed and we started brainstorming what a Carolina Chocolate Drop would look and taste like.

Chocolate would be an obvious major flavor component. I thought a drop shape, perhaps with an over-sized chocolate chip on top, would be achievable if the dough were similar to a peanut butter blossom cookie.

What about the Carolina? The band hails from the Piedmont region of North Carolina, specifically. They happen to be known for their pecans, which would make for a lovely addition to a chocolate drop cookie, don't you think?

We hit the kitchen with ferocity, accompanied by CCDs' Cornbread and Butterbeans (my fave) and Knockin' (Lil's favorite, though I hope she can't understand the lyrics).

A few batches and tweaks later, I present the Carolina Chocolate Drop Cookie.

[print_this]

The Carolina Chocolate Drop

makes 4 dozen two-bite sized cookies

1/2 cup vegetable shortening 1/2 cup unsalted butter 2 ounces dark baking chocolate, melted and cooled to room temperature 2/3 cup granulated white sugar 2 tablespoons milk 1 egg 1 teaspoon vanilla extract 1 teaspoon baking soda 1 teaspoon salt 1 1/4 cup all purpose flour 1/4 cup high quality cocoa powder 1/2 cup pecans, chopped finely 2 tablespoons granulated white sugar 48 oversized dark chocolate chips, such as Ghiradelli

1. Cream butter and shortening in a mixer.

2. Add chocolate and sugar, mixing thoroughly.

3. Stir in milk, eggs, and vanilla. Cream for one minute until light and fluffy.

4. In a separate bowl, stir together baking soda, salt, flour, and cocoa powder.

5. With the mixer on low speed, slowly add flour mixture to creamed mixture. Stir just until mixed.

6. Stir pecans and 2 tablespoons sugar together in a small bowl, set aside.

7. Roll 1 tablespoon sized portions of dough into a ball. Roll in pecan sugar.

8. Place dough on a silpat lined cookie sheet. Press one chocolate chip into the top.

9. Bake at in preheated 350 degrees F oven for 10-12 minutes.


[/print_this]