Nationwide Children's Hospital {Wordless Wednesday}

squirrel at Nationwide Children's hospitalbed lighting at nationwide children'sroom at nationwide childrens learning kitchen for familieslearning car at nationwide childrens

park view from a room at nationwide childrens

menu with dietary description

indoor dining area nationwide childrensoutdoor dining at nationwide childrens

owl carousel figure at nationwide childrensmural in magical forest nationwide childrens

1. four foot tall carved wooden squirrel from Mansfield Carousel (one of many such characters) greeting visitors to the magical forest 2. color changing lights (that kids control) and lift in rehab room 3. sunlight, edutainment system, and private bath in rehab room 4. working kitchen for families to learn how to take care of child at home 5. car for families to practice transporting children with mobility issues 6. view from a patient room on to underground garage roof garden 7. signage in cafeteria includes diet and allergy information 8. indoor cafeteria seating 9. secure outdoor cafeteria seating 10. another friendly character 11. hidden pictures in magical forest mural

I recently toured the newly expanded Nationwide Children's Hospital with a group of bloggers. Unlike traditional scary and sterile hospitals, I found Children's full of whimsy, hope, light and natural materials. Our guides revealed that modern medical technology, sustainable energy practices, and staff support are behind the beautiful facade.

Though I hope none of you ever have to visit in an emergency, if you do so you'll find your stay full of thoughtful details and the highest level of technology, comfort, and care. Families can tour the new facility at their Community Celebration Sunday June 11, 2012 and view Youtube video from our tour and panel Q&A.


Disclosure: Nationwide Children's provided me with lunch and a few pieces of hospital branded swag. Opinions are my own.

Tattler Reusable Canning Lids Review

tattler reusable lid review During nearly every canning class and many weeks at the farmers' market I am asked about Tattler Reusable Canning Lids. I bought some to try at Lehman's an age ago and finally canned my first 2012 batch of strawberry honey jam using the lids last week.

How Tattler Lids Work

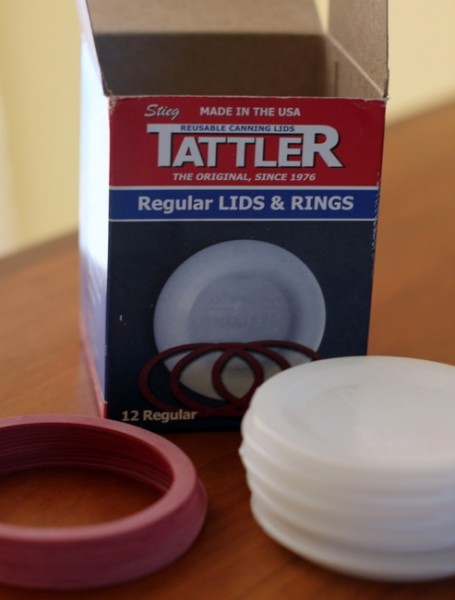
Tattlers are a three piece lid system consisting of a plastic lid, rubber ring, and metal ring not included but reusable from the standard metal ring and lid system. The plastic lid and rubber ring must be cleaned and warmed in a simmering pot of water before placing them on the jars.
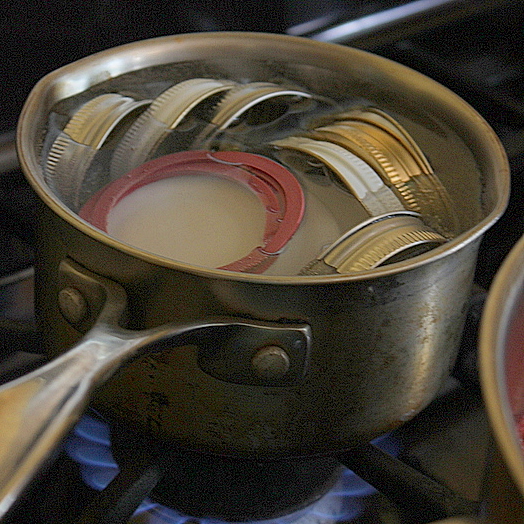
lids and rings on stove

The glass jar rim must be completely clean and dry for the rubber to seal. The ring is tricky to retrieve from the boiling water and more difficult to center on the rim than the metal lid. Once the ring is placed, the plastic lid must be placed directly on top and the metal ring secured but not totally tightened.

Then jars go into the waterbath as usual. Immediately upon removing them from the waterbath, the rings must be tightened fully, an additional burn-risking step to the standard metal ring and lid system. There is no characteristic 'ping' sound, so seals must be tested manually by picking up the jars with the edge of the lid after jars have cooled completed in twenty four hours. Raised letters on the lid prevent labels from laying flat and most would not want to write on the lid because it is reusable.

Tattlers are reusable, made in the USA and BPA free, claims that standard metal lids cannot make. For people who can often to feed their family the best local food, investing in lids that do not contain a dubious chemical and are reusable makes good sense.
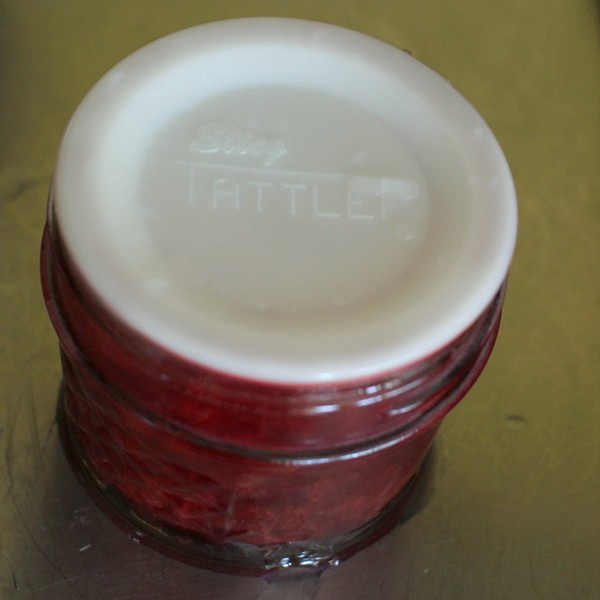
tattler lids on jam jar

My Tattler Lids Review

One out of seven jars with Tattler lids failed to seal in my first experience. Using metal lids for hundreds of jars in the last decade, I have only had two seal failures. Other canners seem to experience more sealing issues with Tattlers than regular lids too.

I wish the three part lids were easier to use. I scalded my fingertips with boiling water trying to get the lids on center and I still failed with one. Perhaps with practice and a tiny set of tongs, I could learn how to set the lids more quickly and accurately.

I also desperately missed the ping noise. Canning is a multi-sensory experience for me and without the auditory signal that my work was complete, I felt unfulfilled. I didn't like having to wait to test the seal for 24 hours, not to mention that the unsealed jar could be growing bacteria during that time.

To use Tattlers more regularly, I would need to find a new labelling method. I'm against labelling on the jar because labels are hard to remove and difficult to see when organized in boxes on my larder shelves. I'm curious how other Tattler users label their jars.

At nearly a dollar each, Tattler lids are five times as expensive as metal ones. I would not be willing to give away a jar with a Tattler lid except to my most-trusted friends whom I know would return them.

Tattler lids used to only be available with a lengthy drive or by mail order. City Folk's Farm Shop will begin carrying them early next week. City Folk's is offering Hounds in the Kitchen readers a special price of $9.75/dozen regular mouth and $10.50/dozen wide mouth on one package through June 10th. Just tell them you heard about Tattler's here.
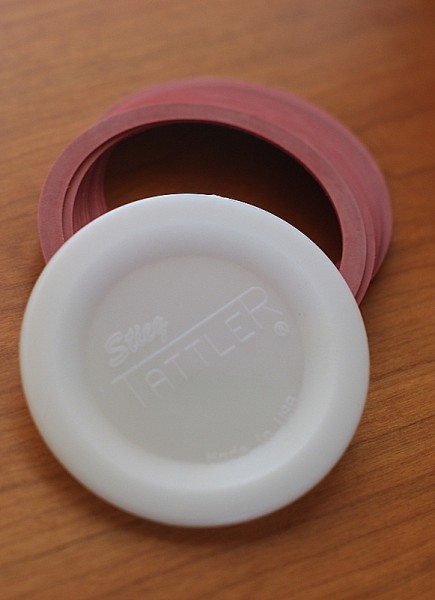
tattler lid and rings

Conclusion

Pro: BPA free, reusable, made in the USA

Con: more difficult to use correctly, risk of not sealing, expensive, no ping, harder to label lid

I don't see myself using Tattlers regularly for jam canning, especially as I love to give a jar of jam as a gift. I will reuse the ones I have with highly acidic foods like tomato sauce that are most prone to leaching BPA.

Have you used Tattler lids? What do you think?

Disclosure: I paid for my own Tattler lids to review. The first link in this article is an Amazon Affiliate link. City Folk's Farm Shop is a social media client.

Added to Simple Lives Thursday #98.

Rhubarb Shrub, a Drinking Vinegar {Recipe}

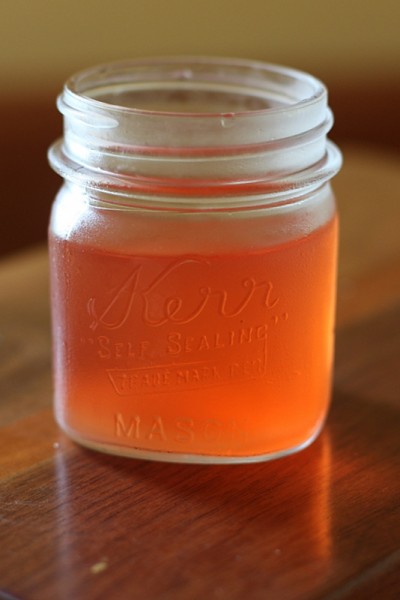
rhubarb shrubShrubs, also called drinking vinegars, are the new 'thing' in the drink and DIY field. Shrubs are a way of preserving fruit by making them into a syrup with vinegar that was widely practiced by Colonial Americans. The LA Times wrote this week about using shrubs in cocktails. Studies show that raw vinegar may contribute to weight loss, lowered cholesterol and improved digestion. I discovered last year that apple cider vinegar is a cinch to make at home with a little loving neglect.
Where does this all lead? To my newest obsession: rhubarb shrub.

Before you say "I could never just drink vinegar!", as my sisters recently did,  hear me out. The flavor components of a shrub are acid from the vinegar, sweetness from sugar, and flavor from the fruit. What else relies on acid, sweetness, and fruit to quench thirst? Lemonade, the summer picnic staple. Commercial sodas are also sweet, acidic syrups diluted with fizzy water.

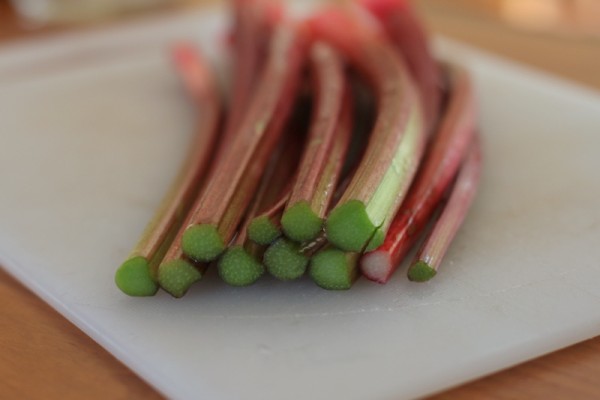
rhubarb stalks

How To Make Shrubs At Home

Because I believe in preserving the potential benefits of the raw cider, I make shrub the 'cold' way. Most recipes call for a 1:1:1 ratio of fruit, sugar, and vinegar but I prefer less sugar. Since vinegar provides the preservative effect, there's no reason not to experiment with small batches and find your own perfect ratio.

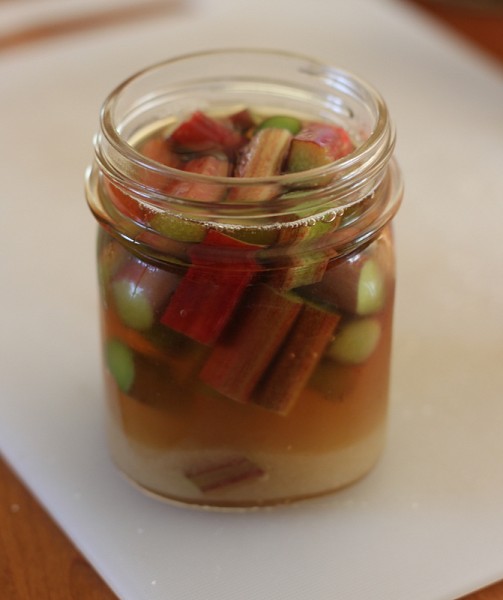
rhubarb shrub before aging

My ideal rhubarb shrub is 1/2 cup chopped rhubarb with 1/3 cup white sugar soaked in 1/2 cup homemade apple cider vinegar. I leave it at room temperature for 2 days and then move it to the fridge. After the taste is full of rhubarb tartness in a few weeks, I strain out the fruit. Serious Eats outlines several other ways to make fruit shrub.

rhubarb shrub with soda

I drink my rhubarb shrub over ice with fizzy water from the Soda Stream. Surprisingly enough for a girl who likes to drink like myself, I have not delved into the world of mixing alcohol with shrubs but you know I will soon.

Are you a fan of drinking vinegars? Have you made a shrub? Tell all in the comments!

Rhubarb Shrub Time: 15 minutes active, 7-14 days aging Makes approximately 1 cup

1/2 cup fresh rhubarb, washed and chopped into one inch pieces 1/3 cup granulated white sugar 1/2 cup raw apple cider vinegar

1. Mix all ingredients in a clean glass jar. 2. Allow to sit at room temperature for 2 days. 3. Move the the fridge and allow to age for an additional 7-14 days until the shrub achieves the taste you want. 4. Strain out and discard the fruit. Keep the shrub in the fridge and enjoy diluted with water, club soda, or in a mixed drink.

Road Trip Food: Chesapeake Snack Mix {Recipe}

chesapeake snack mix Every summer of my childhood, when we would go camping with a group of families, my mother filled an enormous tupperware lidded bowl with homemade Chex Mix. Some kids picked out only the pretzels while others left just the nuts behind. Often the bowl was empty after a single evening.

I always crave Chex Mix when I travel. Over the years, I have combined my childhood memories of the crunchy, salty snack with my husband's family's East coast roots to create my own version: Chesapeake Snack Mix.

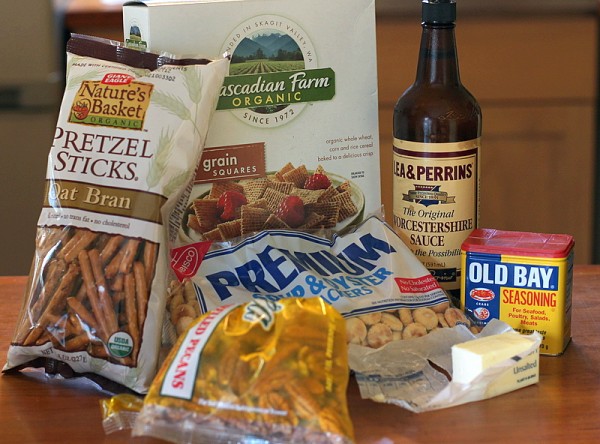
old bay snack mix ingredients

My mix includes coastal favorites oyster crackers and pecans and Old Bay as the primary seasoning. I also upped the ratio of butter and seasoning to dry stuff because that's the way I like it.

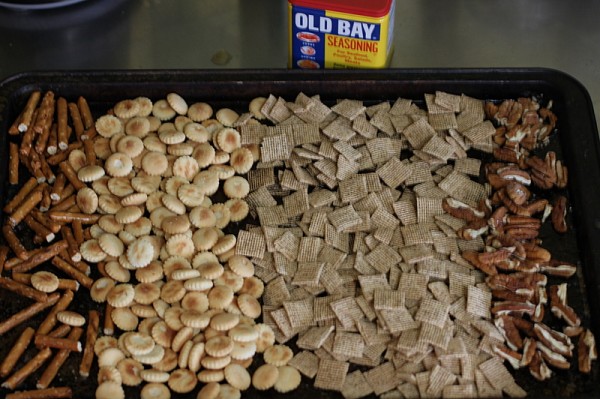
Baked snack mix with old bay

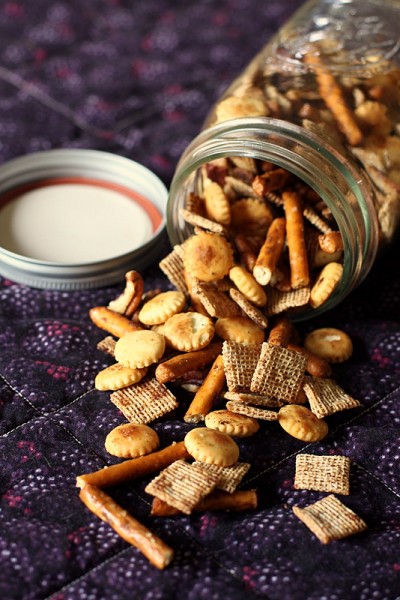
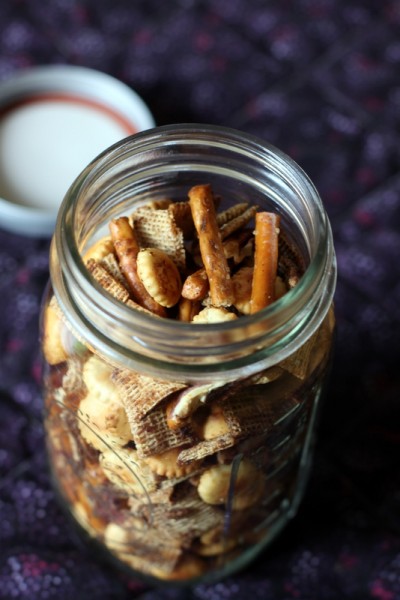
The only downfall of cereal snack mixes is that they have a tendency to be crushed to bits when packed into a bag. That's why I package mine in wide mouth quart jars. When the mix is gone, the jars always come in handy on the trip as a drinking glass, a place for a collection of shells, or a storage container for other snacks.

What snacks do you make or buy for the road?

snack mix in a jar

Chesapeake Snack Mix Makes: 2 quarts Time: 45 minutes

4 tablespoons unsalted butter 1 tablespoon Worcestershire sauce 2 teaspoons Old Bay seasoning 1/2 teaspoon kosher salt 1 cup broken pretzel sticks 2 cups oyster crackers 3 cups multi-grain square cereal (or wheat Chex) 1 cup pecan pieces

1. Melt butter on a large cookie sheet in a 250 degree F oven. 2. When butter is melted, stir in Worcheshire sauce, Old Bay, and salt. Spread pretzels, oyster crackers, cereal, and pecans evenly over the sheet and stir. 3. Put mix back in the oven. In fifteen minutes, stir mix so that everything is evenly coated. Return to the oven. 4. In ten minutes, stir again. If oyster crackers are browned, remove from the oven and allow to cool. Otherwise, leave in oven a few more minutes before removing to cool. 5. Store in an airtight container.

PS. The Kitchn featured my home on a kitchen tour Tuesday with lots of pictures. I hope you click through and enjoy!

Win Friends With Eton Mess {Recipe}

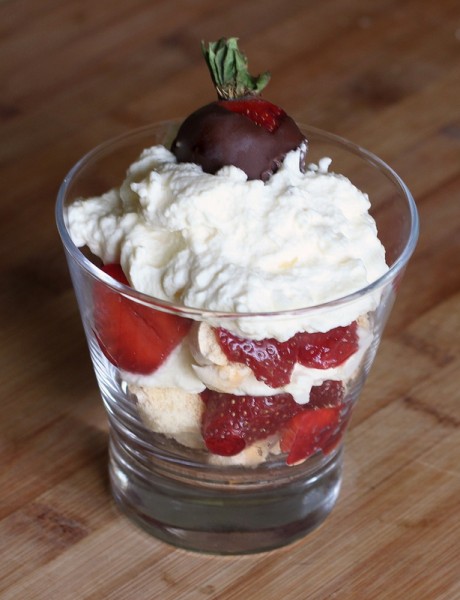
eton mess deconstructedFor the past year, we have been dining with friends every Friday night. Alternating hosting with being guests, we compete not with each other but for the great dining experiences enjoyed together. Highlights have included a low country crawfish boil, the $5 Julia Child dinner, 18-hour braised pork, and the kid favorite, chicken and waffles. Recently our friends served us Eton Mess. Neither Alex nor I were familiar with this layered dessert of crunchy meringue, sweetened whipped cream and fresh fruit. Upon a single taste we agreed that this dessert is perfection.

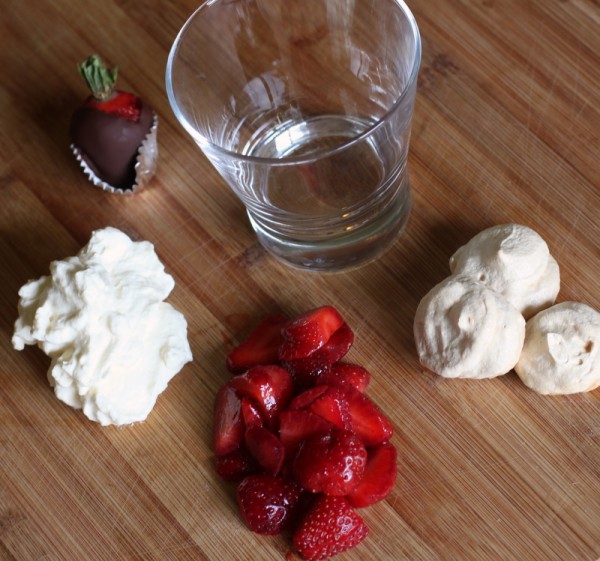
eton mess recipe meringue cream berries

Eton Mess is a play of textures with simple, familiar flavors. The dessert is easy to make ahead and plate for individual servings as dinner comes to a close.

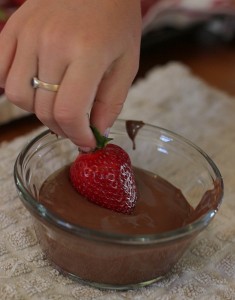
child dipping strawberrieschild piping meringue
As the very name suggest sloppiness, it is perfect for a child to make. For our version, Lil picked the berries, piped the meringue, and dipped the chocolate strawberry garnish. I whipped the cream, but only because Lil was too busy playing. That component, too, is easy for the beginning cook.

toddler eating eton mess

Homer Simpson said "You don't win friends with salad." I add the positive "You win friends with dessert," especially if your friend happens to be this adorable two-year-old.

Eton Mess Serves: 8 (with a few meringues left over) Time: 20 minutes prep, 2 hours cooking and cooling, 10 minutes plating

meringues: 2 egg whites (reserve yolks for mayonnaise, hollandaise, or another recipe) 1/8 teaspoon salt 1/2 teaspoon cream of tartar 1/2 cup granulated sugar 1/2 teaspoon pure vanilla extract

cream: 1/2 cup whipping cream 2 teaspoons powdered or granulated sugar 1/2 teaspoon pure vanilla extract

4 cups fresh strawberries, washed and sliced

8 chocolate-dipped strawberries (optional garnish)

for the meringues: 1. Place the egg whites, salt, and cream of tartar in a large clean bowl or the bowl of a stand mixer. 2. Beat with a rotary mixer or whip until foamy, about two minutes. Increase the speed and continue beating. 3. Add sugar one tablespoon at a time, fully incorporating each addition until the egg white are smooth again. 4. Continue beating until whites are very stiff. Then whip in the vanilla. 5. Transfer meringue to a piping bag or gallon ziploc bag, pressing mixture to release any air bubbles. 6. Using a one-inch round tip or a one-inch cut in the corner of the bag, pipe the meringue onto a cookie tray covered with a silicone mat or parchment in two- to three-inch rounds. 7. Bake meringue in a preheated 275 degrees F oven for 45 minutes. Then lower the temperature to 250 degress F and continue cooking until meringues are lightly brown and hard to the touch. Turn off the stove but leave cookie sheet in the oven with the door closed until cool.

for the whipped cream: 1. Place 1/2 cup whipping cream in a large clean bowl or bowl of a stand mixer. 2. Using a whisk or whip attachment, slowly whisk the cream. 3. After it becomes foamy, increase the speed a little. 4. Slowly add sugar until fully incorporated. 5. Continue to whip just until the cream stiffens into solid peaks. Whipping too long will end up with butter and buttermilk, so watch this closely. 6. Stir in vanilla extract.

assembly: 1. Select clear glass cups or goblets, one for each guest. 2. Fill the bottom with 2-3 crushed meringues. 3. Layer on 1/4 cup of sliced strawberries. 4. Top with a dallop of whipped cream. 5. Layer on more meringues, berries, and cream. 6. Top with a chocolate-dipped strawberry, if desired. 7. Serve immediately.

Here's the Simpsons reference:


Added to Simple Lives Thursday #96.

Grilled Bok Choy & Tatsoi {Recipe}

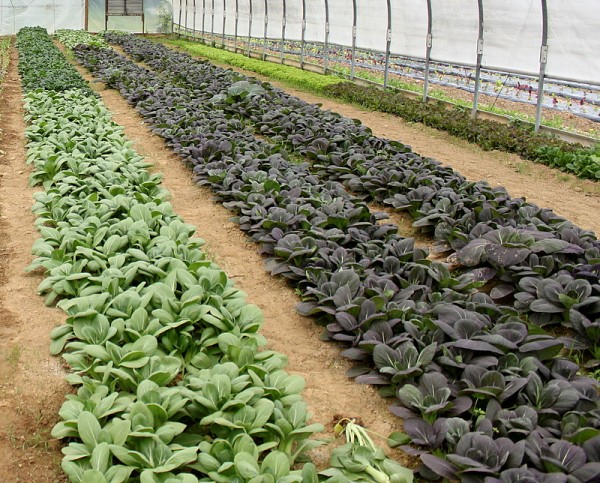
Remember last week when I picked strawberries and toured Bird's Farm? The bok choy and tatsoi in the high tunnel were too beautiful for me to resist. bok choy growing in hoop house

Rich in Vitamin A and C, these greens are tasty ways to supplement your diet. They are mild in flavor, sweeter than kale or mustard greens, and the crunchy stem adds texture to dishes.

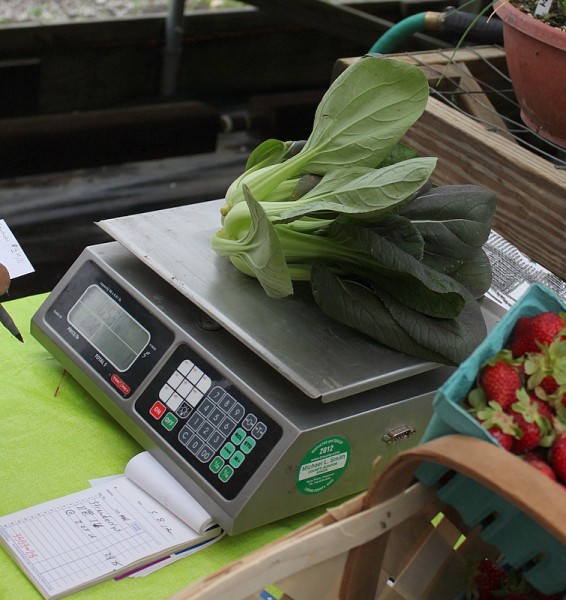
bok choy on scale

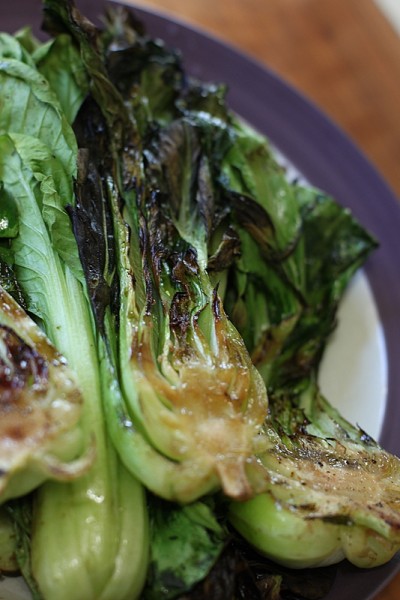
The young plants are often sold as baby bok choy or baby tatsoi. The stems are so tender when young they can be eaten raw, sautéed in a stir fry mix, or cooked quickly as in our favorite preparation: grilled bok choy.

I predict bok choy and tatsoi will be the next 'hot' green vegetable like kale is now. They are even easier to assimilate into the standard American diet and oh so delicious.

Do you eat bok choi and tatsoi? What's your favorite way to cook them?

grilled bok choy

Grilled Bok Choy Time: 10-20 minutes heating grill, 5 minutes preparation, 5 minutes cooking

1 head of young bok choy or tatsoi per person 1 teaspoon olive oil 1/2 teaspoon soy sauce 1/4 teaspoon salt 1/4 teaspoon ground black pepper

1. Slice the head in two lengthwise and wash thoroughly for any sandy soil that may reside in between leaves. 2. Drizzle with olive oil and soy sauce and sprinkle on a light coating of salt and pepper on the cut side. 3. Grill the bok choy, cut side down, over very hot coals for 4-6 minutes or until the greens are browned but not burnt. Serve immediately.

Marvelous Mint {Wordy Wednesday}

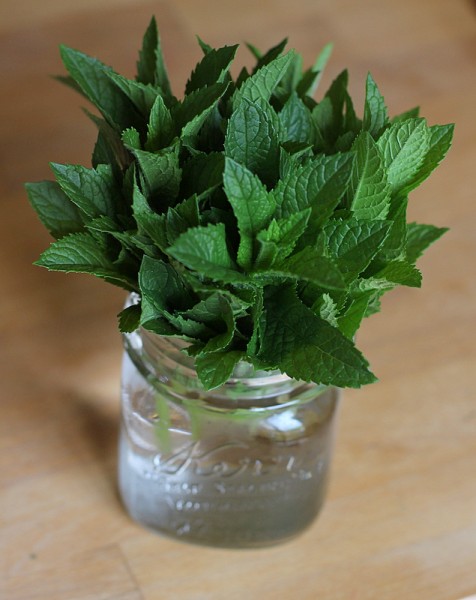
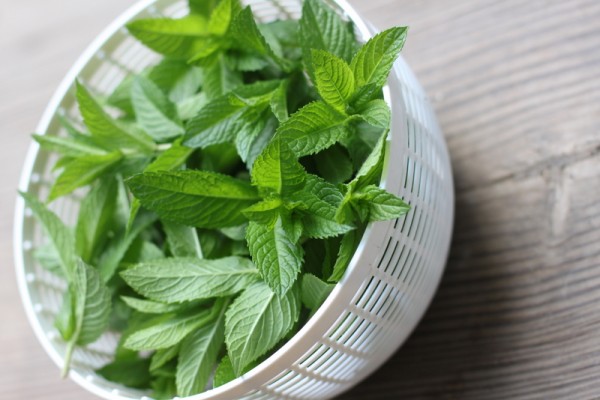
mint in canning jar Mint is a weed by any definition. Many gardeners even consider it invasive - the stuff will fill a space and beyond.

backyard mint patch near house

Our patch resides in a bed alongside the house bordered by the sidewalk. For the most part, this contains the spread and last year oregano actually overtook some of the mint zone.

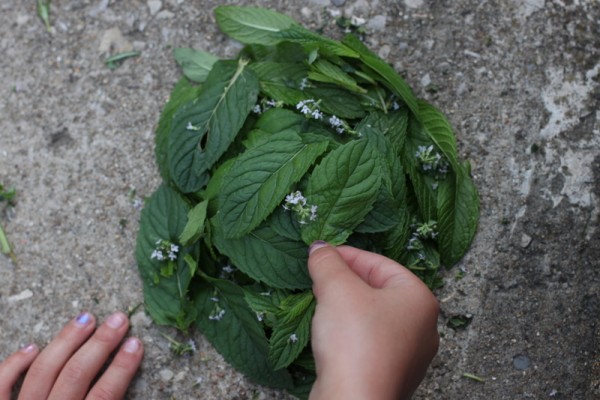
child's decorative mint pileWe "tend" (mint actually requires no work) our mint madness because we love the herb. Lil eats the leaves fresh like salad greens and makes them into nests and garden sculptures.

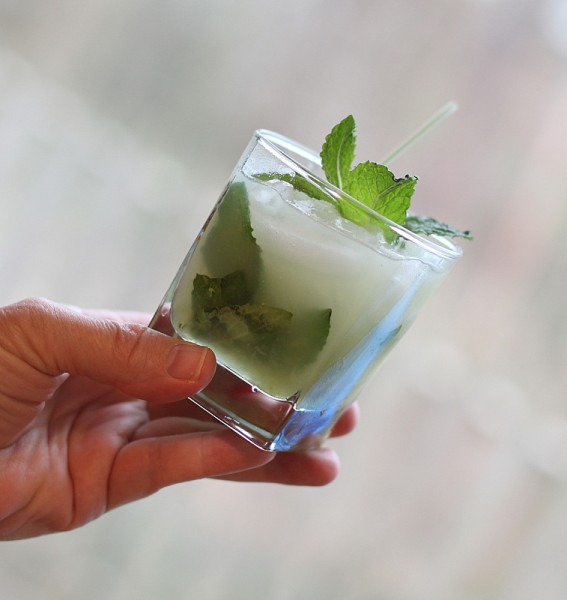
mint mojitoI harvest fresh leaves frequently for drinks and dessert garnishes. At least once a year I fill the dehydrator, crushing the dried leaves for tea.

When mint flowers in late summer, bees and other pollinators 'sup on the nectar while my family enjoys the petite purple blooms.

fresh mint in salad spinner bowlDespite it's overgrowing habit, I'm mad for mint.

Do you grow mint? If so, how do you enjoy it?

Strawberries at Bird's Haven Farms {Farm Tour}

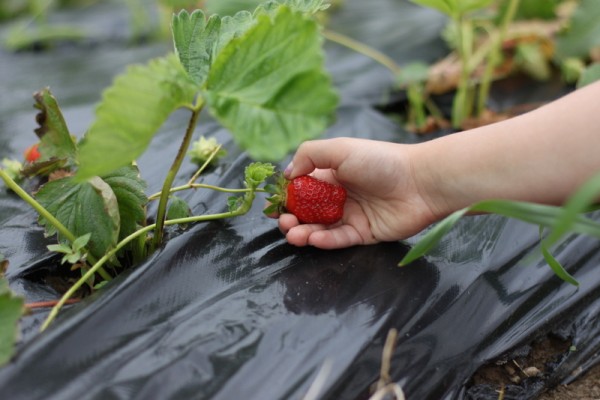
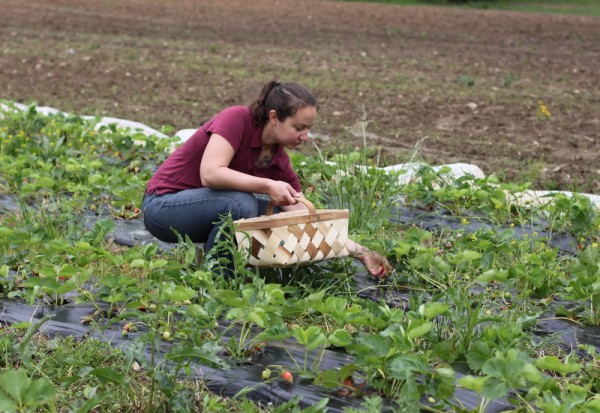
child picking strawberryThe back of my legs ache with familiar soreness of strawberry picking. Remarkably, almost a whole month earlier than last year, the 2012 season is here!

Picking Strawberries at Bird's Haven Farms

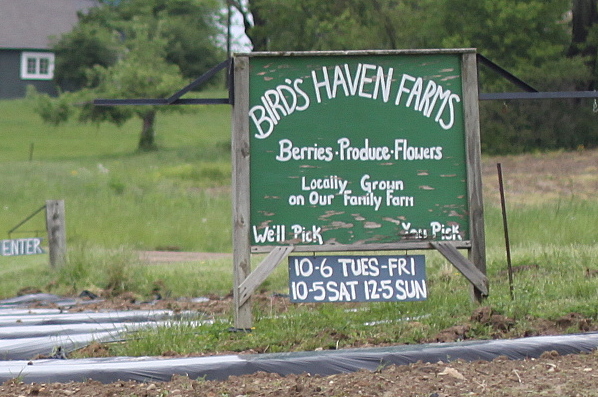
bird's haven farms sign

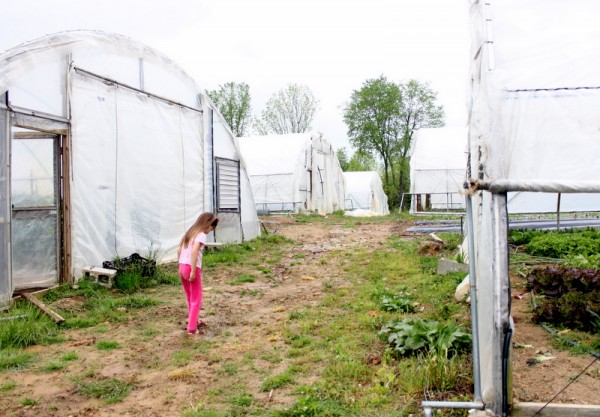
Thanks to a tip from a friend, Lil and I drove north of Granville to check out Bird's Haven Farms on the first day they opened for picking. The farm is a 40 minute drive from our home in Clintonville and only five minutes from our favorite Windy Hill Apple Farm.

child picking strawberriesfoot in the weeds

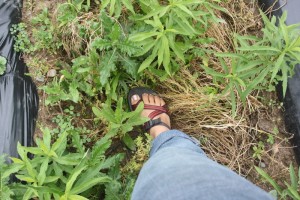
Bird's Haven uses black plastic and hand pulling to conquer weeds, not chemical sprays. The paths between the rows show evidence of this as they are full of weeds. During our visit, just a few hours after heavy morning rain, what wasn't a plant was mud or standing water - fun for dirt-loving kids!

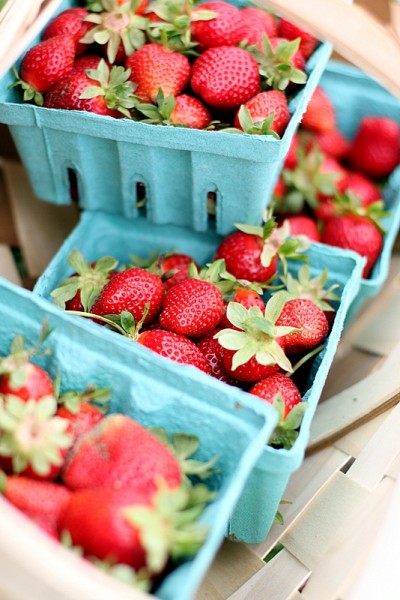
The berries themselves are ripe and juicy with fresh-from-the-field flavor that cannot be replicated by out of season fruit. These strawberries had no bitter after-taste that can come from sprayed berries.

berries in paper baskets

Finding red ones took a bit of work as the fruits are just beginning to ripen, but we managed to fill eleven quart baskets in about an hour. I am thrilled that Lillian finally has as much stamina for picking berries as I do.

Our strawberries cost $25, a very fair price for sustainably-grown berries. We will freeze some, make jam, and eat them fresh until we are stuffed.

Vegetables In Tunnels & At Markets

high tunnels at bird's haven farms

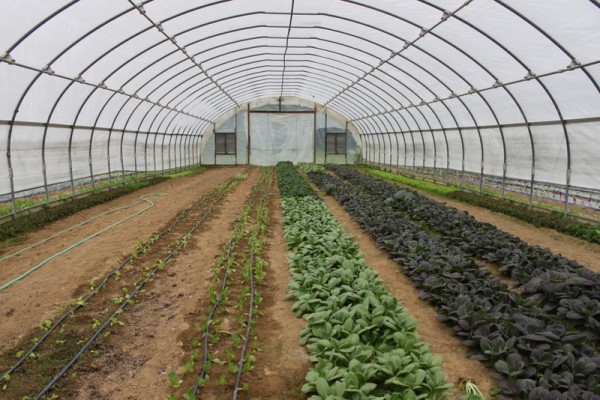
When chatting with the clerk at the greenhouse, I mentioned volunteering with OEFFA and she connected me with someone (a former 'big ag' employee whose name I forget - sorry!) to show me around the rest of the farm. Bird's Haven was one of the first family farms in Ohio to use high tunnels to produce greens, tomatoes, cucumbers, and squash.

high tunnel bok choi

High tunnels allow the family farm to apply far fewer chemicals (no spray unless crop loss is imminent) and extend the season. The tomato plants were loaded with green fruits and it's only early May!

I purchased some beautiful tatsoi and bok choi to cook this weekend. I'll share the recipe because I think these sweet greens are highly underused in most home kitchens.

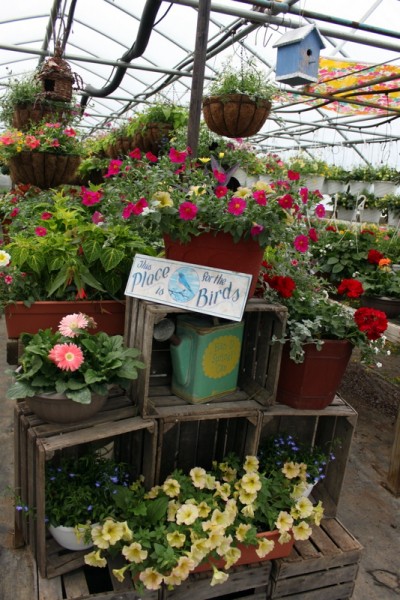
hanging basket at bird's haven

I didn't buy any of their beautiful hanging baskets, though Lil begged for some. Maybe when we sell our house and move!

Bird's Haven Farms is committed to selling only what they produce from seed. Their produce, eggs, flowers, and seedlings are available at the farm and at the Granville Farmer's Market Saturdays from 8:30 am - noon at the intersection of Broad & Main and Westerville Farmer's Market Wednesdays from 3-6 pm at the corner of N. State St. and E. Home St. Additionally, they supply produce to Ella Restaurant, the Granville Exempted Village Schools, The Greener Grocer, and Going Green Store. The farm offers a CSA, though the 2012 sign-up deadline passed. In the fall, they open a u-pick pumpkin patch.

rachel picking strawberrieswiggly tooth eating strawberry

Bird's Haven Farms 5545 Lafayette Rd Granville, OH

740-587-1100

Open: Tuesday - Friday 10 am - 6 pm Saturday 10 am - 5 pm Sunday 12 -5 pm

If you go:

  • Call ahead for field conditions and produce availability.
  • Wear boots (do as I say, not as I do).
  • Bring cash or credit cards as they accept either.
  • Pack sunscreen, a hat, or rain gear, depending on the weather.
  • Bring baskets if you wish, but they provide if you don't have any.
  • Carry a cooler with water and/or snacks in the car. The field is not far from the parking lot so no worries about a backpack to carry into the field.
  • Pack an extra change of clothes and/or shoes for kids who might get muddy.
  • Ask questions. The knowledgeable farm staff is eager to share about their sustainable practices.