New Backdoor! {Before & After}

With a ting and a crash, a pebble kicked up by a weed whacker shattered one of the panes of our back door. Alex swept up the glass and piped in some silicone sealant around the shards left around the edges of the intact other pane. That was three years ago. Last Monday, I finally convinced Uncle Leonard aka Krash to come help us install a new back door.

sawsall the doorcontemplating door frame

I sawzalled (that's a word, right?) through the nails that were holding the old door frame in place and it fell right out. The new one fit...almost.

Much finagling ensued including, at one point, Krash balancing a ladder on the stairs wielding a circular saw overhead to cut into our asbestos shingling. He is not one for safety precautions.

Finally the new door fit in the house frame. Len screwed it in place after lining the frame with handy foam insulation. Alex caulked around the door for additional wind and water protection. Not surprisingly, that area of the house immediately felt less drafty.


old back door needed replacementreplacement back door

We are thrilled to finally mark 'new back door' off our list of home improvements!

PS. Leonard helped us out in exchange for lunch, the return of his ladder, and creation and maintenance of a facebook page for Krash books. Take a peek and 'like' if you enjoy highly creative stories.


In the Works

BD6CTNZJQEB8 I surprised a friend the other day by revealing that I am a multi-project person.  My head is constantly filled with plans. It drives Alex bonkers sometimes and I have been accused of not being spontaneous, but that's just who I am.  I can't help it - I like having things to look forward to.

Here are just a few things in the works at Hound central:

  • Installing and learning to use wood stove
  • Painting living room and upstairs landing
  • Removing deck, building backyard stairs
  • Building two or three new garden beds in deck vacated area
  • Making a stone patio
  • Deciding on which kind and age of chickens
  • Building a coop for said birdies
  • Hosting garden tours
  • Planning workshops for spring equinox, container building, jam making
  • Spring break vacay to Chincoteague
  • August Canada canoe trip
  • And, of course, the ever present FINISH the kitchen (only trim and we're done!)

I think it's good to scheme in the winter.  My next Grow Your Garden post will be all about planning a  new garden.  There isn't much real work to be done now, so it's the perfect time to read, study, and make plans.

In My Kitchen Cupboards

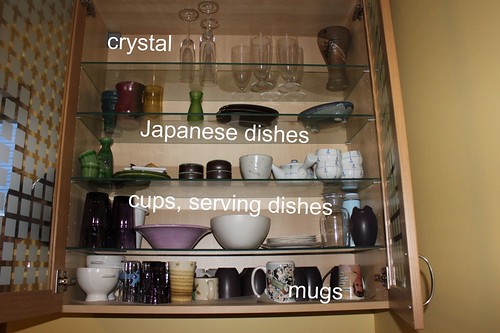
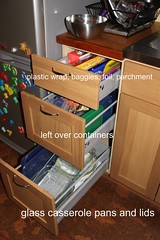
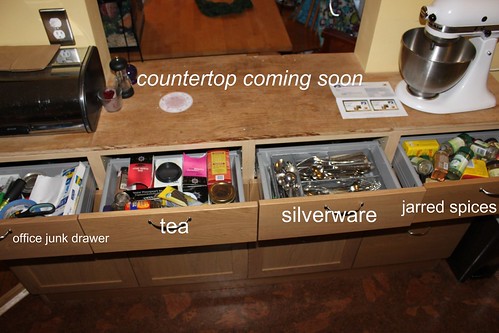
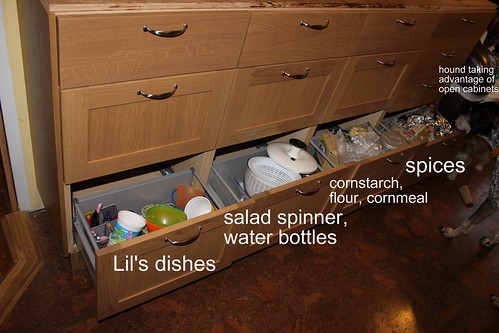
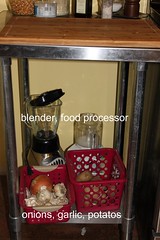
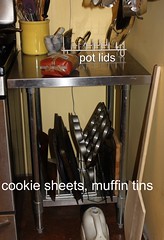
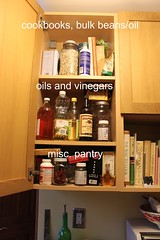
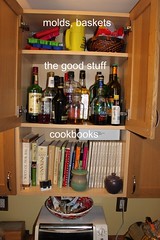
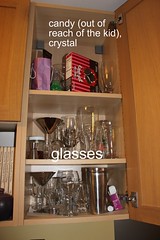
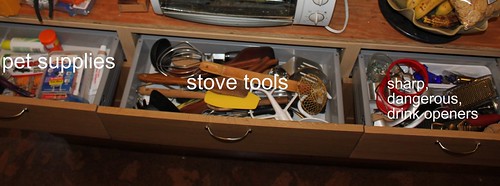
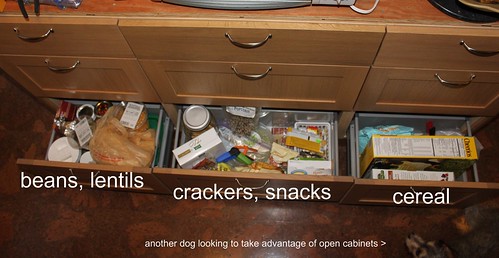
Friends were recently discussion kitchen cupboards.  A well organized kitchen thrills me, so I offered to photo-document what's going on in my cabinets. When I designed this kitchen in the fall of 2008, I centered my thoughts around working zones and storage. I'm a 'everything in it's place and a place for everything' sorta girl, so I designated space for what we use where we use it.  Primarily I selected IKEA drawers because they keep things organized.

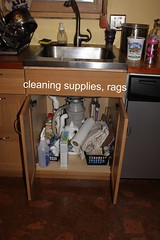
In the photos below, I decided to keep it real and not style a thing.  That means some cupboards are messier than ideal. Here goes:

The sink and dishwasher are in the washing zone along with most of our serving dishes.

The counter on the pass through holds the Kitchen Aid Mixer on top and baking supplies in drawers below.

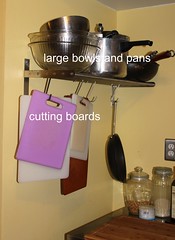
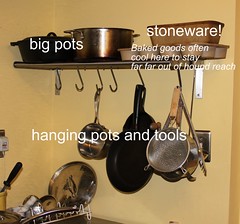
Surrounding the stove is open storage for pots and pans.

Pantry items and mixed drink supplies are in skinny cabinets along the wall opposite.

Cooking tools and more pantry items are in drawers below.

So there's a quick and dirty tour of my kitchen cupboards!  What's in your kitchen?  If you would like to join the bare-all party, leave a link to a post about your kitchen cupboards or pictures in the comments.

Numerar Sink, I Love You!

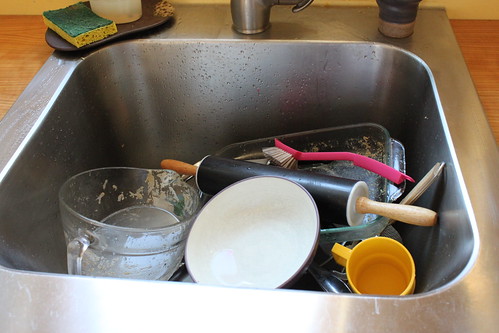
When we renovated the kitchen last winter, we installed a super deep single bowl stainless steel sink, the Numerar.  It is a sit-on-cabinet sink which means no countertop cutout, saving counter cost and effort.  This sink is so deep I can bathe the little dog in it and she can't climb out.  Alex can soak or rinse a whole turkey.  It was only $159 from Ikea. But that's not the best part.  Let me show you how awesome it is:

same sink, not a thing added from above picture

That's right, the Numerar conceals my aversion to doing dishes.  The picture shows three days worth in there.  I love it!

Wooden Countertops Tutorial Part Two

This is a continuation of the Tutorial.  Part One covers materials. Construction

First, dimensions of the surface to be covered are measured, and the plywood subcounter is cut to shape.  Screw this into cabinet sides immediately so the kitchen can be used. We lived with construction plywood counters for just about a year, so I suppose you could just stop here if you were ok with counters that can't be thoroughly cleaned and are pretty ugly.

not pretty, but it works

Care needs to be taken with complex shapes so that the dimensions are accurate and the countertops fit when installed.  I worked in the garage and made trips inside many times to measure, dry fit, and trim.

Next, the solid wood edge pieces are cut to length.  I fashioned the edge pieces to hang down so that the edge makes the countertops appear to be 1.5” thick.

Now the edges are installed on the sides of the plywood using the biscuit jointer.  For those unfamiliar with a biscuit jointer, it cuts slots in both edges of wooden pieces on their butted sides.  Wood glue is inserted in the slots, biscuits inserted in one side, and the pieces are fit together.  They are clamped and allowed to dry thoroughly.

The entire assembly is finish-sanded to 220 grit and then the polyurethane is applied.  I let each coat dry completely, and then roughed the surface with 00 steel wool before applying the following coat.

I applied 6 coats of polyurethane and then finished it by buffing with 0000 steel wool.  If we notice down the road that the polyurethane is damaged or wearing, we can simply sand and then re-coat with additional layers as needed.

After this, the countertops are dropped into place and secured with liquid nails.  With a generous application of liquid nails between the two sheets of plywood, you essentially have a one-piece solid surface.  Edges around the sink are protected with clear silicone caulk.

Final Look

We are thrilled with the look and feel of the wooden countertops.   The cherry contrasts just enough to be pleasant and not distracting.  They are simple to clean and in the month since installation show not a single scratch.  We look forward to years of enjoying the beauty and function of these affordable counters.

Wooden Countertops Tutorial Part One

At the request of several readers, I (Alex, Rachel's husband) wrote this tutorial about the installation of our wood countertops on the cheap. even the hound can tell a good counter when she smells it

Advantages/Disadvantages to Wood

To begin with, you need to decide if a wooden surface is right for you.  If you already have wood cabinets, more wood on the countertops can lead to an overload of natrual products in a kitchen.  Consider using a contrasting wood for the countertop than you use for the cabinets.  In our case, we chose cherry for the countertops to contrast with the oak cabinets both because of the aesthetic quality and because we already had some scrap cherry.

Another consideration is that wooden countertops are likely to eventually wear in contrast to solid surface or granite which claims to be durable for decades.  We figure that with proper upkeep (sanding and refinishing as needed) wooden counters will last at least ten years at which point we can replace them for another meager $400.

Because of the multiple coats of polyurethane finish, these counters are as antibacterial as any.  They are waterproof and can be cleaned with soap and water or gentle cleaners just like higher end materials.

Material Selection

Traditional wood countertops use solid planks of the chosen wood for the surface.  However, this material offers no cost advantage over other solid-surface countertops.  For this project, we wanted to save a considerable amount over the $40-100/square foot that solid-surface countertops can run.  To this end, we chose to make the bulk of the countertop from cabinetry-grade cherry plywood with the edges being finished with solid cherry.

Wood is a earth friendly material source.  It is renewable when harvested and planted correctly.  The solid edges are easy to fashion from scrap wood you might already have.  The plywood remnants can be used for other small projects.

There are some obvious disadvantages to plywood.  Mainly, the veneer surface is very thin and prone to damage if not protected.  The use of several coats of an appropriate polyurethane finish will serve to protect the surface.  Also, the plywood is prone to water damage if water penetrates past the finish to the wood.  To combat this, care must be taken to ensure that the edges of the countertop are finished just as thoroughly as the surface is.

The cherry plywood for this project cost $95/sheet (4'x8') at Woodwerks in Gahanna, OH.  This project required two sheets of plywood because of the specific shapes we needed.  The solid cherry for the side cost nothing as I already had it on hand (a gift from a friend years ago).  I simply had to thickness plane the cherry down to appropriately dimensioned planks and it was ready for use.

I also purchased an inexpensive biscuit jointer for $45 from Harbor Freight.  While much cheaper than comparable models at a home improvement store, it is of good construction and performed adequately for this job.

The polyurethane finish we used is Minwax Helmsman Spar Urethane, marketed specifically for use on countertops.

A sub countertop of 3/4 inch construction plywood was screwed into cabinets.  This provided a working surface the  during the 12 month waiting process and remained in place under the new counter.

Continue to Part Two for details about the construction.

WOOD COUNTERTOPS!!!

Today, Alex installed two pieces of wooden countertops. He made them with cherry plywood and aged solid cherry edges. Finished with six layers of polyurethane, they are smooth and cleanable!!

Alex even let Lil help apply the glue. Yay Alex!!

We have lived without proper countertops for 11 months!! I am just a little bit excited.

(Now, get working on the other two pieces.)

Seasons Turning Weekend

taken by my four year old photographer Lil This weekend was a blur of summer fading to fall.  I put three garden beds to rest, including harvesting peppers and green tomatoes, pulling out honeysuckle and ivy creeping around the fence, and adding to our massive compost heap.

early fall harvest and a bottle of Charlies hard cider

In discussion last night we decided to take advantage of low mortgage interest rates at our favorite credit union.  We hope to sell our Honda Fit and buy a mid 90s Civic or similar, using the car payment difference to refinance the house into a 15 year mortgage. That's not really pertinent, is it?

This morning Alex was planning to start on making molds for the kitchen concrete counter tops.  In reading about how to do so and the necessary steps after, he came across an article about using furniture grade plywood for counter tops.  We have had wood counter tops before and loved them.  In a fit of inspiration ten months in the making, we changed direction and are now going to install cherry veneer counters, and soon!

In the middle of thinking about the counter tops, I received a text from Trish at Local Matters.  She invited us to the lovely community garden at the ECLC school.  Really an integrated playground and garden, we loved walking the spiral paths and raised mound, playing with the climbing toys and monkey sculptures (above), and drinking the apple cider.  This event was a truly good time and a harbinger of offerings to come for Local Matters Local Foods Week.

While at the garden tour, we met a Farmer Paul and his chicken.  We have considered raising backyard chickens for eggs for quite some time.  When he mentioned he was selling several four month old hens, our ears perked.  Maybe now is finally the time for us to get into raising urban livestock.  We're researching coops and will certainly update progress here.

When we returned home, we planted three varieties of garlic.  Getting my hands in the soil after a weekend of big decisions always makes me feel grounded again.

We ended the weekend with a hearty dinner with family: roast pork and potatoes, risotto cakes with tomato sauce, portabella with goat cheese, green salad, bread, butter, and gourmet salts.  Autumn is beginning to settle in around here.