Brandied Pears

canned brandied pears recipeMy aunt Deb picked and delivered a large box of pears from her farm.  We ate some fresh, but soon the pears begged to be preserved before they rotted. My thoughts turned to pear sauce and pear butter, but I have a large store of applesauce already in the pantry and I'm not sure I would enjoy pear butter.  Then I considered, what about brandied pears?  They contain alcohol, which puts them head and shoulders above most canned fruits in my book.

I searched my regular Internet sources and found plenty of recipes but they all required refrigeration.  My fridge is full, thanks.

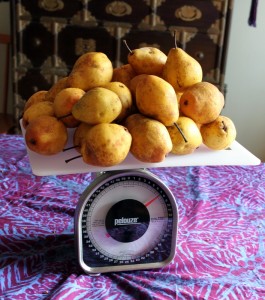
eight pounds of home grown ohio pears

The gold standard, the Ball Blue Book Guide to Preserving, has one recipe that sanely recommends pantry storage.  I modified it just a bit by adding a few spices and adjusted quantities for the 8 pounds of pears I had versus the 10 pounds in their recipe.
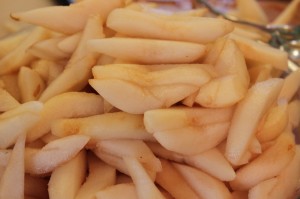
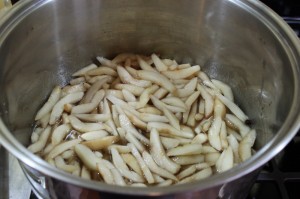
peeled and sliced pearsPeeling, coring and slicing the pears consumed about an hour of time.

pears in syrup

Then the pieces bathed in a sugar syrup gently flavored by whole allspice and clove.

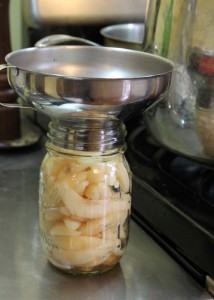
ladling pears into sterilized jars

The syrup reduced while I filled sterilized jars with hot pears.

Off the heat, I added brandy to the syrup and poured the liquid over the pears.

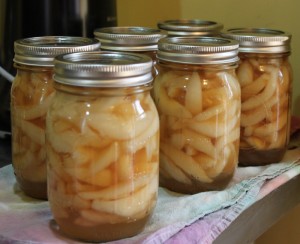
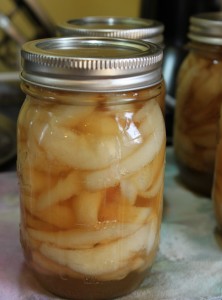
recipe for six pints of brandied pears

Fifteen minutes in the water bath canner and the brandied pears are complete!  They are resting in the pantry until I pretty them up for holiday gifts.

Canned Brandied Pears

makes about six pints

adapted from Ball Blue Book of Canning

8 pounds pears (approximately 30 small ones) aged at room temperature until ripe and tasty

1-2 tablespoons lemon juice

4.5 cups sugar

3 cups water

6-10 whole spices like cloves, allspice berries or cinnamon stick, optional

2.5 cups brandy

1. Peel and core pears.  Slice.  Toss with lemon juice to prevent browning.

2. Heat sugar and water in a large stock pot until boiling.  Add spices if you wish.

3. Add pears to sugar syrup and cook at boiling for five minutes.

4. Ladle pears into hot sterilized jars.

5. Meanwhile, continue to boil sugar syrup.

6. Remove syrup from heat.  Discard spices.

7. Add brandy to syrup and stir well.

8. Ladle brandy syrup over pears in jars leaving 1/4 inch headspace.

9. Fit sterilized rings and lids onto jars and place in hot water bath.

10. Boil for 15 minutes.

11.  Remove jars from water bath and allow to cool completely.

12. Remove rings and wash any syrup leaks off rims.  Label the jars and store at room temperature for up to a year.

This post is part of Simple Lives Thursday and Fall Fest.

Cider Press!

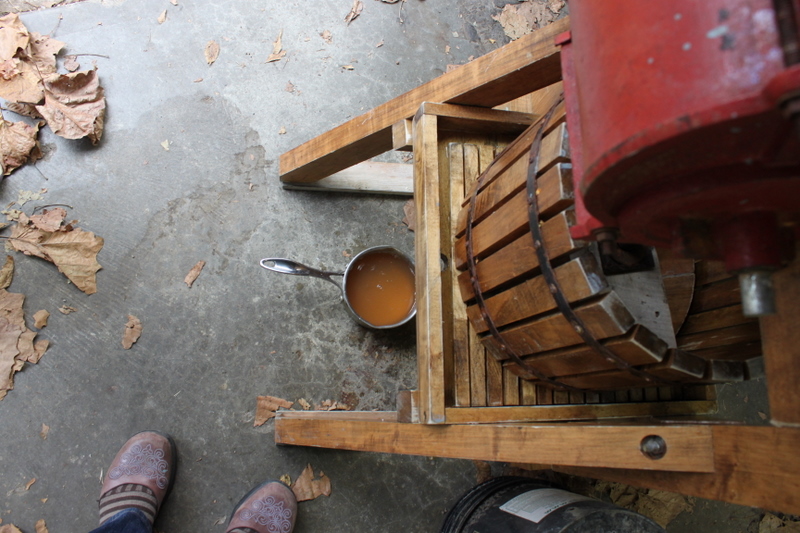
Meet the newest tool in the hand-powered arsenal at Hounds in the Kitchen: cider press

A cider press!

Charlie of Windy Hill Apple Farm had this press on display with a for-sale sign the last time we visited.  I immediately recognized it as a well maintained machine for a good price.

We debated for a few days about whether we need a press when: 1) we have no apple tress, 2) even if we moved to a farm tomorrow it would be years before we would have producing apple trees and 3) how exactly do you use a cider press?

The debate ended when casual mentions of the press for sale were greeted with friends and family strongly encouraging us to buy it and offering up apples ready for cider-making this season.

working a hand crank cider press

Today the cider press is ours.  We immediately tested it with some very squishy pears, yielding a quart of juice.  Not enjoying the taste of the overripe fruit, we poured it into a jug with a fermentation lock to make some pear hooch.  We are determined to master the making of hard cider, as any good pioneer would be.

Soon, bags of apples will be turned into gallons of cider by the power of the screw and our very own hands.  We may host a cider-making day once we figure out what we're doing.  We will definitely accept sharing or renting arrangements for those of you with excess fruit.

"Give me yesterday's Bread, this Day's Flesh, and last Year's Cyder." Benjamin Franklin (1706-1790) 'Poor Richard's Almanac'

Added to Hearth and Soul blog hop.

Jelly Making Lessons

If you, like me, endeavor to make jelly, the following lessons are helpful to keep in mind: 1. You will have more waste seeds, stems, skins than volume of juice remaining after stewing and food milling fruit.

2. You will want to clarify the juice by pressing it through a chinois.

3. When that gets frustrating, you will want to squeeze it through cheesecloth.

4. You will get impatient and squeeze too much.

clarifying juice through cheese cloth in jelly making

5. The pulpy juice that spills out of the cheesecloth will stain your clothes.

6. If you wear your Made By AmyD apron as a good cook should, the staining will not be a problem.

7. If you didn't wear your apron, despite it hanging so close to the kitchen, you now have another 'canning shirt'.

8. You will now read, in the case of the grape juice you just made, that the juice should be refrigerated overnight so 'crystals' can be strained. Your plan to can jelly will be delayed.

9. When the juice is boiled, sugar and pectin are added, and jelly is canned, there will be remarkable little to show for your efforts.

homemade grape jelly jars

10. You will note there are precious few things more simply beautiful and delicious than home canned jelly.

This post added to the hearth and soul blog hop.

Jars: Trash or Treasure?

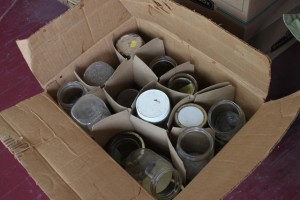
box of jars This crate of jars was given to me by my mother who received it from my paternal grandmother.  What does this look like to you? Trash?

To me, it was a box full of potential. I know Grandma Joyce is a collector of stuff.  Out of the box of miscellaneous jars, I decided not to keep many of unknown origin or with chipped rims. After a little digging and sorting, look what turned up:

row of used canning jarsNearly two dozen usable canning jars. Of course they will all need new lids, which I buy every time I can.

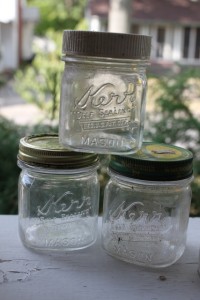
vintage kerr canning jarsI found some of my very favorite jar style in that box.  I adore these squat squared half pint jars.  They are shaped differently than anything I can buy new and the flat back side gives a lovely view of what is canned inside.

Using inherited or thrifted jars adds a whole new dimension to the preservation effort.  As I'm milling applesauce, coring tomatoes, or stirring jam, I often wonder what the life was like of the woman or man who used the jars before me.

Were they preserving out of necessity or hobby?  Were they making a special family recipe or trying something new?  Were they working alone with babes underfoot, alongside their teenage children, or with a group of friends as my mother used to do?  Of course, I will never know the situations for most vintage jar in my stash.

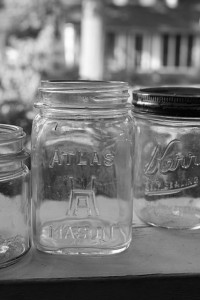
vintage atlas mason jar

I can guess with relative assurance that anyone who went to the pains of home canning some time ago would be delighted to know that someone is still using their jars and practicing the art of food preservation. This post is part of Simple Lives Thursday.

Ohio Love Apples

liberty apple picking ohio

Humble as pie,

Basic as 'a is for',

Diverse as the land and people:

Ohio apples.

ohio apple picking liberty

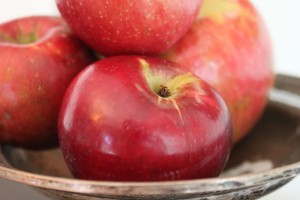
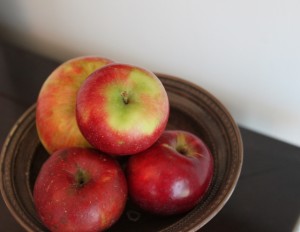
Already this season I have picked a bushel and a half of apples from Windy Hill Apple Farm.  Most varieties are ripening two weeks earlier than normal this year.  I have sauced, dried, eaten them fresh, and even baked a dozen into my first ever apple pie.  In October, I will return to Charlie's for the king of Ohio apple varieties, Gold Rush.

Helpful tip ~ Store apples until April or longer by following these steps: 1. Wash storing apples, such as Gold Rush. 2. Leaving them wet, place in a thin plastic grocery sack. 3. Loosely tie the sack shut. 4. Place in the crisper drawer of your refrigerator. 5. Every few weeks, re-wet apples if they are dry and remove any that may have gone soft.

oh-I-o love apples, do you?

Added to Hearth and Soul blog hop.

How to Make "Sun" Dried Tomatoes

A carefully dried tomato can carry the taste of summer's sweet abundance through many seasons.  Dried tomatoes provide a distinct chewy texture and richness to pan sauces and stews.  They can be eaten as is for a quick burst of vitamin C.  Making your own during is not hard at all. Equipment

Dried tomatoes are generally made in one of three ways:

  • in a solar cooker or sun dehydrator
  • in a very low temperature oven
  • in a dehydrator

A solar cooker is great because it saves energy.  You can find simple plans to build them at Mother Earth News and elsewhere.  The downside is that they take more monitoring, including bringing in at night if the temperatures drop and cause dew.

Sliced tomatoes can be dried in a single layer on a cookie sheet in a very low temperature oven (125 deg F maximum).  This temperature is best achieved by leaving the door shut with a gas pilot oven lit.  Unfortunately many modern ovens do not keep the pilot light lit and do not allow such a low temperature setting.

A home dehydrator is the more reliable method for creating great dried tomatoes.  We use an American Harvest model scavenged from my parent's basement.  We set it at 125 deg F and leave for approximately 24 hours.

Method

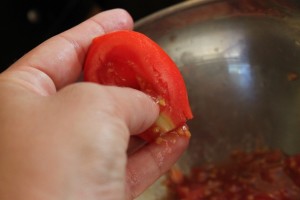
removing seeds from tomato for dehydrating

Slice your tomatoes in half or in 1/2 inch to 1 inch slices, depending on your preference and equipment.

Remove the core and at least some of the liquidy pulp.  I don't mind the taste of a few dried seeds so it doesn't bother me to leave some in.

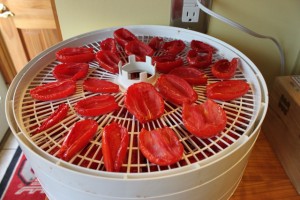
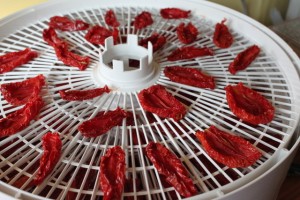
paste tomatos in dehydrator

Place tomatoes in a single layer in your desired drying apparatus.  It is not necessary to leave much space in between tomatoes because they will shrink significantly.

Start drying.  Monitor regularly, especially with a solar dryer or oven.

dehydrating tomatoes after 5 hours

Test for doneness by breaking a tomato in half.  You should see no beads of liquid.

dried tomatoes after 18 hours

When tomatoes are done, remove them from the drying apparatus and allow to cool to room temperature.

Package in an airtight container.  You can store at room temperature, in the fridge, or freezer.  Because they take up so little room, I place mine in small plastic bags in the freezer until ready to use.

To cook with dried tomatoes, rehydrate them for 15 - 45 minutes in water, red wine, or broth.  Chop if you wish and toss in a sauce.  If using for a stew, cut dry tomatoes with scissors and then add to your recipe.

Keys to Great Dried Tomatoes

  • Use a fully ripe paste tomato.  The variety pictured in this post is Amish Paste, one I grow at home.
  • Be sure they are fully dry before storage.  Nothing breaks a cook's heart like finding a moldy batch of preserved food!
  • Prepare for shrinkage.  Tomatoes lose approximately 75% of their volume when they are dried.  Approximately 10 pounds of tomatoes will dry down to 4 cups of dried tomatoes.

This post added to Two for Tuesdays.

Canning Week 2010 Part Two coming soon

Ugh.  I dropped a heavy ceramic ring that I use as garden decor on my foot Wednesday night.  It barely hurt at first, but by Thursday morning my foot was very tender, a bit swollen and bruised.  I spent most of yesterday worrying about it. Last night I was in pain and itchy from taking an old painkiller.  I barely slept.

This morning I went to a podiatrist.  He took x-rays and determined my foot bones were all intact.  He said the pain is coming from bruising and tendonitis.  Rest, ice, and anti-inflammatories should make it feel better soon.

Because I didn't write my posts ahead of time like a good blogger, I'll have to reschedule the last two segments of Canning Week 2010, pickles and tools and tips, for next week or later.

Enjoy your weekend!  I'll be here, with my foot up.

Canning Vegetables

canning and jam making advice 2010In Canning Week 2010 day 3, I share a bit about canning vegetables.  View a lesson on pectin and recipe for peach jam from earlier in the week.  Tomorrow I'll discuss pickles. The massive harvests are starting, and they aren't limited to sweet fruits.  Something has to be done with mountains of tomatoes, corn, green beans, and more.

Canning is one useful option to preserve the harvest.  Vegetables are a bit more tricky to can than fruits because they often contain less acid, so one has to rely on recipes.

Low acid vegetables must be canned in a pressure canning system.  As I'm a bit afraid of my pressure cooker and I don't like the texture of most canned vegetables, I don't have experience pressure canning.  There are recipes on Fresh Preserving to can fresh low acid vegetables including green beans, carrots, corn, and onions.

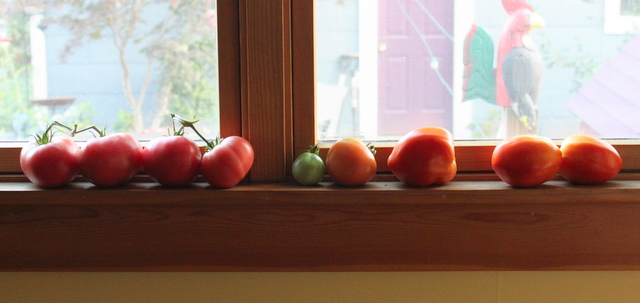
homegrown tomatos ripening on a window sill

Tomatoes, high in acid, are commonly canned in a water bath.  You can can them whole or in pieces.   I prefer to can much of our harvest this way because it is most adaptable.

If you follow a recipe to maintain the correct acidity, you can also make and can pasta sauce, pizza sauce, barbecue sauce, ketchup, salsa or paste.  We usually make a large batch of spaghetti sauce and several smaller batches of other tomato products throughout the late summer.  I wrote about some of these options for the tomato tonnage last year.

I will be making a basic tomato sauce and canning it next Wednesday, August 11, from 6:30 - 8:30 at the North Market Dispatch Kitchen.  For $12.99 ($8.99 for Slow Food Columbus members), participants will go home with a jar of sauce and confidence to preserve their own at home.  Buy a ticket today and join me!

Basic Water Bath Canning Method

Use for tomato pieces, whole, or tomato-only sauce.

1. Blanche tomatoes by dipping whole tomatoes in boiling water for 1 minute and then immediately transferring to an ice water bath.

2. Remove skins from tomatoes.  (Skip the blanching and removing skins if you don't mind them.)

3. Chop into desired pieces or use a food mill to make sauce.

4. Pack into sterilized jars.

5. Fill jars to exactly 1/2 inch of the top of the jar.

6. Use a thin knife or chopstick to gently release any air bubbles.  Add a bit of extra tomato juice to top off the jar if necessary.

7. Add 1 teaspoon lemon juice per pint to adjust acidity and preserve color.

8. Top with sterilized lids and rings.

9. Place in boiling water bath for 40 minutes for pints, 45 minutes for quarts.

10. Remove from the water bath and allow to cool thoroughly before storing in a cool dark place.