Ketchup, For The Good Times {Recipe}

homemade ketchup recipe Some preserves are easy, some are drastically cheaper than store-bought, and some are tastier than anything you can buy. Alas, homemade ketchup is none of these things.

So I can't exactly explain why I make it every year.

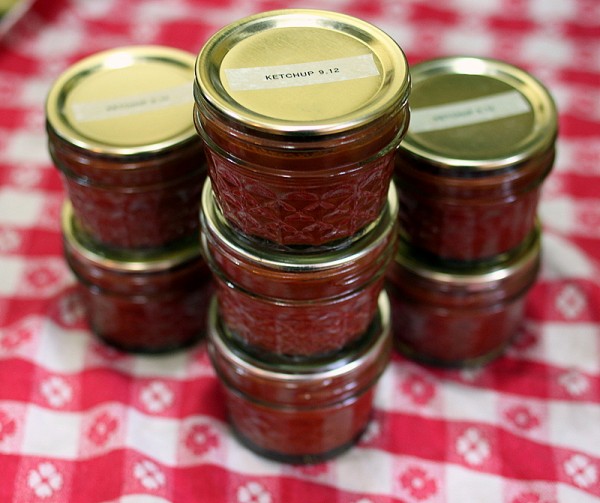
I suppose I can ketchup because processing all the jars of regular sauce becomes boring. And when I'm in the midst of tomato madness, condensing a little puree with spices isn't any extra trouble - it is, in fact, a welcome chance to do something different.

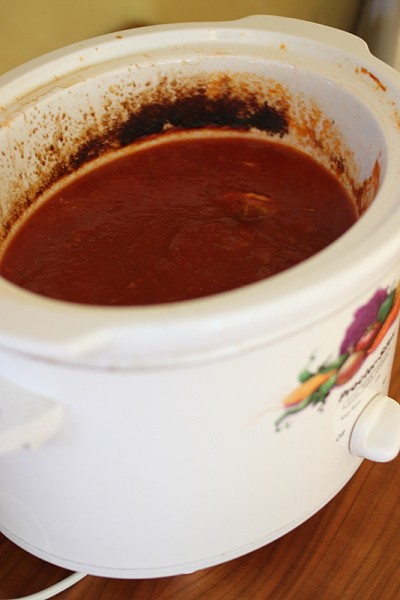
Last year I improved my ketchup method by cooking the sauce down in a slow cooker. This prevents the bottom from scorching and makes it easy to leave the house or do other chores during the lengthy, oh so lengthy, cooking period.

While ketchup doesn't meet any of my traditional characteristics of a recommended preserve, HITK readers have ask for my recipe. Here it is:

ketchup recipe in slow cooker

Homemade Ketchup

Makes: approximately 5 pints Time: 12 hours cooking, 30 minutes active

1 teaspoon olive oil 1 whole onion, diced 2 quarts tomato pulp (most easily made with a food strainer and sauce maker tool, or made by stewing tomatoes and running through a manual foodmill to remove skins and seeds.) 1 cup brown sugar or honey 1/4 cup apple cider vinegar 1 teaspoon garlic powder sachet of whole aromatic spices (your choice of bay leaf, cinnamon stick, cloves, allspice berries, juniper berries, celery seeds - I use a little of each) 1 teaspoon salt 1/2 teaspoon white pepper 1/2 teaspoon lemon juice per pint

1. Heat a medium sized pot over low heat. Add olive oil and onions. Cook until translucent, approximately 10 minutes. 2. Add onions and remaining ingredients except for lemon juice to a slow cooker*. Turn slow cooker on high and allow to simmer for 3-4 hours. 3. Remove spice sachet and set aside. Puree mixture with an immersion blender. 4. Replace spice sachet and continue to cook for 3-4 hours. Taste (don't burn your tongue!) and adjust salt, pepper, vinegar, or sugar as you see fit. 5. Continue cooking and tasting until tomato is of ketchup consistency. This may take an additional 3-4 hours. 6. Ladle hot ketchup into sterile jars with one half teaspoon lemon juice per pint. Wipe rims, place on two part lids, and process in a water bath for 35 minutes/pints, 40 minutes/quarts. Remove from water bath, cool, and store properly.

*Don't have a slow cooker? Use a medium pot on low heat, uncovered, and stir frequently to be sure the bottom does not burn.

This post, with much respect for the A Prairie Home Companion, brought to you by the Ketchup Advisory Board.

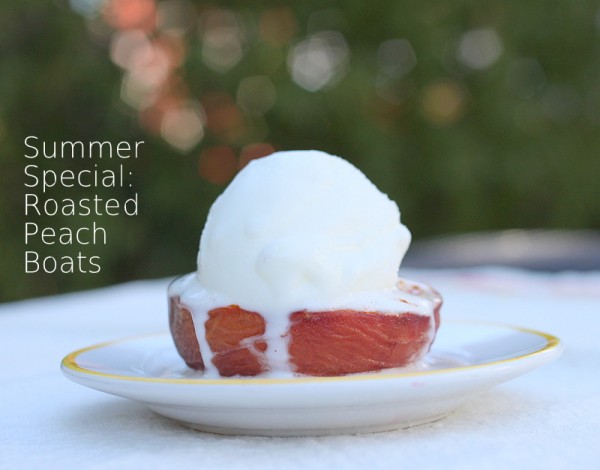
Roasted Peach Boats + Yagoot Giveaway {Recipe}

Peaches in the summertime, apples in the fall, if I can't have you all the time, I won't have none at all. - Gillian Welch, Back In Time roasted peach boat recipe It's the height of peach season and my family is going through a peck a week. That's fifteen pounds of peaches!

We each eat several fresh peaches daily, I canned nine pints, and we cook them into pie and cobbler. Wanting a lighter dessert for a recent meal, I created these roasted peach boats.

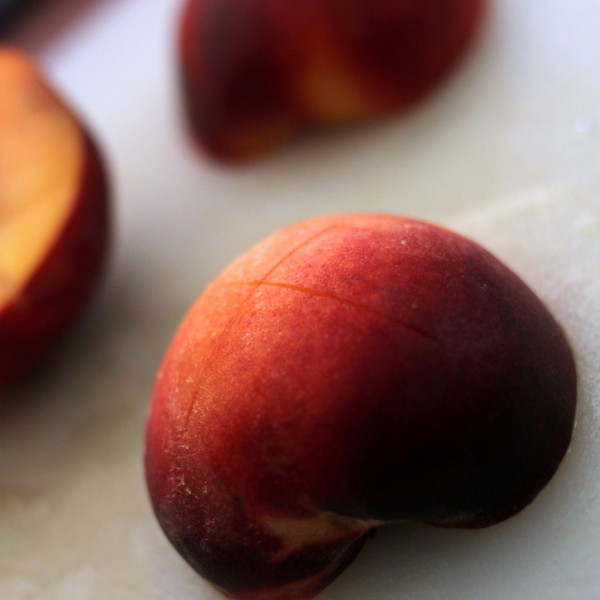
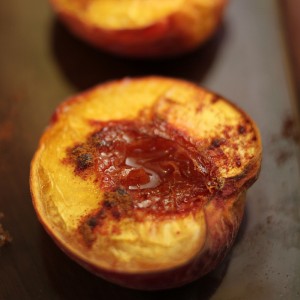
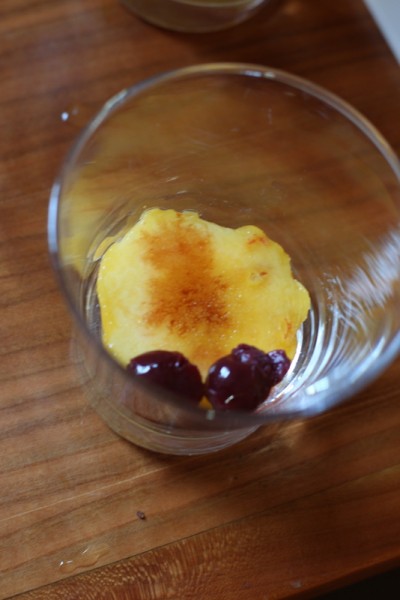
Oven roasting peaches concentrates their flavor and reduces the flesh to a smooth, scoopable texture. Scoring the peel before cooking helps the skin break easily with the edge of a spoon. The small bowl holds a dallop of freshly whipped cream, portion of crunchy granola, or in this case, a scoop of Yagoot frozen yogurt.

scored fresh peachroasted peach boat

Yagoot asked me to create a recipe with their new Yagoot@Home line of frozen yogurt. Filled with live active yogurt cultures, Yagoot is a tangy and low fat alternative to ice cream. Pints of seasonal flavors are available in their shops in Cincinnati and Columbus.

Yagoot Gift Card Giveaway

Yagoot is offering two twenty dollar gift cards for readers of Hounds in the Kitchen to try their yogurt. If you want a chance to win, simply leave a comment with your favorite frozen yogurt topping or serving idea.

lil peach boat

Roasted Peach Boats

Makes: 2 Time: 30 minutes Ingredients: 1 fresh Ohio peach (I am loving the Branstool Orchard peaches this year.) 2 teaspoons brown sugar 1/4 teaspoon ground cinnamon

Method: 1. Cut peaches in half and remove pit. 2. Score a shallow 'X' on the rounded outside of each half. 3. Place scored side down in a oven-safe roasting pan. 4. Sprinkle flesh with brown sugar and cinnamon. 5. Roast in a 350 degree oven for 30 minutes or until peach is soft. 6. Allow to cool for five minutes. Top with whipped cream, granola, frozen yogurt, or ice cream.

NB: You can make a big batch of roasted peaches at once, cool, and store them in the fridge for up to four days. Bring them to room temperature or reheat before serving.

Music video for the song lyric above:

Giveaway details: Two $20 gift cards will be awarded at random to two separate commenters. Prize ERV – $20. Prize is provided and delivered by Yagoot; Entrants agree to not hold Rachel Tayse Baillieul or Hounds in the Kitchen liable for the prize. Entry open to US resident adults 18 years of age and older. Entries as comments on this site will be accepted from 2 pm EST Tuesday August 7, 2012 – 2 pm EST Wednesday August 15, 2012. Two winners will be chosen on Wednesday August 15, 2012 by random.org and notified via email. In the event that a winner does not respond within 48 hours, new winner(s) will be selected.

Disclosure: Yagoot provided me with gift cards to cover the ingredients of creating a recipe using their yogurt. All opinions are my own.

Roasted, Marinated Eggplant Antipasto {Recipe}

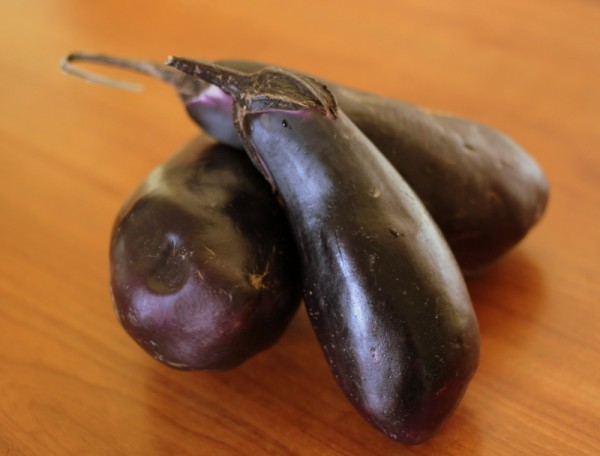
marinated roasted eggplant recipeI am so uninspired by eggplant that I scarcely could believe enchanting, chewy, tangy nosh a friend recently served me was eggplant antipasto.

fresh local raw eggplant

I mean, I should love eggplant. It is purple, picturesque, and easy to grow in the backyard. But the often spongy, slimy texture simply isn't worth the weak flavor to spend time growing or cooking it. Or so I thought until eggplant antipasto.

I recreated my friends' dish at home with some irresistible Wayward Seed eggplant and ate piece after piece. I served some to another friend and between the two of us and Alex we cleared the plate in no time.

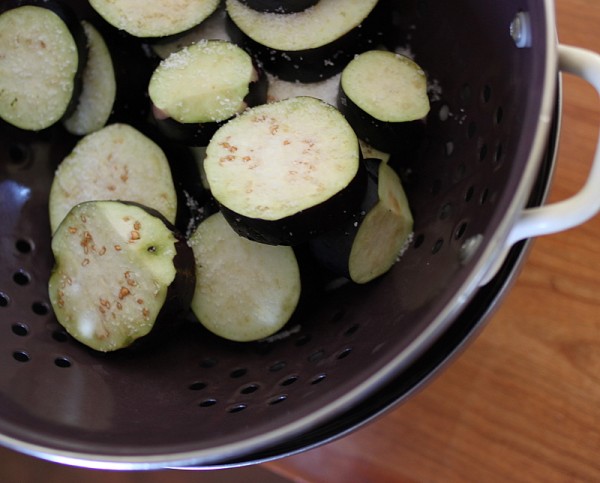
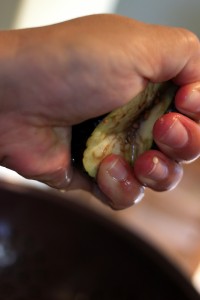
salting eggplantsqueezing eggplant

The lengthy preparation hardly seems worth the quick consumption. First, sliced eggplant must sit in a salt coating to leach out liquid. Then, the cook must squeeze out any remaining water and bake them for a half hour in the oven. Finally, the slices soak in brine for a minimum of four hours.

I would rarely recommend a method that requires so much time and fussiness but I assure you that even eggplant doubters will enjoy this preparation. It converted me.

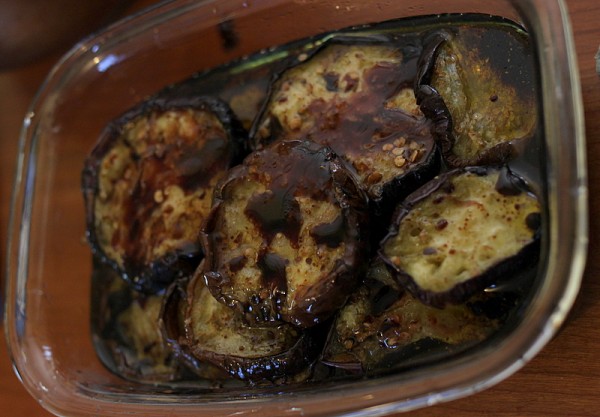
marinated eggplant

Roasted, Marinated Eggplant Serves: 6-8 appetizer servings Time: 20 minutes active, 5 hours draining/marinating As flavors are concentrated in this recipe, high-quality ingredients are key.

1 pound small to medium sized eggplant, sliced into 1/2 inch rounds generous sprinklings of salt, approximately 2 tablespoons 1/4 cup quality balsamic vinegar 1/4 cup quality honey 1/2 cup quality olive oil 1/2 teaspoon ground white pepper

1. Place eggplant slices in a large colander sitting inside a bowl to collect drips. 2. Generously salt eggplant on both sides. Leave at room temperature, uncovered, for 30 - 60 minutes. Meanwhile, preheat the oven to 350 degrees F. 3. Squeeze each slice to remove the maximum amount of liquid, brushing off excess salt grains. 4. Place slices in a single layer on a cookie sheet. Drizzle with a few tablespoons of the olive oil. 5. Bake for 30 minutes or until slightly browned. 6. Whisk together honey, vinegar, oil, and white pepper in a small glass or ceramic container. 7. Add eggplant to the marinade and gently stir to be sure all pieces are covered. Let stand at room temperature for 4-8 hours. 8. Serve with toast points or bread rounds. Leftovers can be kept covered in the refrigerator for up to one month but always bring to room temperature before serving.

Boiled Peanut Hummus {Recipe}

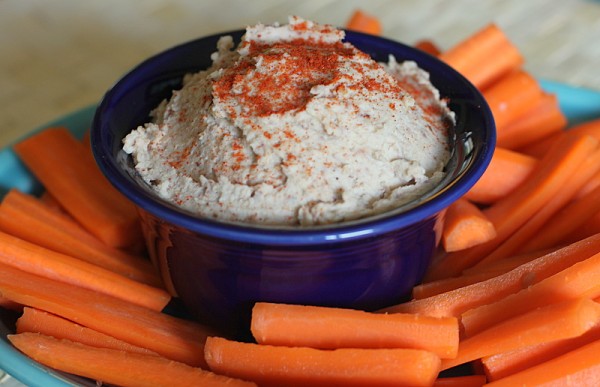
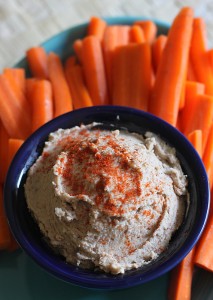
boiled peanut hummus recipe When I set out to develop a simple healthy nosh for an otherwise indulgent Southern-inspired dinner, I never expected it to involve frogs and many hours of preparation. But boiled peanut hummus did exactly that.

Veggies and bean puree are a perfect appetizer because they can be prepped ahead of time and add a nutritious component to meals or snacks. I wanted to experiment with boiled peanuts because I suspected their legume quality would make for a special hummus.

Twitter friends pointed me to the Crestview Market for raw peanuts. Crestview is the only one of the four (!) Asian markets within three miles of our house that I had not yet explored. I couldn't just grab the peanuts without wandering the aisles. Back by the ample meat counter I spied one of my few irrational fears: frogs. Live ones. A whole tray of bright green, fist-sized frogs covered with a hair net-like containment sat by some soft shell crabs.

I turned my back and tried to get the heck out of Dodge, not even stopping to snap an Instagram.

Back home, I poured all the raw peanuts that would fit into my slow cooker and covered them with water. I let it run overnight, allowed the peanuts to cool and then began peeling the soft beans from their wet skins. I blended them with seasonings and hoped for the best.

The resulting dip is delightfully earthy and leguminous. Amongst the rich flavors one can only barely pick out peanuts. The leftovers tasted better than the first night, yet another recipe that ought to age and mellow before eating.

Was it worth the frogs, time, and slimy skins? I'm not sure. But if you can find canned boiled peanuts in your area, or better yet fresh boiled, try this recipe for a spin on traditional hummus.

boiled peanut hummus dip recipe

Boiled Peanut Hummus Makes: 1 1/2 cups Time: 8 hours boiling, 15 minutes preparation

3 cups raw in-shell peanuts or 1 1/2 cups shelled boiled peanuts 2 tablespoons olive oil 1/4 teaspoon salt 1/4 teaspoon Old Bay seasoning 1 teaspoon lemon juice 1/4 teaspoon ground black pepper

1. Cook raw peanuts covered in water in an electronic slow cooker set on high for ten - twelve hours. 2. Allow to cool and shell peanuts, measuring 1 1/2 cups. 3. In a bowl of a food processor, mix peanuts, olive oil, salt, Old Bay, lemon juice, and black pepper. Pulse a few times and then process until hummus is smooth. Add water, a tablespoon at a time, to thin hummus if you wish. 4. Best after twenty four hours in the fridge when the flavors can marry.

Peach Old Fashioned {Cocktail Recipe}

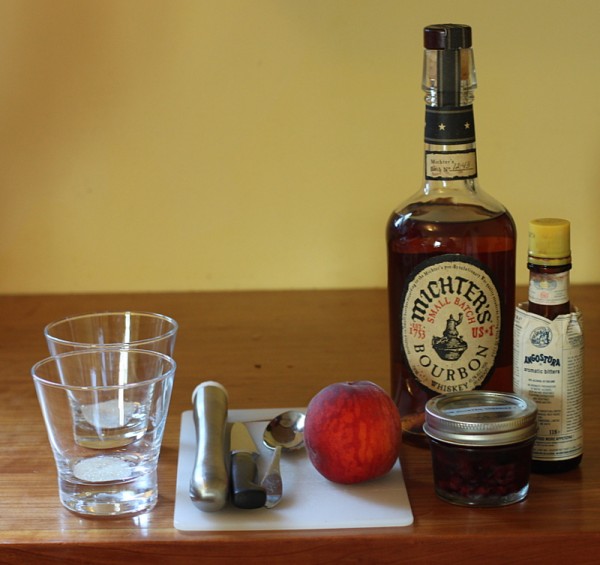
peach old fashioned recipeA gifted bottle of Michter's bourbon plus the first peaches of the season equalled a lovely cocktail a few weeks ago. Alas with the derecho and heat wave, I took to drinking the bourbon straight up for awhile. Now I'm back to share this cocktail recipe with you. old fashioned stepsmuddled old fasioned fruit

A traditional Old Fashioned includes a muddled orange slice. For the summer season, I substitute a peeled peach. How do you peel a peach? If the fruit is ripe, the peel should remove from the flesh with a gentle tug of your bare hands.

I like to make Old Fashioneds because they are simple to put together: line up the glasses, fill with fruit, muddle, add ice, top with bourbon. I like to drink Old Fashioneds because bourbon is my favorite spirit and the mix of liquor, fruit, and bitters is clean flavored and refreshing.

Do you enjoy an Old Fashioned?

ingredients for peach old fashioned

Peach Old Fashioned

Makes: 1 serving

1/2 fresh peach, peel removed 1 maraschino cherries or 2 home-canned tiny sour cocktail cherries scant 1 teaspoon sugar 2 dashes Angostura bitters 2 ounces good quality bourbon ice

1. Place peach, cherries, sugar, and bitters in the bottom of a low ball glass. (If you don't have a low ball glass collection, a half pint jam jar works well for this casual cocktail.) 2. Muddle gently with a cocktail muddler or the end of a wooden spatula. 3. Add ice to fill jar about two thirds full. 4. Pour bourbon over the ice. 5. Stir gently to combine and serve.

Homemade Chocolate Syrup {Recipe}

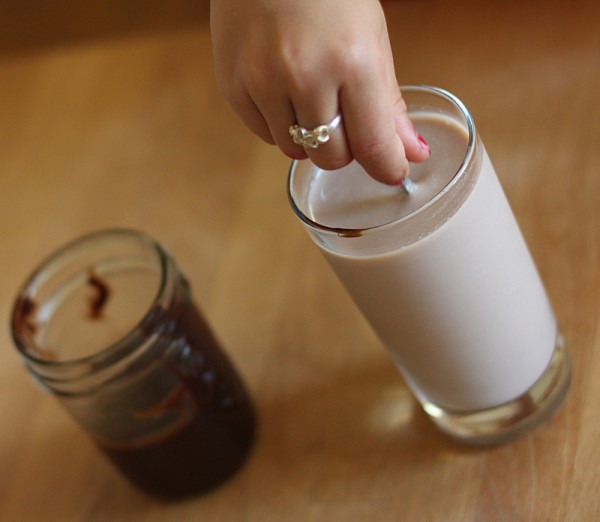
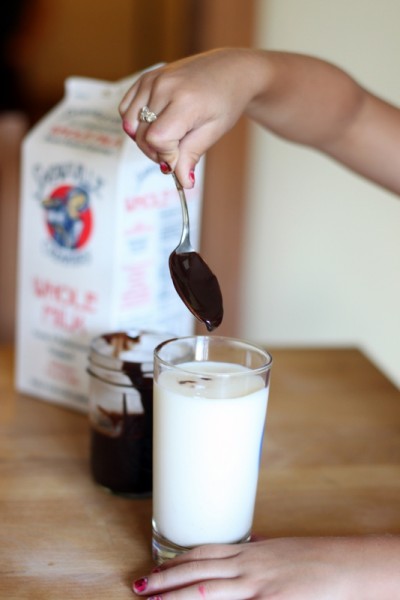
lil drinking chocolate milkI freely admit that despite being exposed to hundreds of kinds of local foods, my daughter is not an adventurous eater. We can and do deal with this at home but travel is difficult with her slim food preferences.

One of our biggest struggles while dining away from home is milk. Lil has an addiction to Snowville Creamery milk. I agree with her that their milk tastes fresh and yummy and...like milk. What we can offer her at restaurants and chain groceries is typically over processed; I understand her rejection of the cooked-tasting stuff.

And yet, I want her to drink milk. It's a nearly complete food that makes up for dinners where she eats only bread or lunches where she picks at a fruit salad.

What's a mom to do? I cover the stale milk flavor with something everyone loves: chocolate.

stirring chocolate milkI could pick up the national brand chocolate syrup in the brown can, but instead I usually make my own from ingredients found in most pantries. I made this in the Bahamas and cooked several batches in Hawaii. My recipe contains no corn syrup, only takes a few minutes to prepare, is low fat and vegan. Homemade chocolate syrup is equally at home topping ice cream or stirred into cold milk or hot coffee.

dropping homemade chocolate into snowville milk

Simple Chocolate Syrup

Time: fifteen minutes Makes: approximately 1/2 cup 1/4 cup 100% cocoa powder (buy the highest quality, fair trade cocoa powder you can find) 1/4 cup granulated sugar 1/2 cup water tiny pinch salt (optional) 1/2 teaspoon vanilla extract (optional) 1. Whisk together cocoa powder, sugar, water and salt in a small pot. 2. Heat over low, stirring often, until the mixture is the thickness you like. Stick-to-the-spoon thick takes about five minutes. 3. Remove from heat and stir in vanilla extract. 4. Cool and store in the refrigerator for up to two months.

Win Friends With Eton Mess {Recipe}

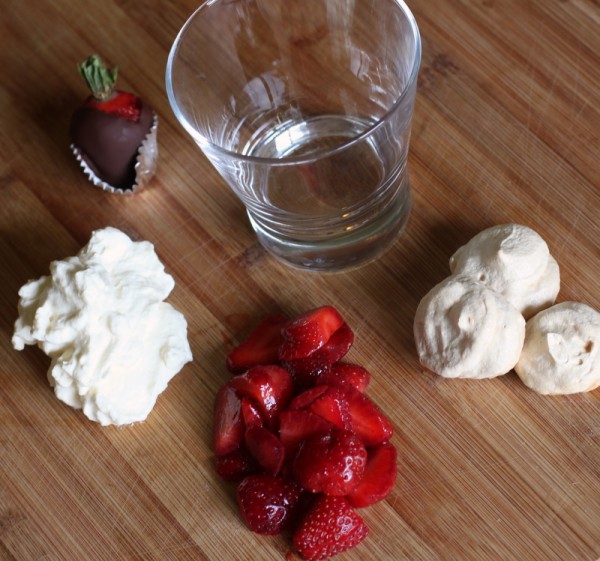
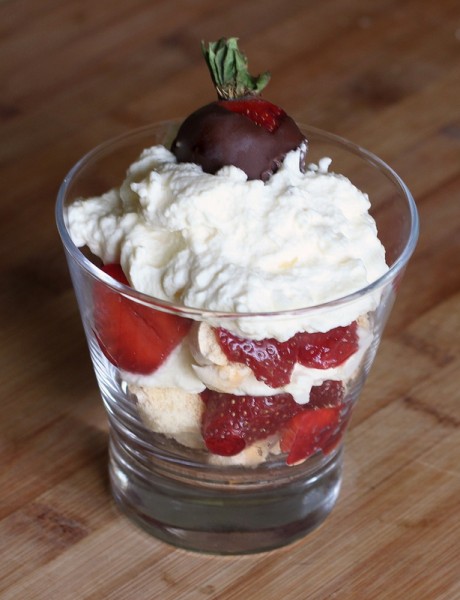
eton mess deconstructedFor the past year, we have been dining with friends every Friday night. Alternating hosting with being guests, we compete not with each other but for the great dining experiences enjoyed together. Highlights have included a low country crawfish boil, the $5 Julia Child dinner, 18-hour braised pork, and the kid favorite, chicken and waffles. Recently our friends served us Eton Mess. Neither Alex nor I were familiar with this layered dessert of crunchy meringue, sweetened whipped cream and fresh fruit. Upon a single taste we agreed that this dessert is perfection.

eton mess recipe meringue cream berries

Eton Mess is a play of textures with simple, familiar flavors. The dessert is easy to make ahead and plate for individual servings as dinner comes to a close.

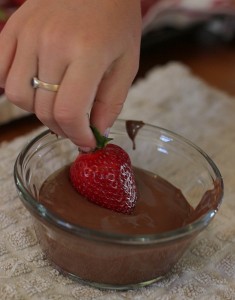
child dipping strawberrieschild piping meringue
As the very name suggest sloppiness, it is perfect for a child to make. For our version, Lil picked the berries, piped the meringue, and dipped the chocolate strawberry garnish. I whipped the cream, but only because Lil was too busy playing. That component, too, is easy for the beginning cook.

toddler eating eton mess

Homer Simpson said "You don't win friends with salad." I add the positive "You win friends with dessert," especially if your friend happens to be this adorable two-year-old.

Eton Mess Serves: 8 (with a few meringues left over) Time: 20 minutes prep, 2 hours cooking and cooling, 10 minutes plating

meringues: 2 egg whites (reserve yolks for mayonnaise, hollandaise, or another recipe) 1/8 teaspoon salt 1/2 teaspoon cream of tartar 1/2 cup granulated sugar 1/2 teaspoon pure vanilla extract

cream: 1/2 cup whipping cream 2 teaspoons powdered or granulated sugar 1/2 teaspoon pure vanilla extract

4 cups fresh strawberries, washed and sliced

8 chocolate-dipped strawberries (optional garnish)

for the meringues: 1. Place the egg whites, salt, and cream of tartar in a large clean bowl or the bowl of a stand mixer. 2. Beat with a rotary mixer or whip until foamy, about two minutes. Increase the speed and continue beating. 3. Add sugar one tablespoon at a time, fully incorporating each addition until the egg white are smooth again. 4. Continue beating until whites are very stiff. Then whip in the vanilla. 5. Transfer meringue to a piping bag or gallon ziploc bag, pressing mixture to release any air bubbles. 6. Using a one-inch round tip or a one-inch cut in the corner of the bag, pipe the meringue onto a cookie tray covered with a silicone mat or parchment in two- to three-inch rounds. 7. Bake meringue in a preheated 275 degrees F oven for 45 minutes. Then lower the temperature to 250 degress F and continue cooking until meringues are lightly brown and hard to the touch. Turn off the stove but leave cookie sheet in the oven with the door closed until cool.

for the whipped cream: 1. Place 1/2 cup whipping cream in a large clean bowl or bowl of a stand mixer. 2. Using a whisk or whip attachment, slowly whisk the cream. 3. After it becomes foamy, increase the speed a little. 4. Slowly add sugar until fully incorporated. 5. Continue to whip just until the cream stiffens into solid peaks. Whipping too long will end up with butter and buttermilk, so watch this closely. 6. Stir in vanilla extract.

assembly: 1. Select clear glass cups or goblets, one for each guest. 2. Fill the bottom with 2-3 crushed meringues. 3. Layer on 1/4 cup of sliced strawberries. 4. Top with a dallop of whipped cream. 5. Layer on more meringues, berries, and cream. 6. Top with a chocolate-dipped strawberry, if desired. 7. Serve immediately.

Here's the Simpsons reference:


Added to Simple Lives Thursday #96.

Grilled Bok Choy & Tatsoi {Recipe}

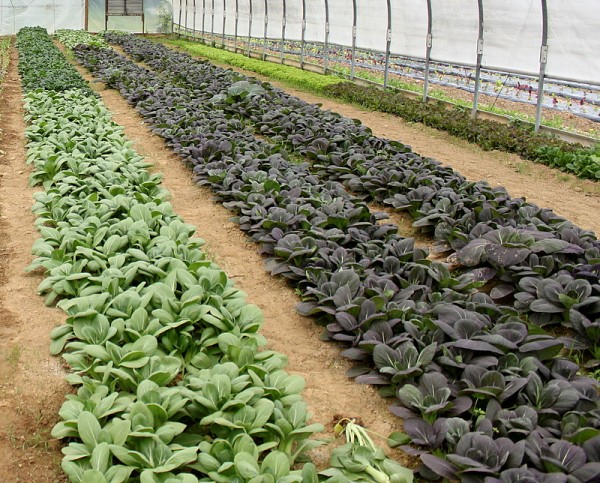
Remember last week when I picked strawberries and toured Bird's Farm? The bok choy and tatsoi in the high tunnel were too beautiful for me to resist. bok choy growing in hoop house

Rich in Vitamin A and C, these greens are tasty ways to supplement your diet. They are mild in flavor, sweeter than kale or mustard greens, and the crunchy stem adds texture to dishes.

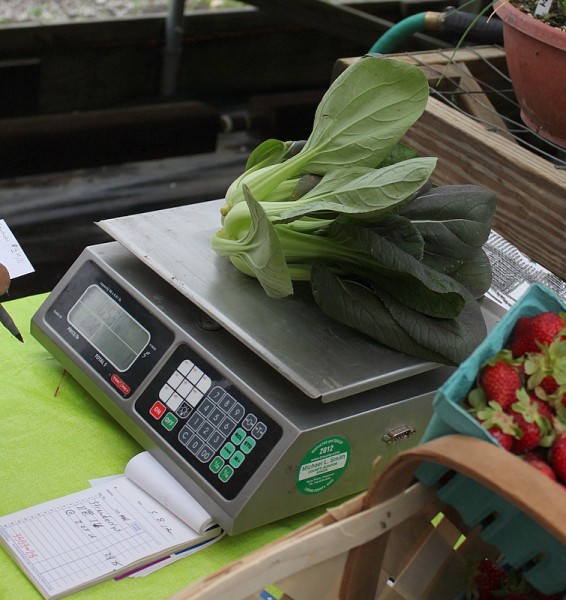
bok choy on scale

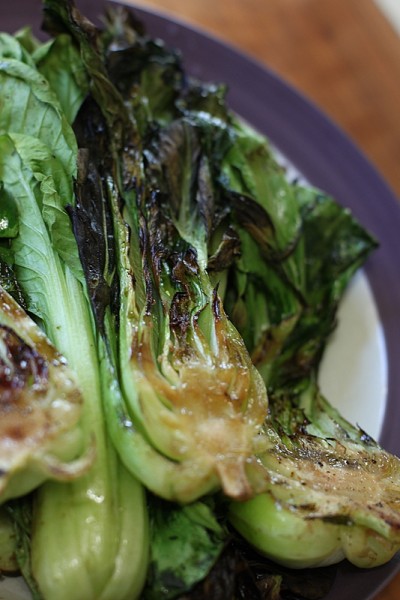
The young plants are often sold as baby bok choy or baby tatsoi. The stems are so tender when young they can be eaten raw, sautéed in a stir fry mix, or cooked quickly as in our favorite preparation: grilled bok choy.

I predict bok choy and tatsoi will be the next 'hot' green vegetable like kale is now. They are even easier to assimilate into the standard American diet and oh so delicious.

Do you eat bok choi and tatsoi? What's your favorite way to cook them?

grilled bok choy

Grilled Bok Choy Time: 10-20 minutes heating grill, 5 minutes preparation, 5 minutes cooking

1 head of young bok choy or tatsoi per person 1 teaspoon olive oil 1/2 teaspoon soy sauce 1/4 teaspoon salt 1/4 teaspoon ground black pepper

1. Slice the head in two lengthwise and wash thoroughly for any sandy soil that may reside in between leaves. 2. Drizzle with olive oil and soy sauce and sprinkle on a light coating of salt and pepper on the cut side. 3. Grill the bok choy, cut side down, over very hot coals for 4-6 minutes or until the greens are browned but not burnt. Serve immediately.