New & Improved Baked Apple {Recipe}

My favorite season is here! I love autumn for chilly mornings, the rainbow of changing leaves, and my birthday. I also love apples, the quintessential fall fruit. baked apple recipe

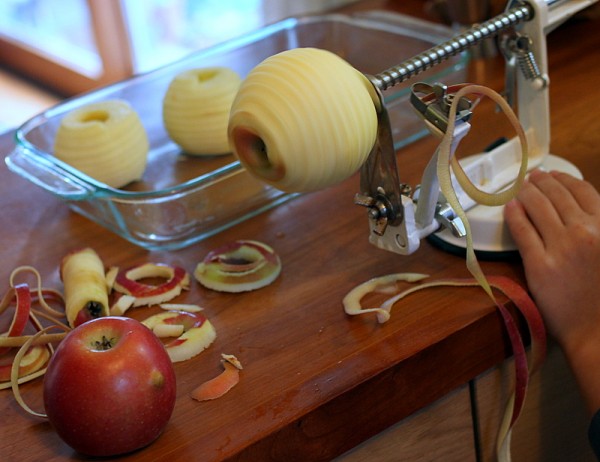
Last night, Lil requested baked apples, a 'dessert' so nutritious that I had to indulge. The only apples we had on hand were the Freedom variety from Sippel Farm. These are tasty red apples but the skins are a little tough. I knew if I baked in my traditional way, the skins would become leathery but I had an inkling that a favorite kitchen gadget might help us out.

Apple Peeler Corer Slicer

Enter the apple peeler corer slicer. This gizmo is one I resisted purchasing for years because it has every marking of a unitasker. Indeed it only works well on apples, but it makes quick work of apples for crisp, jam, and sauce. We use it often enough to justify the $20 cost;  City Folk's Farm Shop has an apple peeler corer slicer to borrow.

apple peeler corer slicer

Lil loves to operate the peeler, as do her friends. Some of them ask for an 'apple slinky' every time they are over. Even the chickens appreciate this tool because they get to eat up all the skins and cores, so nicely cut into beak-sized pieces.

Baked Apple Recipe

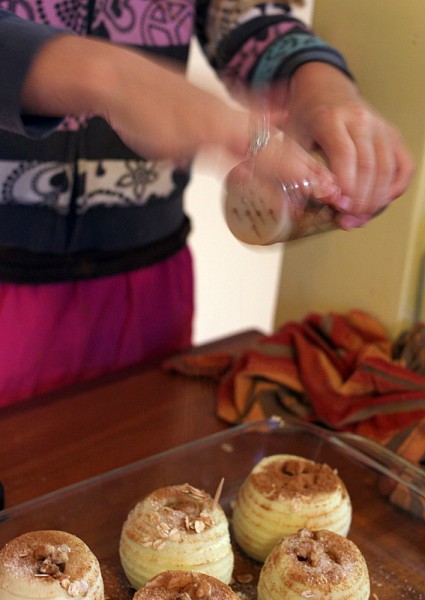
Back to last night - Lil peeled, cored, and sliced our apples. I sat them upright in a baking dish and we filled with a little bit of butter, oats, nuts, and sugar. Lil sprinkled with cinnamon. Actually, Lil covered them in cinnamon as she was so enjoying making the spice rain down on the apples that she forgot to stop. Oops.

sprinkling cinnamon on baked apples

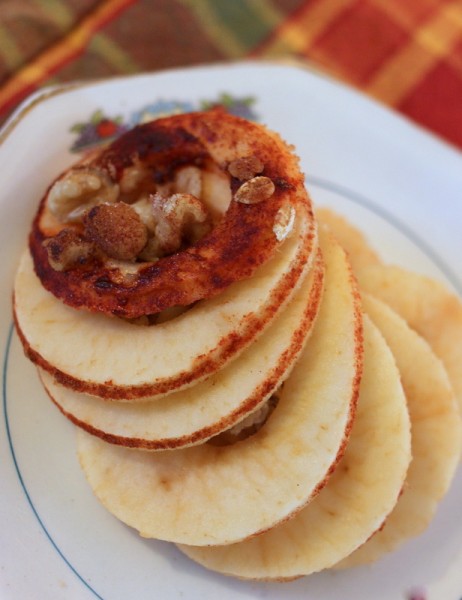
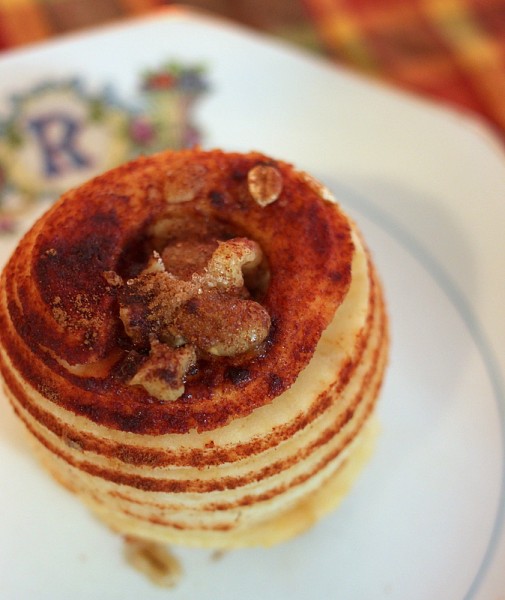
They baked in a low oven for an hour while we prepared and ate the rest of our dinner. I tipped the rounds into a spiral for service. Our dinner guests agreed that this was an improvement to the typical baked apple, as pleasing to the eye as to the fork.

baked apple spiral

Baked Apple Makes: 1 serving Time: 1 hour

1 starchy baking apple per person 1/2 teaspoon butter per person (can substitute coconut oil) 2 teaspoons sugar or honey 1 teaspoon rolled oats 1 teaspoon chopped walnuts or raisins (optional) 1/4 teaspoon cinnamon

1. Peel, core, and slice apples. Place with core hole vertical in an oven safe baking dish. 2. Fill core hole with butter, 1 teaspoon sugar, oats, and walnuts or raisins. 3. Sprinkle cinnamon and remaining sugar over the top of the apple. 4. Bake in 300 degree F oven for 40 minutes. Check for doneness by poking at apple. If it does not yield easily, pour 1/2 cup apple cider, hard apple cider, or water into pan and cover with aluminum foil. Bake an additional 20 minutes or until apples are cooked to your desired texture.

Warning: Don't Cook Distracted

hand with bandaids If you were busy last week with volunteer work, house showings, and homeschooling,

and a family you know loses a child to SIDS,

and you're powering through pounds of tomatoes because they're ready for canning,

while also baking cookies for said family,

watch out for immersion blender blades and

hot stove racks.

You just might cut and burn yourself.

Don't Cook Distracted.

This message brought to you by Agent P.

The Olympic Cocktail {Recipe}

the olympic cocktail recipeI love the Olympic games, cocktails, and a good story, so I naturally fell for the tale of the classic cocktail, The Olympic. The forgotten stepsister of the popular Side Car, the Olympic originated in London in 1922, likely in recognition of Olympic ocean liner, not the athletic competition.

The first recipes were one part cognac to one part orange juice to one part curacao, likely a non-electric-blue color because Brilliant Blue FCF hadn't originated yet.

In celebration of the 2012 games in London, we began experimenting with the Olympic. Our version, heavier on the cognac than the original, is refreshing with just the right amount of sweetness.

We'll serve the Olympic tonight with a London-inspired meal of steak and mushroom pasties, shaved brussels sprouts salad, popovers, and roasted peaches. I can hardly wait!

olympic cocktail ingredients

The Olympic Makes 1 drink

fresh squeezed juice of half a navel orange 2 ounces VSOP cognac 1 ounce quality orange brandy liqueur like Grand Marnier 1 dash Peychoud's bitters strip of orange peel for garnish

1. Place ice and water in a cocktail glass. 2. Pour orange juice, cognac, orange brandy and bitters over ice in a cocktail shaker. 3. Shake and strain into glass. Garnish with a strip of orange peel.


Are you watching the Olympics? Who are you cheering for?

Powerless & A PSA

derecho cell phone picture Thanks to the derecho that swept through central Ohio, our home has been powerless since 4:30 pm Friday. Powerless is:

  • no air conditioning or fans for sleeping in nights with 75 degree low temperatures
  • refrigerated foods moved to one relative's house, frozen foods at another's
  • retreating to air conditioned spaces in the heat of the day and later for overnights
  • taking laundry to your parents' like you are in college again
  • rejecting showing requests because there are no lights to show off your house for sale
  • making frequent trips home to take care of animals as confused as we are
  • trying to complete work for social media clients on an unfamiliar computer
  • rationing cell phone battery life
  • hearing that 90% of houses will have power restored by Saturday (still four days away!)
  • hoping you are not the 10% left behind, but maybe in a group that will be restored sooner
  • realizing just how dependent you are on the grid
  • being ever more committed to making the next house more energy independent
  • still feeling lucky that your home and family are only annoyed and not physically damaged

Needless to say, blogging is not at the top of my list right now. If you miss me, hop over to the guest post I wrote for Dollar Stretcher blog about Homesteading for Savings. Columbus Parent also just published an article about Lil and I and our recipe for real food power bars. And now for something from Alex, a public service announcement for those living in Ohio.

Ohio Health Scam?

"It was quite by coincidence that I had my own little health care run-in on the day last week when the Supreme Court decision on health care was just about the only thing in the news.  As some of you may recall, I had surgery in April to remove a piece of a metal axe lodged in my thigh.  As with any major medial procedure, the bills and adjustments have been slowly trickling in.  Everything has looked reasonable until we received a very strange bill last week.  The bill was for $406.25 from Ohio Health (Grant/Riverside Labs). The bill stated that Ohio Health had contracted with Patient Financial Services (PFS) to service this bill.

Ohio Health is the normal company that processes my bloodwork taken during my annual physical exam, so at first I wasn't overly concerned.  This year my annual physical came about six weeks before my surgery, which required me to come back to the doctor for an additional pre-admission blood panel. I assumed that this bill was a result of two diagnostic tests being performed in close succession.

Imagine my surprise when I called PFS and discovered that this bill was for services rendered January 25, 2010.  According to the woman I talked to, Ohio Health had audited its billing systems and determined that this balance was outstanding.  I have vague memories of problems with the bloodwork being paid for at that time, but I had contacted my doctor and assumed everything was taken care of as I heard nothing further on the matter.

As it turns out, my doctor's office diligently corrected their error, but Ohio Health never bothered to fix their mistake in the coding for services that were submitted to my insurance company for payment. As could be expected, my insurance denied the claim and Ohio Health was never paid.  Furthermore, my insurance company stated that as more than sixth months had passed since the claim was denied, no appeal would be accepted, and any bills were now my responsibility.  Needless to say, I was more than a little bit upset.

My next step was to call PFS back, and this is were things took a turn for the bizarre. I happened to be connected with the same agent I talked to the first time.  I explained to her what my insurance company said, and she replied instantly and in a most shocking manner.  Without missing a beat, she instantly said, "Ok, we'll simply close out this account for you."  Somewhat in shock, I thanked her and hung up the phone.

After having a few moments to reflect on things, I cam to the conclusion that this must be a gigantic scam.  I have no way of knowing what the relationship is between Ohio Health and PFS, but I would guess they have either contracted them to service debt or outright sold outstanding balances to them for pennies on the dollar.  The strategy here seems to be one of hoping that most people won't question things and will simply pay the amount in question.  Barring that, they likely hope that the insured will be able to convince their insurance companies to pay.  As a final recourse, they simply cancel the bill.

Why do I think that this is the case?  Firstly, no information on the date of service, services rendered or anything else you might expect to see was present on the bill.  Additionally, a third party was managing the collection, not Ohio Health themselves. Finally there is the fact that the entire issue was closed so quickly.  The woman I was speaking with didn't have to consult a supervisor or go through any further steps, but obviously had the authority (and I would guess standing instructions) to simply close the account.

This whole situation strikes me as extremely shady and dishonest on the part of Ohio Health.  They may have contracted with an outside company to do their dirty-work for them, but their name is featured prominently on the bill, and they bear the responsibility for the actions of their contractor.  This entire process is rigged to prey on the fear and uncertainty of people who might not have the savvy to navigate our convoluted health care system.  Honestly, if the amount in question had been smaller, I might have simply opted to pay it instead of wasting my time and arguing the issue.

The lesson seems to be that Ohio Health customers need to be vigilant. I know I will be more cautious than ever about double-checking what companies say I owe." -Alex  

We genuinely hope that you all are safe and we can return to regular activities and writing soon.
Homemade Chocolate Syrup {Recipe}

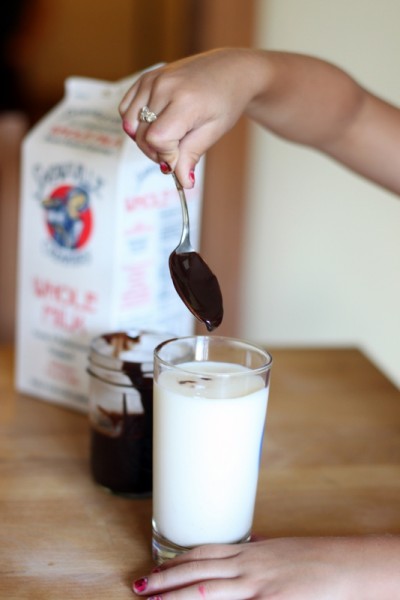
lil drinking chocolate milkI freely admit that despite being exposed to hundreds of kinds of local foods, my daughter is not an adventurous eater. We can and do deal with this at home but travel is difficult with her slim food preferences.

One of our biggest struggles while dining away from home is milk. Lil has an addiction to Snowville Creamery milk. I agree with her that their milk tastes fresh and yummy and...like milk. What we can offer her at restaurants and chain groceries is typically over processed; I understand her rejection of the cooked-tasting stuff.

And yet, I want her to drink milk. It's a nearly complete food that makes up for dinners where she eats only bread or lunches where she picks at a fruit salad.

What's a mom to do? I cover the stale milk flavor with something everyone loves: chocolate.

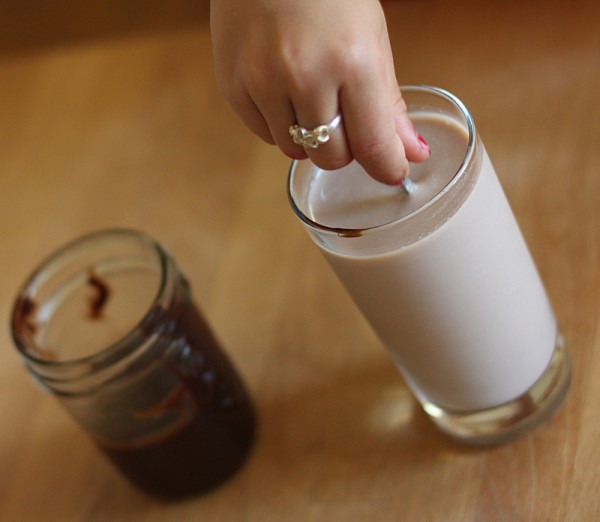
stirring chocolate milkI could pick up the national brand chocolate syrup in the brown can, but instead I usually make my own from ingredients found in most pantries. I made this in the Bahamas and cooked several batches in Hawaii. My recipe contains no corn syrup, only takes a few minutes to prepare, is low fat and vegan. Homemade chocolate syrup is equally at home topping ice cream or stirred into cold milk or hot coffee.

dropping homemade chocolate into snowville milk

Simple Chocolate Syrup

Time: fifteen minutes Makes: approximately 1/2 cup 1/4 cup 100% cocoa powder (buy the highest quality, fair trade cocoa powder you can find) 1/4 cup granulated sugar 1/2 cup water tiny pinch salt (optional) 1/2 teaspoon vanilla extract (optional) 1. Whisk together cocoa powder, sugar, water and salt in a small pot. 2. Heat over low, stirring often, until the mixture is the thickness you like. Stick-to-the-spoon thick takes about five minutes. 3. Remove from heat and stir in vanilla extract. 4. Cool and store in the refrigerator for up to two months.

How to Eat an Unfamiliar Vegetable {Friday Five}

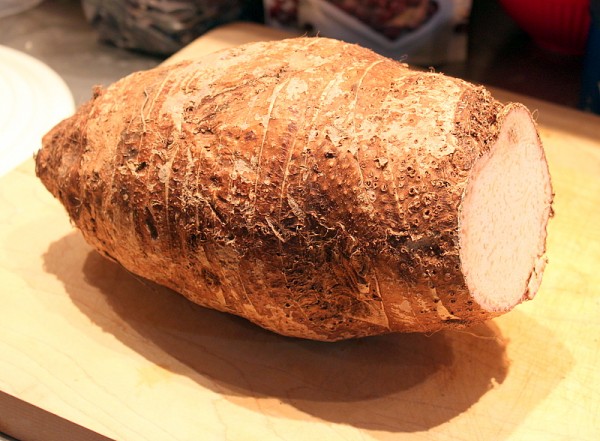
Hawaiian taro root I saw plenty of unfamiliar produce at farmers' markets in Hawaii. Often I ask farmers what to do with strange items but when I purchased the above taro root from a non-native English speaker, I didn't receive much guidance. My family was suspect of the taro after eating poi and I wanted to show them it could be tasty so I employed my five step plan to enjoy an unfamiliar vegetable:

1. Raw - I taste everything raw to see what the initial characteristics are like. In the case of taro our tongues were coated with thick starch and not much other flavor. I knew this meant we had to cook the taro for a good while to break down the starch and add heavy seasoning to trick our tastebuds.

2. Steamed - A quick steam is a good way to enjoy vegetables whose initial raw taste has good flavor. I suspected that taro would take a long time to steam thoroughly so we skipped this step.

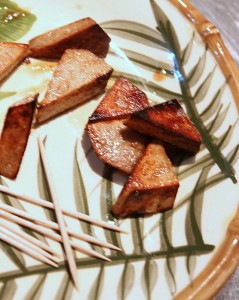
3. Boiled and Pureed - Most root vegetables taste good when boiled in salted water. Puree with a little butter if the texture is off putting. Peas, beans, and leaf vegetables can also be quickly boiled and added to purees. I meant to try boiling taro but ran out of space on the range. bacon fried taro wedges 4. Oven Roasted - Nearly all produce, including fruit, taste sweeter after a trip in a hot oven. Toss the raw product with a little olive oil, salt, and pepper (or brown sugar in the case of fruit) and cook until caramelized. Roasted taro mixed nicely with potatoes prepared the same way.

5. Fried in Bacon Fat - When all else fails, pull out the big guns: bacon drippings. There is precious little that doesn't taste amazing when fried in bacon fat and indeed the taro was more than palatable this way. To completely cook the starch, we fried each half-inch side for five minutes.

What do you do when you come across an unfamiliar vegetable?

Please excuse the poorly lit photos. Despite ample outdoor light for some reason I chose to take pictures in the kitchen. I blame it on the mai tais.

Road Trip Food: Chesapeake Snack Mix {Recipe}

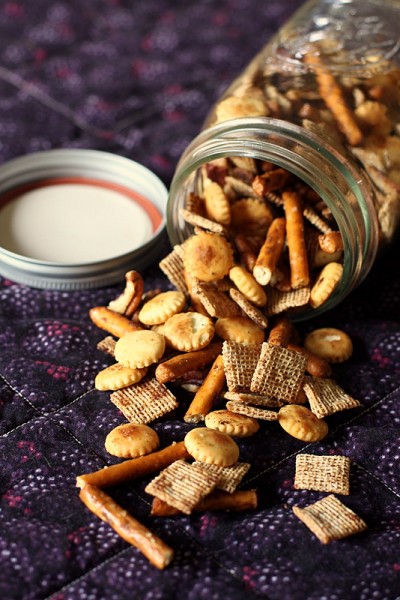
chesapeake snack mix Every summer of my childhood, when we would go camping with a group of families, my mother filled an enormous tupperware lidded bowl with homemade Chex Mix. Some kids picked out only the pretzels while others left just the nuts behind. Often the bowl was empty after a single evening.

I always crave Chex Mix when I travel. Over the years, I have combined my childhood memories of the crunchy, salty snack with my husband's family's East coast roots to create my own version: Chesapeake Snack Mix.

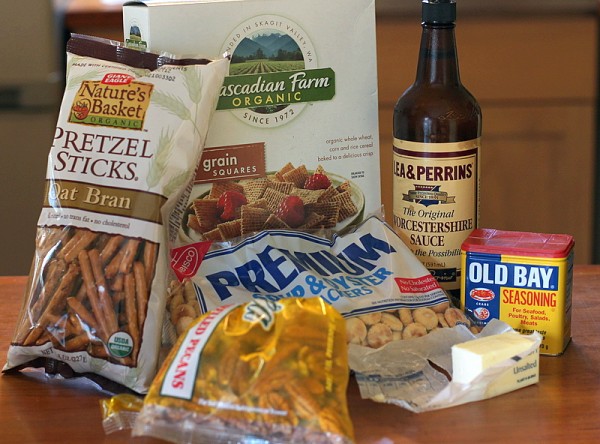
old bay snack mix ingredients

My mix includes coastal favorites oyster crackers and pecans and Old Bay as the primary seasoning. I also upped the ratio of butter and seasoning to dry stuff because that's the way I like it.

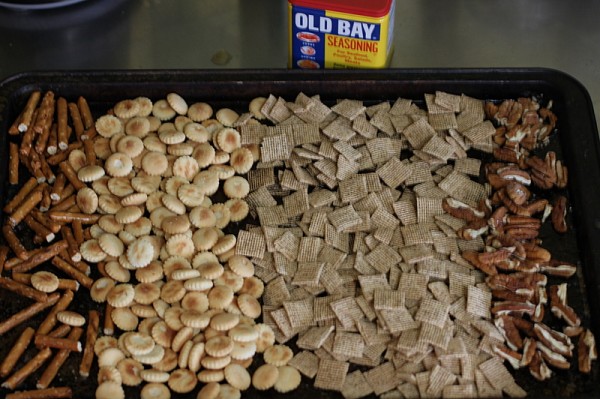
Baked snack mix with old bay

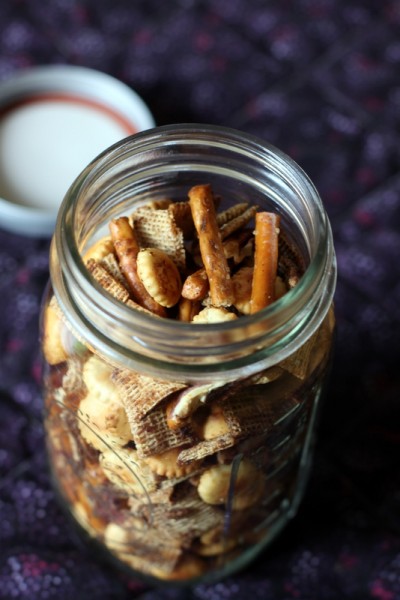
The only downfall of cereal snack mixes is that they have a tendency to be crushed to bits when packed into a bag. That's why I package mine in wide mouth quart jars. When the mix is gone, the jars always come in handy on the trip as a drinking glass, a place for a collection of shells, or a storage container for other snacks.

What snacks do you make or buy for the road?

snack mix in a jar

Chesapeake Snack Mix Makes: 2 quarts Time: 45 minutes

4 tablespoons unsalted butter 1 tablespoon Worcestershire sauce 2 teaspoons Old Bay seasoning 1/2 teaspoon kosher salt 1 cup broken pretzel sticks 2 cups oyster crackers 3 cups multi-grain square cereal (or wheat Chex) 1 cup pecan pieces

1. Melt butter on a large cookie sheet in a 250 degree F oven. 2. When butter is melted, stir in Worcheshire sauce, Old Bay, and salt. Spread pretzels, oyster crackers, cereal, and pecans evenly over the sheet and stir. 3. Put mix back in the oven. In fifteen minutes, stir mix so that everything is evenly coated. Return to the oven. 4. In ten minutes, stir again. If oyster crackers are browned, remove from the oven and allow to cool. Otherwise, leave in oven a few more minutes before removing to cool. 5. Store in an airtight container.

PS. The Kitchn featured my home on a kitchen tour Tuesday with lots of pictures. I hope you click through and enjoy!

Win Friends With Eton Mess {Recipe}

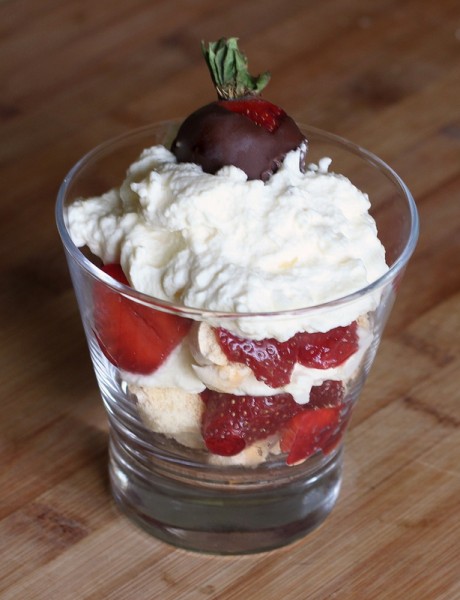
eton mess deconstructedFor the past year, we have been dining with friends every Friday night. Alternating hosting with being guests, we compete not with each other but for the great dining experiences enjoyed together. Highlights have included a low country crawfish boil, the $5 Julia Child dinner, 18-hour braised pork, and the kid favorite, chicken and waffles. Recently our friends served us Eton Mess. Neither Alex nor I were familiar with this layered dessert of crunchy meringue, sweetened whipped cream and fresh fruit. Upon a single taste we agreed that this dessert is perfection.

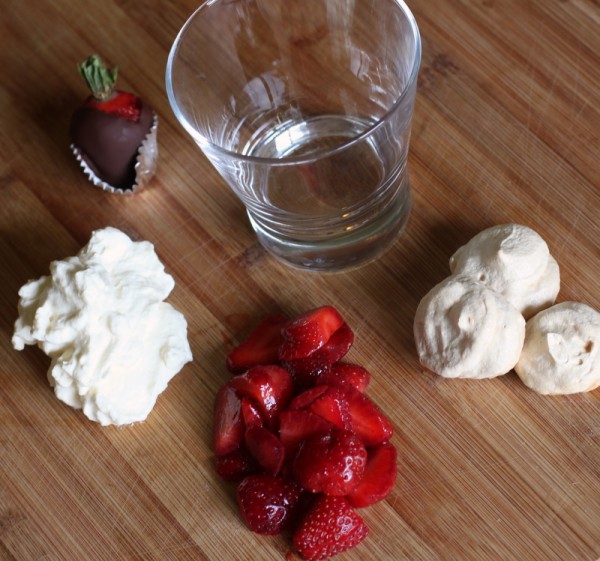
eton mess recipe meringue cream berries

Eton Mess is a play of textures with simple, familiar flavors. The dessert is easy to make ahead and plate for individual servings as dinner comes to a close.

child dipping strawberrieschild piping meringue
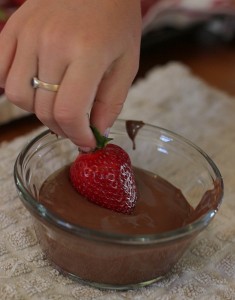
As the very name suggest sloppiness, it is perfect for a child to make. For our version, Lil picked the berries, piped the meringue, and dipped the chocolate strawberry garnish. I whipped the cream, but only because Lil was too busy playing. That component, too, is easy for the beginning cook.

toddler eating eton mess

Homer Simpson said "You don't win friends with salad." I add the positive "You win friends with dessert," especially if your friend happens to be this adorable two-year-old.

Eton Mess Serves: 8 (with a few meringues left over) Time: 20 minutes prep, 2 hours cooking and cooling, 10 minutes plating

meringues: 2 egg whites (reserve yolks for mayonnaise, hollandaise, or another recipe) 1/8 teaspoon salt 1/2 teaspoon cream of tartar 1/2 cup granulated sugar 1/2 teaspoon pure vanilla extract

cream: 1/2 cup whipping cream 2 teaspoons powdered or granulated sugar 1/2 teaspoon pure vanilla extract

4 cups fresh strawberries, washed and sliced

8 chocolate-dipped strawberries (optional garnish)

for the meringues: 1. Place the egg whites, salt, and cream of tartar in a large clean bowl or the bowl of a stand mixer. 2. Beat with a rotary mixer or whip until foamy, about two minutes. Increase the speed and continue beating. 3. Add sugar one tablespoon at a time, fully incorporating each addition until the egg white are smooth again. 4. Continue beating until whites are very stiff. Then whip in the vanilla. 5. Transfer meringue to a piping bag or gallon ziploc bag, pressing mixture to release any air bubbles. 6. Using a one-inch round tip or a one-inch cut in the corner of the bag, pipe the meringue onto a cookie tray covered with a silicone mat or parchment in two- to three-inch rounds. 7. Bake meringue in a preheated 275 degrees F oven for 45 minutes. Then lower the temperature to 250 degress F and continue cooking until meringues are lightly brown and hard to the touch. Turn off the stove but leave cookie sheet in the oven with the door closed until cool.

for the whipped cream: 1. Place 1/2 cup whipping cream in a large clean bowl or bowl of a stand mixer. 2. Using a whisk or whip attachment, slowly whisk the cream. 3. After it becomes foamy, increase the speed a little. 4. Slowly add sugar until fully incorporated. 5. Continue to whip just until the cream stiffens into solid peaks. Whipping too long will end up with butter and buttermilk, so watch this closely. 6. Stir in vanilla extract.

assembly: 1. Select clear glass cups or goblets, one for each guest. 2. Fill the bottom with 2-3 crushed meringues. 3. Layer on 1/4 cup of sliced strawberries. 4. Top with a dallop of whipped cream. 5. Layer on more meringues, berries, and cream. 6. Top with a chocolate-dipped strawberry, if desired. 7. Serve immediately.

Here's the Simpsons reference:


Added to Simple Lives Thursday #96.