Dried Corn and Stalks - Alternate Harvests

When my mother wanted us to grow sweet corn this year, we whined. "The deer will tear it down!" "Don't you know sweet corn is one of the most difficult crops to grow successfully?" "If the deer don't get it, raccoons or geese or rats will!"

But we planted anyways because we promised to grow something for each member of our immediate family and this was a year of experimentation.
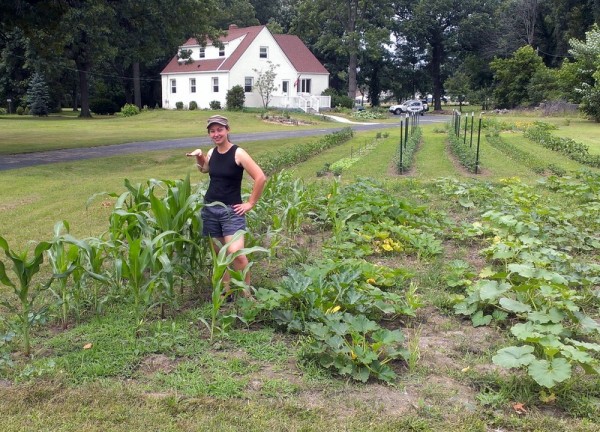
corn knee high

And guess what? The corn grew! It was more than knee high by the fourth of July. Later, the stalks tasseled and set ears. Lil and friends ran through the rows and crouched behind stalks as if in a giant corn playground.

Alas, we never harvested sweet corn at the right time. It was under ripe before our family trip to the Eastern Shore and starchy after. We whined again. "If we were home, would it have tasted good?" "Was it the variety?" "Ah, well, maybe corn-fed venison will be a better harvest."

A month later, the corn patch still had no visitors from hungry wildlife. "Did the raccoons stay away because the corn is near the road?" "Or maybe does the Nasturtium we planted discourage deer as promised?" "I guess we should harvest it."

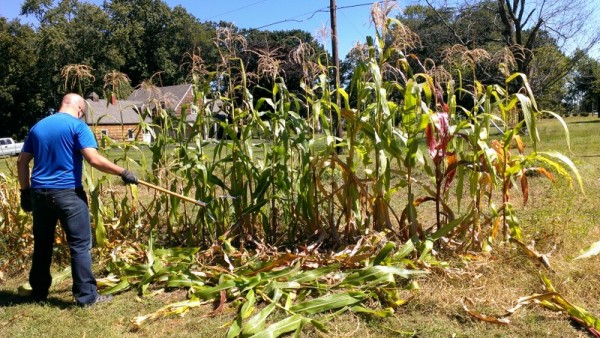
cutting down corn stalks

We cut all the cobs off the stalks and scythed the stalks down. We marveled at all the biomass grown from one handful of seeds.

corn drying in hoop house

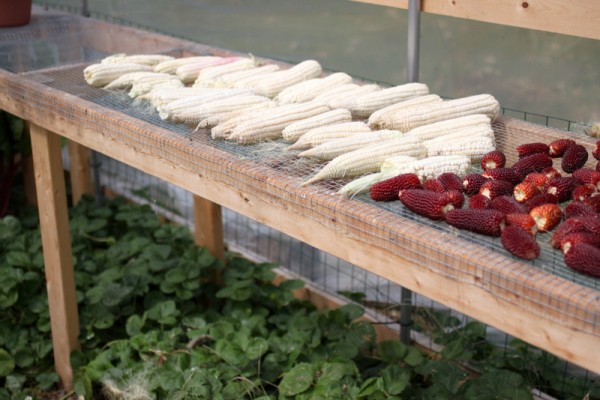
The sweet corn ears are drying on our hardware cloth shelf in the hoop house next to strawberry popcorn. If they dry to completion, we'll try milling the sweet corn into corn meal. If the cornmeal doesn't work, we know some chickens who would likely eat it.

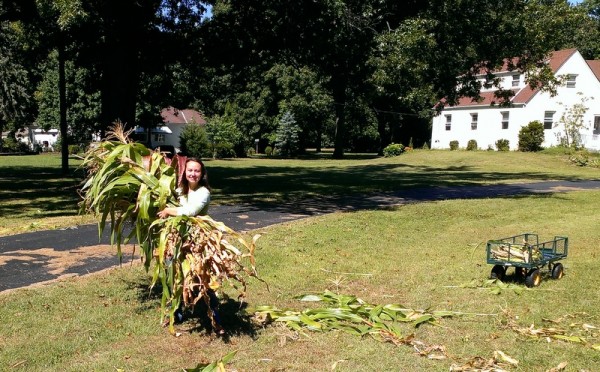
The stalks are drying on the paved walkway to the house (classy, we are) because they can be a secondary harvest. Tied up with twine, they'll be festive autumn decor.

holding corn stalks

Mom, thanks for the push to try growing sweet corn. It didn't produce what we wanted, but we harvested what we could. Don't be surprised if your porch is soon visited by the corn stalk fairy!

International Homesteading Education Month

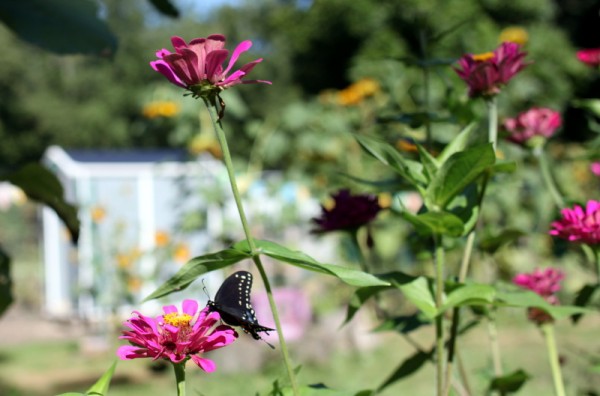
butterrfly on zinniaMother Earth News and GRIT may have invented International Homesteading Education Month a few years ago but we'll celebrate it anyways. We love all kinds of holidays, even created ones, so we are all in for a month of learning and sharing. Each member of our family adopted a learning goal for this month. Mine is to understand how to make cold-process soap. I'll attend a class at City Folk's and hopefully make my first successful batch by October 1. Alex wants to up his archery skills. He plans to build a backyard target and practice with the bow more often. Lil wants to practice sewing by making a quilt.

Beyond our own goals, we want to share what we already know. Our calendar is filled with educational events that we're hosting/co-promoting. Take a look at the schedule below - we would love to learn with you!

Managing Your Online Presence - Tuesday September 10 from 1 - 2 pm. -  This webinar is designed to help farmers and producers increase their brand awareness to gain additional business. Register for free online.

Bread Basics - Tuesday September 17 from 6:30 - 8:30 pm at The Seasoned Farmhouse SOLD OUT

Mark Shepherd talk - Wednesday September 18 from 7 - 9 pm at Unity Church - Be inspired by a permaculture farmer during this talk featuring Mark's recent experience applying his Restoration Agriculture concepts to communities in Africa. $10 suggested donation.

Backyard Season Extension - Saturday September 22 from 2:30 - 4 pm at Swainway Urban Farm - Keep your plants productive through early winter with small-scale season extension techniques! In this workshop, we'll discuss row cover materials and install a low tunnel over a raised bed. We'll share DIY ideas and best practices for reusing materials year after year. You will also learn potential pitfalls and how to avoid them. Cost: $20 or two people may register together for $35 Register at City Folk’s Farm Shop, by calling 946-5553, or by emailing shawn@cityfolksfarmshop.com.

Dehydrating Basics - Tuesday September 24 from 6:30 - 8 pm at City Folk's Farm Shop - Dried fruits and vegetables retain many of their nutrients, take up very little space, and keep indefinitely. If you enjoy cooking with a vegetable or fruit dried, this is the simplest way of food preservation. We'll compare DIY and manufactured dehydrators, sample dried goods, and share tips for using dehydrated foods. Cost: $20. Register at City Folk’s Farm Shop, by calling 946-5553, or by emailing shawn@cityfolksfarmshop.com.

Salads and Dressings - Sunday September 29 from 3:30 - 5:30 pm at Franklin Park Conservatory - Unleash the power of a beautiful salad and you’ll discover new delicious ways to serve nutritious vegetables at every meal. We’ll go old-school by making Caesar Salad with croutons and dressing from scratch, mix up a modern beet, goat cheese, and greens with mustard citrus vinaigrette, and taste an overnight-marinated kale dish. Every participant will make a dressing to take home. $30 members; $35 non-members. Registration details on the Franklin Park website.

Home Ec Columbus - Monday September 30 from 8-10 pm at City Folk's Farm Shop - Bring a dish to share (or not) and join our casual group of food lovin' folks. Free

Sharing this with you now since Seasoned Farmhouse classes tend to sell out quickly! Puttin' Up Apples - October 23 6:30 - 8:30 pm at The Seasoned Farmhouse - From Granny Smith to Gold Rush, Paula Red to Pink Lady, Ohio apples are some of the best in the world. You can put up these nutritious fall fruits to enjoy year-round with just a few simple techniques. Learn the secrets to keeping apples fresh for up to nine months, how to dry apple chips, and make a jar of applesauce in class to take home. Rachel will also share her great grandmother's time-tested recipe for apple butter. $65.

What are your educational goals for September?

Scotch Eggs - Better Than Fair Food {Recipe}

scotch eggs recipe The Ohio Poultry Association invited Lil and I to an eggstravagana at the Ohio State Fair this year. We learned how to make the perfect omelet, talked to poultry farmers, pet chickens, ate Ohio-farmed food for lunch, and indulged in Ohio ice cream while basking in the glow of the butter cow. My friend Kristin aka CbusMom has a great recap of the day including a picture of yours truly riding the giant slide.

There was only one problem with our visit. The Ohio Poultry Association fed us so well that we were too full to experience the deep-fried goodness of street fair food. The meals we ate in the Taste of Ohio center nutritious and filling but I left wanting some indulgence.

Fortunately our extended family was happy to appease this desire on our recent vacation to the Eastern Shore of Virginia. Inspired by the Ohio Poultry Association and our abundance of backyard eggs, we made a British creation for the first time: Scotch eggs.

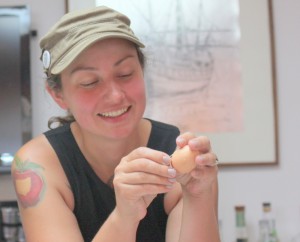
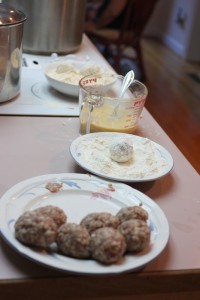
peeling boiled eggs wrapping egg in sausage for scotch eggs

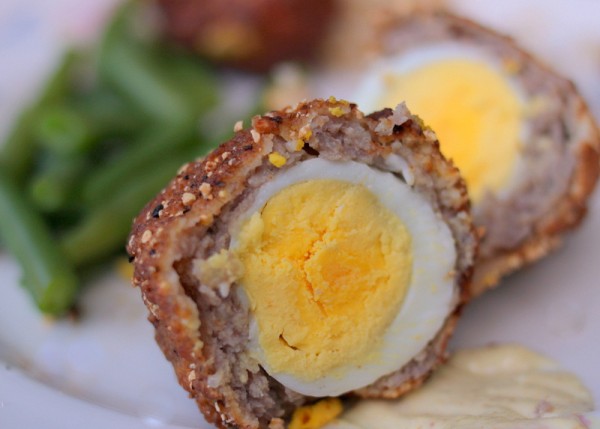
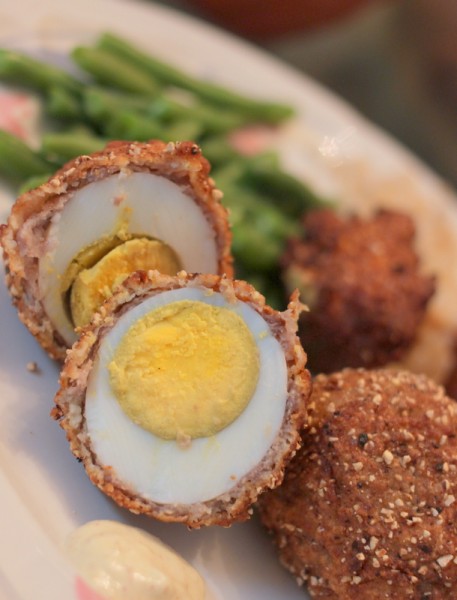
Scotch eggs are hard-boiled eggs nestled in sausage, rolled in a bread crumb coating, and deep fried. We used backyard eggs and homemade bulk breakfast sausage because even fried food can be locally sourced.

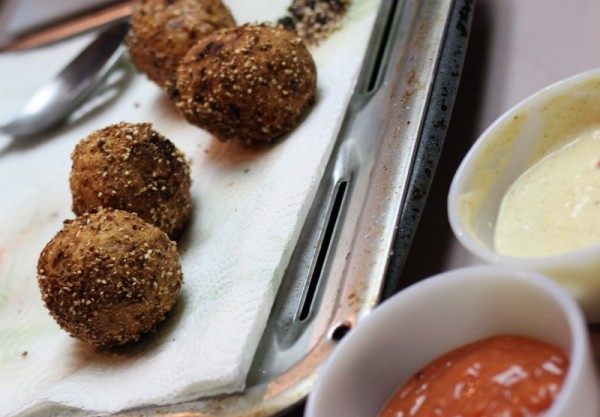
scotch eggs before cookingscotch eggs after cooking

Hearty does not begin to describe this protein-packed treat. We gobbled up scotch eggs for dinner one night. Most of us couldn't finish more than one so we chilled leftovers overnight in the fridge. Cold scotch eggs are a familiar train stop food in Great Britain; Alex and others were happy to much on them for breakfast the next day.

Maybe next year we'll see Scotch eggs at the fair!

scotch eggsScotch Eggs makes one dozen

13 fresh eggs, divided 1 pound bulk (not stuffed) sausage 1 cup all-purpose flour, divided 1/2 cup cornmeal 1/2 teaspoon salt 10 grinds fresh black pepper 1 teaspoon Old Bay or other spice mix, optional 1 gallon lard or peanut or other oil for frying

1. Hard-boil 12 eggs in your preferred manner. I cover mine in cold water in a heavy-bottomed pan, heat the pan until boiling, turn off the heat, cover, and time for 10 minutes. After 10 minutes, fill pot with cold water and ice until eggs are chilled. This step may be done up to five days ahead. 2. Peel eggs. 3. Use approximately three tablespoons of fresh sausage to completely cover the eggs in an even layer. Set eggs in a single layer on a plate or tray and refrigerate until use. 4. Heat a pot of lard or oil to 375 degrees F for deep frying. Always use a tall, heavy-bottomed pan for deep frying and never fill more than half way. Keep a fire extinguisher and/or can of baking soda nearby in case of a fire. 5. Meanwhile, make a three-bowl breading station. In the first bowl, pour 1/2 cup flour. In the second bowl, mix one fresh egg with 2 tablespoons water. In the third bowl, mix 1/2 cup cornmeal, 1/2 cup flour, salt, pepper, and optional spice mix. 6. When oil is ready, retrieve sausage-covered eggs from the fridge. 7. Roll eggs in the breading bowls in this order: flour, eggs, cornmeal. 8. Using a slotted spoon, gently transfer eggs to the hot oil in small batches. Cook for approximately five minutes or until the breading browns. Drain on a towel-lined cooling rack. 9. Serve warm or cold with mustard.

Disclosure: The Ohio Poultry Association provided my family with Ohio State Fair tickets, parking passes, food vouchers, and ride wristbands. All opinions about the deliciousness of homemade fair food are our own.

Fall Planting Starts Now...Or Yesterday

Just when tomatoes are coming in by the tons and weeds seem overwhelming, there's one more little task to add to your list of gardening tasks - fall planting. For us, autumn planting is a nice break from the harvest season, a re-commitment to eating fresh from the yard even as temperatures cool. Sowing seeds and seedlings now will give you a crop to eat through the autumn and early winter while preventing soil erosion and nutrient loss.

First, Save Seeds

Before you rip out tomatoes, squash, or peppers, be sure to save seeds from the best fruits. Seed saving should always be in the back of your mind to preserve biodiversity, ensure varieties are adapted to your local conditions, and save cash. Read my seed saving guide published a couple years ago for the basics or the Adaptive Seeds Guide for more detailed information.

Plant Autumn-Sown Garlic, Perennials, Fruits

Several edibles want to be planted at this time of year. Garlic is the most well-know crop that must be planted in the fall. Put yours in the ground before mid October and let it over-winter. You may see sprouts in the fall and that’s ok. They’ll survive snow and ice and shoot up again in the spring.

Fall is a great time to plant many flower bulbs and transplant berries or fruit trees too. Split your own plantings first - strawberry runners, raspberry shoots, herbs, and perennial flowers can all be transplanted in the fall. Often you can find perennials and fruits in the clearance section of your local nursery. It's best to split and transplant in mild weather, but if you run into a hot spell, just water often.

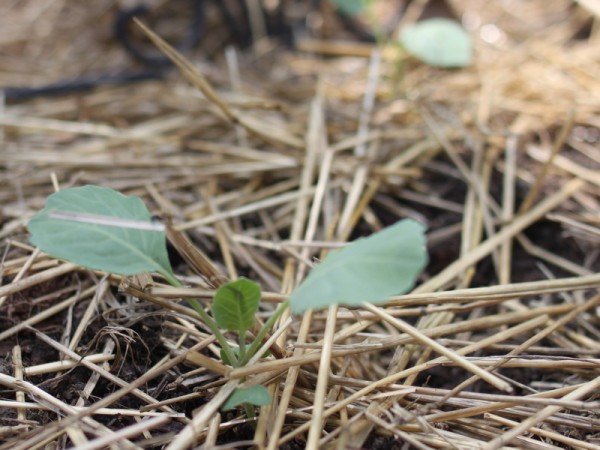
fall planting cabbage seedling

Plant Leafy Greens, Roots, and Cabbages

In Ohio, we can grow greens, many root vegetables, and members of the cabbage family in the fall. Planted now, these germinate quickly and tolerate cold temperatures as they mature.

Prepare the beds in which you wish to sow fall crops by lightly turning the soil and adding compost or an organic, mild fertilizer. Baby the seeds and seedlings when they are young, as hot dry days can scorch them. We use straw mulch to prevent weed growth and hold in moisture.

Below is a chart of fall crop dates in central Ohio; be mindful that if you plant seedlings, have a warm microclimate, use season extension, or autumn is mild, you may plant a few weeks beyond these dates.

Variety

Planting Date

Days To Harvest

Notes

arugula

8/20

30

asian greens

7/15

45-50

beets

7/30

50-60

broccoli

7/15

70-90

best started indoors

cabbage

7/15

60-75

best started indoors

carrots

7/30

60-90

sweetens after frost

cauliflower

8/5

60-85

best started indoors

collards

8/5

60-80

endive

8/20

35

kale

7/30

60

sweetens in cool temps

kohlrabi

8/15

55-70

lettuce

8/20

45-70

radish

9/15

35-60

rutabaga

7/30

90-100

sweetens after a frost

spinach

8/20

40-60

swiss chard

7/30

50-60

turnip

8/10

45-60

sweetens after a frost

When Winter Weather Comes

Cold temperatures are not the enemy of fall crops and indeed make some sweeter. There are also simple season extension techniques like row covers and low tunnels to keep plants from succumbing to frost die-off. I'll write about these soon.

Mulch At A Minimum

At the very least, protect your vegetable beds by mulching in the fall with straw or leaf litter. Mulch holds in nutrients, prevents erosion, and helps keep weeds at bay. In the spring, rake off the mulch and begin planting!

 What are you planting now?

NB. Swainway Urban Farm fall seedlings, like the cabbage pictured above, are available at City Folk's Farm Shop and the Clintonville Farmers' Market for the next few weeks or until supplies run out. If you buy at the market, say hi to me!

Our Worst Canning Accident Yet

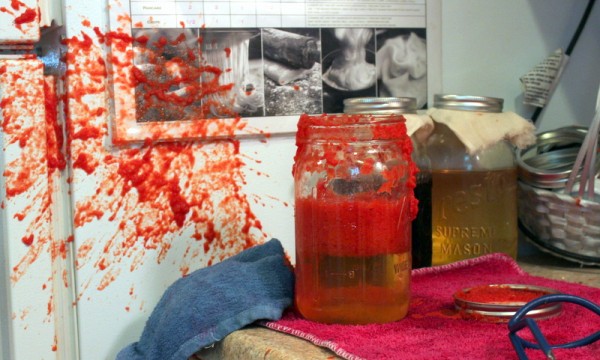
canning disaster My students at canning classes frequently express concern about botulism. I ease their fears about that rare occurrence by assuring them they should worry about burns instead. Hanging around boiling water, hot jars, and simmering sauces is a recipe for a brush with hot stuff, one I experienced today.

My friend Kate of Kate On The Way and I were canning sauced tomatoes in quarts. During the water bath phase, one of the lids loosened and tomato sauce seeped into the boil. No problem, we kept the other jars in there to finish processing.

Kate removed a jar after the finished time. As she went to tighten the ring a bit (a necessary step for Tattler lids), the lid flew off, creating an explosion of tomato. We both were covered in the spray of boiling sugary puree.

We ran for cool water and eventually made our way outside to harvest, chew, and apply plantain poultice. Our left arms have a series of first and second degree* burns with Kate suffering more than me.

Alex was kind enough to pull the remaining jars from the canner after they cooled a little. By then, three of the remaining jars had also lost their lids, the contents mingling with the water bath.

Learning From A Canning Accident

Since neither of us were hurt badly, we moved pretty quickly into the "how did this happen?" phase. Kate and I have each canned hundreds of jars of food before, if not thousands.

We referenced a canning book and filled the jars to the right head space. We heated the canning bath to a simmer so the jars weren't rattling in a raging boil. We used a proper canner with a  rack on the bottom. We have done all of these things many times.

We concluded that the lids must have been the issue. Although they were tightened according to directions, and Kate and I both have used them before, the Tattler process failed this time. Will we ever use Tattlers again? Kate says yes, I'm less sure.

Additionally, I experienced why it isn't a good idea to hover when someone else is pulling jars out of the water bath. I can't remember exactly why I was near - I might have been getting ready to grab something out of the fridge - but I shouldn't have been so close. While the Tattlers might be responsible in this case, glass failures and drops can also occur when jars are moved from the water bath to the cooling place. Someone standing nearby can be in the line of fire.

Finally, we were reminded that even experienced canners must remain vigilant to the risks at hand. We feel fortunate that the liquid exploded onto our bodies and not our faces, and that no pets or children were caught in the splatter. We lost some home-grown goodness and in a little bit of pain, but ultimately realize this could have been much worse.

We'll continue to put up food using water bath and pressure canning, with these lessons learned:

  • Use caution if you use Tattler lids with liquidy sauces
  • Stand back when removing hot jars from the hot water bath
  • Keep children and pets at a distance when canning
  • Have a plan in place for treating burns
  • *Identify some plantain in your yard. By all accounts, we should have blistered burns but thanks to plantain we don't. Kate details a little more about using plantain to heal.

What's your worst canning disaster? What did you learn from it?

Acmella oleracea aka Toothache Plant aka Our Party Trick {Wordless Wednesday}

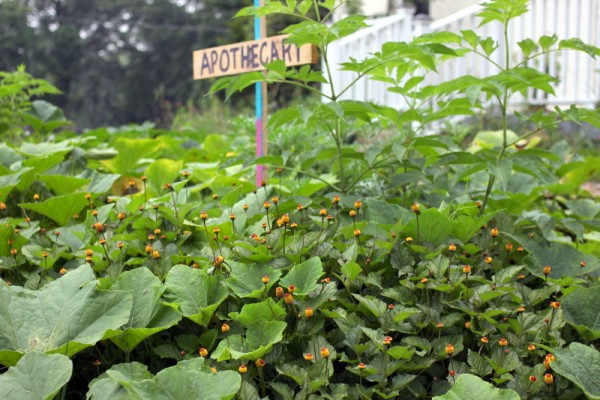
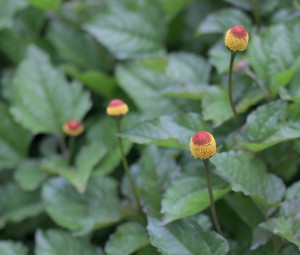
acmella oleracea plants toothache plant flowerseyeball plant flower

child eats toothache plant

sour face from toothache plantspitting out toothache plant

A friend wrote recently, "Seeing you always leaves a tingly feeling in my mouth." He's talking about toothache plant, Acmella oleracea, our party trick flower. Innocent in appearance and vigorously growing in our apothecary garden, we encourage guests to taste the small dense flowers. They give off the oddest sensation, described by some as sour, acidic, numbing, and 'like liking a 9V battery'. The effect dissipates after about five minutes.

Beyond the silly sensation, flowers and leaves of the toothache plant is useful for numbing the mouth, discovered by Brazilians as an herbal remedy for cold sores and dental problems. Some people, including Lil, munch on the flowers, also called eyeball plant, as a sour candy alternative. Or she may just like spitting out the flower on the ground.

We will collect seeds and have plenty to share if you want to grow your own next year.

What's the strangest edible you've grown?

Homemade Low-Cost, High-Character Cold Smoker Contraption

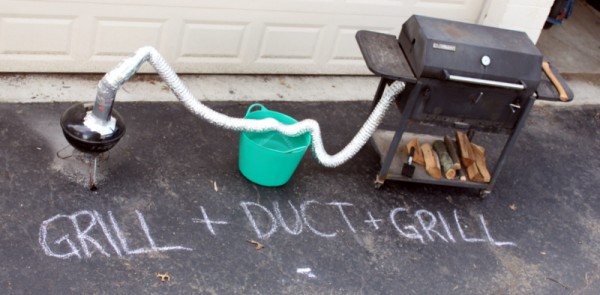
Today I will reveal the second craziest homemade cold smoker ever created. It was born from a desire to cold smoke a molasses cured, home butchered ham without breaking the bank and inspired by the craziest homemade meat cooking devise, my father's Hillbilly Ham House.

Behold Alex's Cold Smoking Contraption.

cold smoking contraption

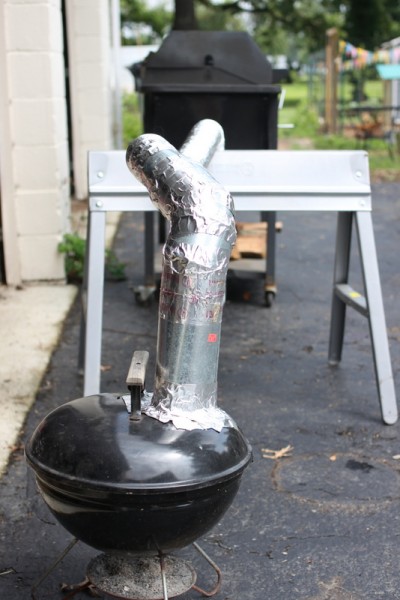
To build this beauty, Alex started with a gifted excess mini Weber grill and removed the top vent. He arranged a length of round furnace pipe acquired for $3 at the Habitat ReStore into the hole, followed by a $5 length of flexible dryer vent. Connections were reinforced with aluminum duct tape, $5 a roll.

mini weber cold smokersmoker vent

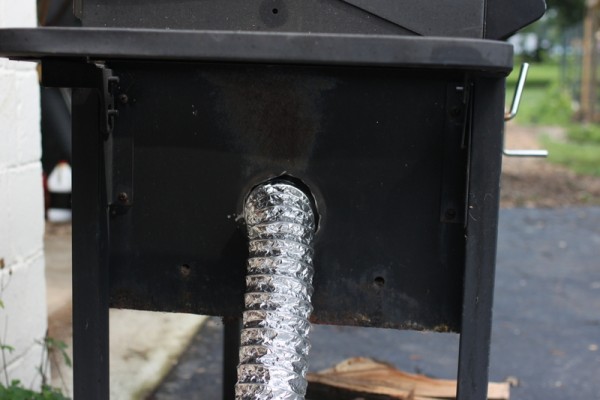
The dryer vent ran into the modified lower vent of our existing large charcoal grill. Alex used the angle grinder and many curse words to extend the hole enough for the pipe to fit in properly. The grill remains usable to cook off meat with charcoal.

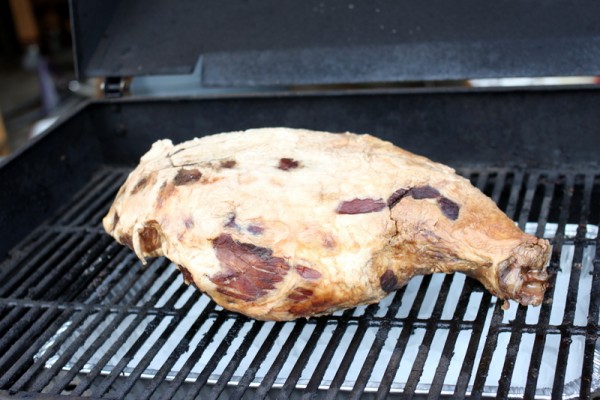
Useage is simple: Build a small wood fire in the mini Weber. Put the meat on the big grill and monitor temperature. After 18 hours, you have ham!

The dryer vent was incapable of handling the smoke heat for the duration and melted through once. Alex cut off the effected part, reattached with tape, and went about the smoking. A more permanent solution would be durable flexible hosing or connecting pieces of furnace pipe.

home cured ham over ice

Cold smoking is the act of surrounding a piece of food with smoke but little to no residual heat. The ideal cold smoking temperature for a ham is 60 degrees F. Given that the air temperature in summer is generally higher than 60, adjustments can be made. We kept a pan of ice in the base of the meat chamber to help keep cool and were able to average about 75 degrees F.

Alas, our basement is still a little too warm for dry curing, the next step in the ham Alex wished to make. We ended air drying early before mold set in and packaged the ham in slices and chunks for the future. Someday we'll learn that hams are not meant to be made in July.

What do you think of Alex's creation? DIY genius or a bunch of junk?

PS. For classier Weber modifications, head over to our friend Dave's site Webercam.com.

Pea Shoot Pesto {Recipe}

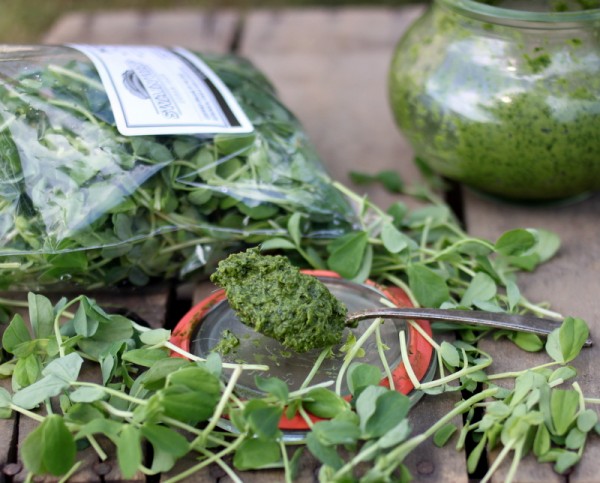
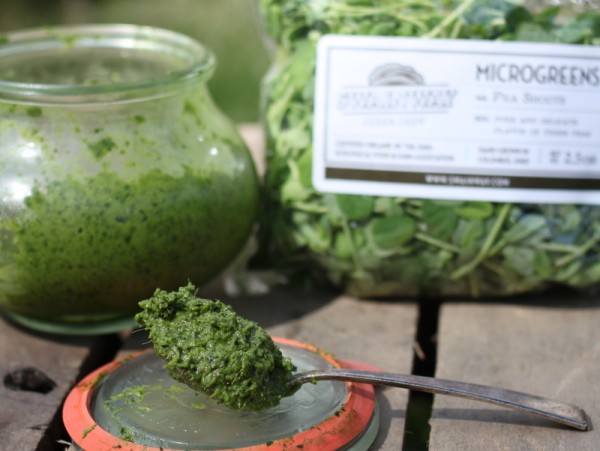
pea shoots in pesto recipe

Pesto is the simplest sauce in the world. All you need are fresh herbs, a little salt, and oil. Basil is traditional but you can use any seasonal herb. You can even use a mortar and pestle or lots of knife work instead of a blender or food processor.

And yet, there are secrets to making a bold, balanced pesto.

First, don't skimp on the fat. Oil creates a smooth texture while holding the color and flavor of the herbs. Use high quality oil because the flavor comes through the final product. Oil also tones down the strong flavor of the greens. To prevent freezer burn, top a container of pesto with a layer of oil before freezing.

Always add a little acid. A splash of lemon juice or vinegar balances the richness of the oil and preserves the color.

Experiment seasonally. Basil pesto is a classic in the summer but don't leave pesto behind in the other seasons. Play with spinach and kale in the fall and microgreens in the winter and spring. I developed this recipe for customers of Swainway Urban Farm to sample at the farmers' market. Simply adapt the recipe below to your ingredients on hand!

pea shoot pesto recipe

Pea Shoot Pesto Recipe

2-3 garlic scapes (1/4-1/2 cup) or 1-3 cloves garlic 1 bag (2.5 oz) fresh pea shoots 1/2—1 teaspoon salt 1/3 cup olive, grapeseed, or sunflower oil 1 teaspoon white or rice wine vinegar

1. Wash scapes, removing both ends, or peel garlic. Chop roughly. 2. Place garlic, peashoots, and salt in food processor or blender. 3. Blend, drizzling in oil and vinegar as the mixture purees to your desired consistency. 4. Serve as a dip with veggies, spread for bread, or sauce for pasta. 5. Store in the fridge with a light covering of oil for up to ten days or freeze for future use.