Lil's Garden Sign

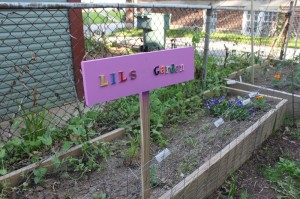
child's garden signThis year, we gave ownership of a 2 by 8 foot raised bed to our four and a half year old daughter Lillian.  She illustrated a plan for what she wanted to grow in the early spring and we have been planting things ever since. Last weekend we made a sign for her garden.  I can't say the idea was original; my friend (and amazing birthworker) Eliza just made something similar for her daughter.

Using an old piece of treated lumber, Alex fashioned a stake.  He screwed a piece of cherry plywood (still lots of leftovers from the countertops) on to the post and then helped Lil hammer in some nails.  Nails aren't necessary, but that's how she wanted to do it and it's her sign.

child spray painting

We gave Lil the choice of a few colors and not surprisingly she chose pink paint.  She loved using the spray paint and left only a small patch of pink grass in her wake.

child painting wooden letters

The next day we painted letters from the craft store with acrylic paint.  I glued these to the pink sign, waited for them to dry, and then sprayed the whole thing with clear coat.

wooden garden sign

I think the sign could use a little prettying up around the edges, but it is adorable none the less.  It will be proudly on display at our Open House Saturday June 5 from 11 am - 1 pm.  Please come!

Potato Growing in the Compost Bin

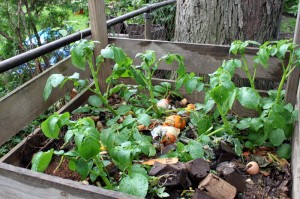
potatoes growing in compost bin When we had some red potatos sprouting in kitchen recently, Alex tucked them carefully in the corners of our backyard compost bin.

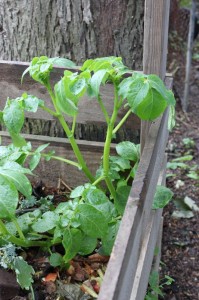
They are now over a foot tall.  It used to be pretty shady back there but American Electric Power recently hacked away some tree branches and the plants may get more sun than before.

potato plant in compost bin

I see no reason to disturb the tubers.  Having something rooted gives us another excuse to be lazy composters and not turn the bin this summer.  When the leaves go brown, we'll dig around and see if there are any spuds to harvest.

Last year we had an abundance of volunteer tomatoes and sunflowers but they seem to have not reseeded so well this year. Do you have any volunteers making their home in your yard?

Bird Netting EVERYWHERE: Why and How

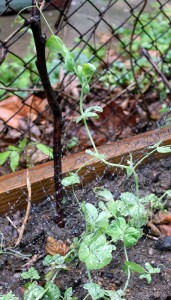
pea shoots under bird netting Just after the second set of pea leaves appeared, birds started eating them.  I blame sparrows, the possibly invasive species that seem to swarm our neighborhood in the spring.

So, bird netting is on the peas.

strawberries with bird netting

Last year we lost strawberries to the squirrels.  Even with Alex's not exactly legit squirrel hunting, they still come around.

Bird netting is on the strawberries.

four seasons lettuce covered by bird netting

Then I noticed that despite plenty of rain and sun the lettuce just never seemed to grow.

belgian endive with bird netting

Five days of bird netting and the leaves are rounded and growing.  Same with the endive.

As much as I hate covering everything in little bits of plastic, I raise plants for me!  Go away birds and squirrels!!

If you struggle with critters eating your plants, netting might be the answer:

  • Purchase an appropriate quantity of netting. I have two 14x14 foot packs I purchased from the local nursery for about $6 each.
  • While it is still carefully folded, cut to the length of your garden bed.
  • Spread each piece gently over top of the crop you are protecting. It doesn't have to be perfectly aligned. If your area is particularly windy, use several small sticks to secure the corners.
  • When plants have been established, you can try removing the netting. Gently peel it away from the plants, unwinding tendrils if they have grown through the netting.
  • Fold your netting to reuse next year. It never seems to pack down to the size it was when I purchased, so we keep a large grocery bag filled with folded up pieces of netting.
  • Enjoy your peas/berries/lettuces munch free!

Hanging Out Our Shingle for the Open House

hand painted hound pub sign Seven long years ago, Alex's father Tom Baillieul made a two sided British style pub sign for us.  It featured the name of our business dream at the time, The Baying Hound, a micro-brewery.  Many years and business ideas later, the sign is finally hanging.

What held us up for many years was lack of a hanger.  I finally realized we could make one and traced out a design on cherry plywood last weekend.  Alex cut it and we spent the week applying coats of Spar Urethane.  All materials were leftovers from making our wooden kitchen countertops.

wooden pub sign hanger

Alex screwed the hanger into a window frame.  The rest of our house is sided in asbestos shingle which we dare not disturb.

the baying hound sign hanging

Two s-hooks attached the sign to the hanger and we're in business!

baying hound pub sign

I love the inclusion of Devie's likeness and our names in this sign.  Most of all, it feels great to finally have Tom's artwork displayed in proper fashion.  If you want to see more of his creations, visit his website EarthFriend Arts.

The pub sign will be proudly displayed at our early summer Open House.  On Saturday, June 5 from 11 am - 1 pm we invite visitors of all ages to the homestead.  Come enjoy iced tea and seasonal treats while you peruse the garden and visit the chickens at 349 Tibet Rd Columbus OH 43202.  I hope to see you there!

Jon Fisher Greenhouse

At last year's block party in October, a neighbor brought over a baseball sized orange tomato.  It was plump and tasted fruity and barely acidic.  She said the odd variety came from Jon Fisher Greenhouse on the south side of Columbus, an establishment I had never heard of before. fisher's greenhouse entranceOn a recent Friday afternoon, we drove 20 minutes south from Clintonville to visit the greenhouse.  Fisher's is located south of 270 at 4290 Parsons Avenue near Obetz.
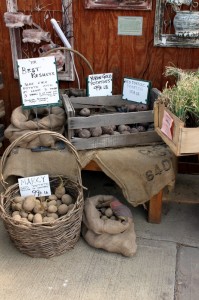
jon fisher greenhouse potatos

After snapping a few pictures of the root vegetables, a shopkeeper asked me why I was there.  I explained about the Hounds in the Kitchen blog and being a homestead gardener.  She offered to take me over to the greenhouses so I could see more of their operation.
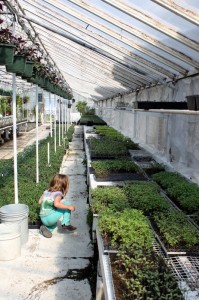
jon fisher greenhouse jon fisher greenhouse growing room

As luck would have it, Mr. Fisher himself was there for a personal tour.  He showed Alex, Lil and I the dozens of varieties of tomatoes sown in the greenhouses.  Two of the greenhouses were original buildings constructed by Fisher's grandfather who started the business in the 1950s.  In addition to tomatoes, Fisher's sows fifty varieties of other plants including peppers, cucumbers, and flowers.  Last year they had just over 100 varieties of home raised seedlings; this year he expects to have 95.
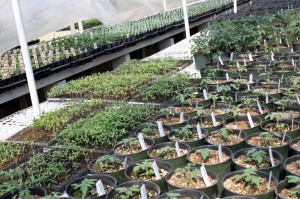
tomato seedlings in fisher greenhouse

The toasty greenhouses keep plants warm and growing from tiny seedlings in 1000 plant flats to foot tall plants in three inch pots.  Mr. Fisher is obviously a tomato lover, telling stories about the varieties his mother and grandmother used to grow and can.  He pulled out a seed catalog and paged through, showing me heirlooms they have growing now and those they grew in the past.
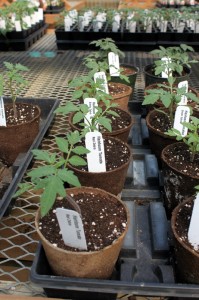
heirloom tomatoes at fisher greenhouse

Heirlooms were $2.49 each and standard varieties cost a little less.  We left with Julia Child, Clint Eastwood, Cherokee Chocolate, Russian Paste, Rutgers, and Roma tomatoes.  Lil won't let us leave a nursery without flowers these days, so she picked out a purple pansy for her garden.
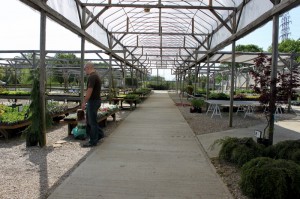
showroom at fisher greenhouse columbus

Like most local nurseries, Fisher's retails many plants they do not personally grow from seed.  Fisher's is clearly set up to accommodate hoards of customers in their large and open showrooms, though there was not another person in sight when we visited on a spring weekday.

Jon Fisher Greenhouse also grows a plant of every variety in their test garden.  On Saturdays and Sundays in August, visitors can enjoy tastes of the ripe produce.

While Fisher's is well out of the way for urban Columbus folk, I can tell it will be my source of heirloom tomato seedlings for years to come.  Have you been?
Strawberries!!

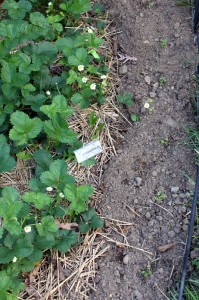
strawberry flowers and immature fruits Our berries are growing gangbusters this year!

This is their second and third year in this bed, one in between our house and the neighbors.  It gets sunlight for about 6 hours of the day now and that time is ever lengthening.

strawberry blossoms

Weeds are a threat to these berries.  I weed the bed almost daily removing the starchy sticky stems of milkweed that seem to grow inches overnight.

green strawberries as big as thumb

As the green fruits are already the size of my thumbnail, I laid bird netting over top this week.  I want to enjoy every sweet berry, leaving none for the squirrels or birds.

When friends ordered alpine strawberries earlier this spring from The Strawberry Store, I could not resist joining their wholesale buy.  I'm so glad I gave in because these are the sweetest tiny plants I have ever seen!

alpine strawberry seedlings

Alpine berries are supposed to have unsurpassed flavor.  Unlike traditional strawberries, they can be divided for reproduction.  I have two varieties, red Alexandria and Yellow Wonder.

alpine strawberries in garden bed

Alex dug out an addition to our regular strawberry bed for these tiny wonders, barely visible in the picture above.  I can't wait to taste the fruits!

Top Five Most Useful Garden Tools

gardening toolsA garden center can be an intimidating place. Implements of all kinds taunt you with promises to work less, remove more weeds, and garden more efficiently. How many tools does one really need? They are expensive, after all, and there's nothing worse than buying an pricey thingamajig that gets used a few times and then collects dust.

Here are the top five most utilized home garden tools in our stash:

1) Shovel - Don't be afraid to borrow shovels from neighbors until you find the kind you like. I prefer a D-handled shovel while Alex likes a long handled one. Lil has a kid sized shovel too!

2) Rake - A classic bow rake is useful for combing soil, removing leaves and grass in beds, and mixing in amendments.  Raking is very easy for children, so we have a kid sized rake for Lil too.

3) Hand trowel - We have a half dozen hand trowels around the garden of all shapes and sizes.  A thin transplanter is nice for planting small seedlings, a wide hand trowel is great for moving mulch around, and a soil scoop is perfect for container gardening.

4) Pruner - If you thrift all other tools, spend money on a quality pair of pruning shears.  I use these to trim shrubs, cut back ivy and honeysuckle, and lop off branches.

5) Watering can - We have two European style plastic watering cans.  They carry water beyond the reach of our rain barrel hoses.  We also employ them to empty the kiddie swimming pool onto our garden beds.
We acquired most of our tools when a friend convinced us to go to a garden store auction seven years ago.  We are forever thankful to Krash because we won two lots of brand new tools.  I think we paid $40 total for most of the tools we still use today!

Tools are sometimes found at thrift or garage sales.  Perhaps someone in your family has extras in their garage.  If you intend to purchase new, look for solid wood handles and beefy hardware.  Storing tools upright in a sheltered location will keep them lasting longest, though we leave ours all over the yard for most of the growing season.

What garden tools do you find essential?

Disclosure: If you purchase from one of the included links, I will receive a small percentage of the sale. As always, I suggest supporting a local business if you are buying new, but if you prefer online shopping, please support me.

Composting the Hound Way

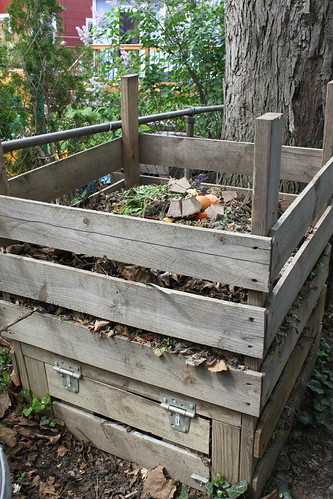
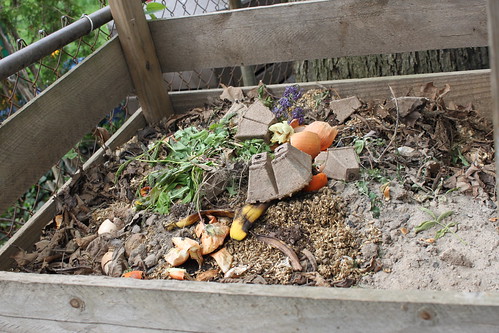
compost binA friend asked on twitter recently if I had anything written about compost.  I have not and there's a good reason why: I am a lazy composter.

It's not that I don't love composting; I do.  I just don't measure temperature or output or anything like others who have composting down to a science.

My composting goal is to have a place to get rid of my food scraps and leaves without giving them to the city.  When it ends up as 'black gold' soil, that's just a bonus.

If you want to learn about how to compost the right way, read something else. ;)

home made compost bin Here's how we do it:

1) Build a compost bin.  Alex built ours from 2x4 posts and fence sections assembled with decking screws.  Tumbling composters do a better job at keeping the temperature up to make soil faster but they cost more.

2) Collect scraps.  For awhile we used a ceramic crock until I broke the lid.  Then we used a stainless steel flour can until that developed a hairline leak.  Right now we have an old plastic canister that holds our scraps next to the sink.  My Open Sky shop has a nice kit of composting accessories in it that includes a countertop collection bin and a cute bamboo bin.

Most composting guides will tell you to add only vegetable matter and eggshells to the compost.  If you aren't bothered by flies and waiting longer, meat and dairy will compost too.  We do not wish to bug the neighbors so we trash meat and dairy.

3) Dump scraps.  Real composters will tell you about layering x amount of brown matter with scraps and x amount of green matter.  We just toss what we have when we have it.  We keep fall leaves in a trash can next to the compost bin and add those if the bin is attracting flies.

4) Turn.  This is where the true laziness is apparent.  I never turn the compost bin.  Alex does once or twice a year with a pitchfork.  Sometimes a rat or mouse lives in there and tunnels through, doing some of the digging for us.  Real composters will advise turning much more often to maintain heat and lower scrap size.

5) Reap the soil.  Our bin does not produce compost very quickly.  Go figure.  When we do want to get some of the good stuff, we open the hatch and dig out from the bottom.

I hope I didn't lose all my gardening credibility today.  Do you compost? How?

By the way, worm composting is another way to go, one which I have even less experience. My friends at One20 Farm have a site devoted to the supplies and knowhow you need to enter the world of vermicomposting.