Make it Yourself: Applesauce

Apples are my favorite fruit.  They keep well, are crunchy and sweet, travel easily, and are completely delicious. Being that we live in the land of Johnny Appleseed, Ohio apples are in abundance from June - October.  We pick bushels (literally) and eat apples fresh, dried, and sauced.

Applesauce is easy and tasty to make yourself.  There are several methods, all involving these four simple steps:

1) Core and peel (optional) apples.  Add spices or lemon juice (to preserve color) if you wish.

2) Stew on stove top with a bit of water for 30 minutes or oven at 200 degrees for 2 hours

Stewing is finished when all slices are soft

3) Puree with blender, potato masher, or food mill

food milling is a perfect activity for kids

4) Store in freezer containers or can in glass jars (20 minutes canning time for quarts, 15 for pints, fill to 1/4 inch)

Personally, we make two varieties each year.  Method A (my sisters' favorite) is to peel and core the apples, chop finely, and stew on the stove.  This makes an evenly textured sauce called 'chunky applesauce' in my family.  The other, easier variety is 'smooth applesauce' made by coring and slicing in one step with an apple slicer, stewing on the stove, then processing with a food mill.  I prefer stove top stewing vs. oven baking because it is faster and the less cooking for the apples, the less nutritional value lost.
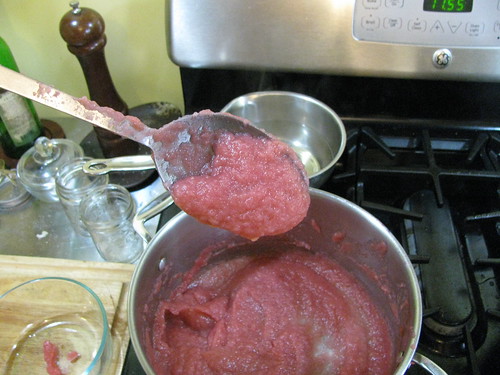
all natural pink

We just made smooth applesauce with the Liberty apples from Charlie's farm.  The peels, even though we discarded them after milling, made the applesauce bright pink!  It was so tasty we needed no sweetener.  If I can bring myself to share my stash, I might give some of the Liberty pink sauce as Xmas gifts.  Can't you just see a jar topped with a pretty pink and green holiday fabric? :)

Make it Yourself: Meat Jerky

We are posting this for Labor Day weekend in honor of all the people like us enjoying a family camp out this weekend.  We will spend 3 days at East Harbor State Park on the Lake Erie shore.  Expect another camp food post when we get home! So in line with all of our efforts to preserve/store food, Rachel had the idea that I should write a short post on making jerky.  The advantage to jerky is that it helps preserve meat for longer term storage than if it were fresh.  And, it tastes delicious!

Meat will still spoil eventually in jerky form but it will take much longer than raw meat.  Simple refrigeration will serve to keep jerky for an extended period of time (6 months +).

So what do you need to make jerky?  There are really only three elements: meat, seasoning/cure/marinade, and a drying device.

To start, what meat should you use?  Really you can use anything.  I have successfully used beef, bison, turkey, chicken, pork and even salmon.  I find I have the best luck with beef/bison and turkey.  You can use most any cut, but I would suggest something cheap as it is simply not necessary to buy a good, tender cut of meat and then process the crap out of it to make jerky.  For beef/bison, use round roast, rump roast, sirloin or the like.  For turkey, I just use plain turkey breast.  I like to cut the meat into thin strips prior to the marinating step so that the meat can get full exposure to the flavorings.   Cut the strips as thin as possible to aid drying later on.

For the seasoning or marinade there are two schools of thought.  You can either use a dry rub with lots of salt and or use a wet marinade.  Either way, you need to ensure that the salt content is high to promote preservation and drying of the meat (salt helps remove moisture content from meat).  My preference is a wet marinade made with equal parts oil and soy sauce, 1/4 part of lemon juice and then whatever herbs or spices I have around.  Sometimes I use cayenne pepper for an extra kick or just thyme/oregano for a more savory flavor.  Marinate or let it sit in the rub in the refrigerator until the meat feels firm rather than tender and you are ready to go.  This should usually be 2-7 days.

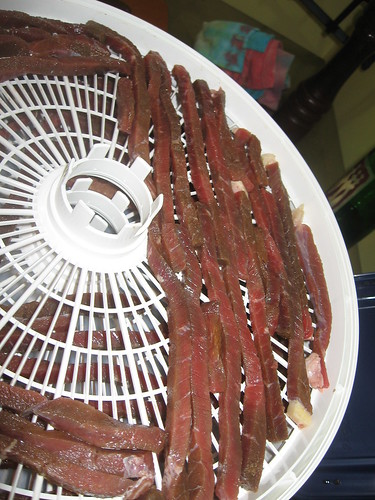
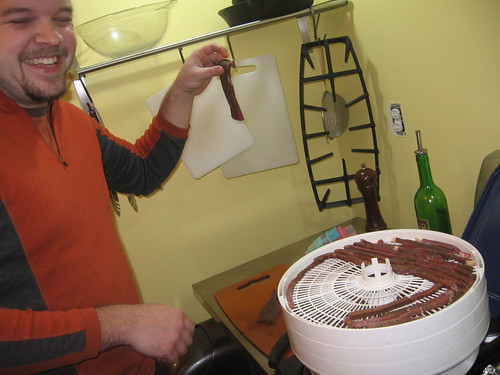
For drying, you can use a dehydrator, oven on lowest setting, racks in the sun and smoking with low heat.  Currently we use a dehydrator as it is the easiest method and causes the least mess.

Smoking is especially good if you want to impart extra flavor, but be warned that meats like chicken and turkey can really absorb the smoky flavor to an extent that they may become unpleasant to eat.

The oven is simple as most people have one.  Keep the temperature low enough (less than 200 deg F) to avoid cooking the meat, which can be achieved by keep oven at lowest setting with the door open or leaving the pilot light of a gas stove lit.

Sun drying can be contentious as many people are wary of leaving meat outside in the warm air for that long.  I find it works fine, you just have to figure out some way to keep critters off your product.

The meat must be thoroughly dry before you consider it done, usually 12 - 18 hours.  Try splitting a piece in half.  It should release no moisture and feel tough.

When it is finished, jerky can be stored in a container in the fridge for months.  Also, it can be taken hiking or outdoors with no refrigeration for multiple days at a time with no problem.  The salt combined with moisture removal does an excellent job of keeping the meat preserved.

Ideas for the Tomato Tonnage

After you have made tomato sandwiches, salads, stews, and more, it is tempting to just toss the rest of you CSA or home garden tomato harvest in the compost heap.  Preserving tomatos is not that hard and you will thank yourself in the fall for putting up farm fresh goodness.  Here are a few ideas for easy preserving: Make pseudo sun-dried tomatos: Halve and dry in a dehydrator or low temp (as low as you can get it, ideally 145 deg F.) oven for 12 - 24 hours.  They will be ready to store at room temperature when you can break one in half and see no beads of moisture.

Make easy sauce: Most tomato sauce recipes call for blanching the tomatoes, which is the most time consuming (and burn inducing) part of the work.  It is easier to just skip the blanching and puree the whole tomato.  Freeze your sauce for less work than canning.

Make ketchup: Ketchup (catsup?) requires a tremendous amount of tomatos.  Just yesterday I made a batch with about 15 pounds of tomatos and ended up with a meager three half pints of ketchup.  Homemade ketchup is fabulously delicious, making it worth the effort.  These are basic directions, which I modified by substituting molasses and honey for sugar and juniper berries for aromatics.  If you aren't obsessed with canning like me, just freeze in small containers.

brought to you by the ketchup advisory board

Freeze: As a last resort, throw your maters in the freezer.  Whole is fine.  Put them in a container to reduce freezer burn.  When you thaw frozen whole tomatoes, the texture will be completely broken, but they are still useful to add to stews and sauces.

Even if you do compost rotten tomatos, all is not lost.  Our compost heap volunteers have turned out to be fabulous producers!

check out this volunteer fivesome

'Easy' Tomato Sauce

One of the more difficult parts of most tomato sauce recipes is blanching the tomatos.  Removing the skin has to be done in small batches and then you are left with slippery juicy innards to chop.  Not to mention that one more pot of boiling water on the stove means more chances to burn oneself. Sometimes when we make sauce, like when we made pepper tomato sauce last week, we skip the skinning.  The resulting sauce has a meatier texture than sauce made with blanched tomatos.  It's a fair trade in my book at the end of a long canning season.

The 'easy' routine is:

Chop tomatos and other ingredients roughly

Stew until soft

Blend until smooth

Simmer until thick

Can or freeze

Viola!

Work in Quarts and Pints

I put in six hours at the kitchen today.  My work was measured in quarts and pints; four and twenty one, respectively. It started with these fifty pounds of organic tomatoes from Green Edge Gardens.  (Daughter pictured above is only thirty eight pounds.)
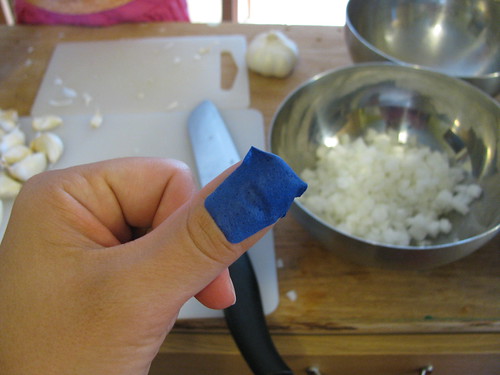
Then my friend Sarah and I chopped and sauced.  Thank you Sarah not only for your help but for bringing your sons to entertain Lillian.

knife was indeed sharp as the devil himself

2 large onions, 2 heads of garlic, handfuls of basil, 25 lbs tomatos, balsamic vinegar, salt, pepper

Next was the canning.

And finally, pints and quarts of chopped tomatos and tomato sauce to put up for the winter.

I will not lie: canning tomatos is hella more work than jam.  Like jam, the results are outrageously more delicious than what you can buy from the store.  In mid-winter all the work seems to be worth it.  At least that's what I remember from last year.

Make It Yourself: Dried Herbs

Herbs are big and bushy around Central Ohio right now, which means it's time to think about drying some for the winter. Many people also grow herbs inside and we'll certainly try that, but indoor gardening remains difficult for me.

Here's how I dry big leafed herbs like basil, oregano and mint:

1) Pick whole stalk (or buy from the farmer's market)

2) Wash and pat dry

3) Hang by clothes pins on the clothes line in bright sun. If you don't have a clothesline, look for a sunny spot where air circulates well.

4) Bring in at night (to avoid dew re-wetting them)

5) Hang one more day

6) When herbs are completely dry (they will be crispy textured), bring inside

7) Use fingers to rub off the leaves

8 ) Package in labeled glass jars or ziploc bags

homegrown mint tea awaits us in winter

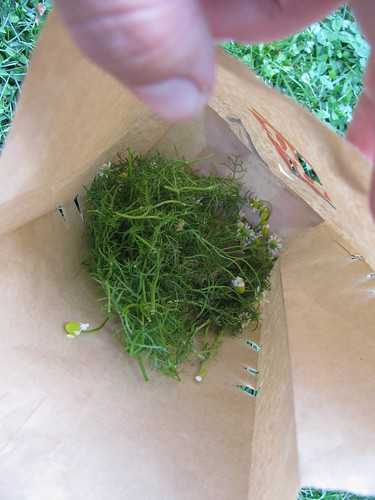
For more delicate herbs (thyme, chamomile), I modify the above steps by hanging them inside a cut up paper bag on the clothes line.

notice the tiny cut holes in the sides

The bag catches any little pieces that might dry and fall off. This is particularly important for chamomile, as the best tea is made from the flowers.

Come visit me on Saturday 12 - 3 at Wild Goose to make your own drying bag and take home a stalk of herbs to dry for yourself!

Learn to Preserve at Wild Goose!

I am co-hosting two events coming up at Wild Goose Creative ( 2491 Summit Street Columbus, OH 43202)!  Please come fill out the audience so I'm not talking to myself. First, I will join Holly Davis of PlumLife for the Farm to Table to Freezer event from 3 - 5 pm Sunday August 16.  We will be demonstrating several methods for preserving local harvests without canning.

Then, from 12:30 - 3 pm Saturday August 22, the public is welcome at a Students for Food Soverignty planting party.  I will be demonstrating two techniques to preserve summer flavor year round.  There will also be an herb planting project, in-house farm stand, and coffee.

Make it Yourself: Honey Berry Jam

The strawberry dilemma of a few weeks ago was solved this Wednesday when we got another six quarts of berries from our Wayward Seed fruit CSA.  I was thrilled!! yes, that is a fruit thief hand

In the span of a few hours on Thursday, I made three quarts of berries into jam. Many people bemoan jam making, but it really is quite simple.

Over the last few years I have developed a recipe using honey instead of refined sugar for the sweetener.  Honey is arguably healthier and provides a delicious compliment to the tart strawberries.

Here's how I jam:

1) Wash three quarts berries

2) Remove stems and chop into pieces (I do this in my hand dropping pieces right into a ten quart cooking pot )

3) Place eight pint jars in your canner (I use our pressure cooker pot), add water, and bring to a boil.

4) Place lids (new) and rings (can be reused) in a smaller pot, fill with water and bring to a boil.

5) Back to the berries: Mash with potato masher and add one packet of Sure-Jell Fruit Pectin, Low Sugar.  Mash more until all large pieces are broken and Sure-Jell is well mixed.

6) Put strawberries on a burner set on medium and bring to boil.

(Yes, you now have three pots on the stove.  I suggest doing this on a cool day.)

7) (Meanwhile) Once jars are boiling, carefully lift out and place on a towel next to strawberry burner.  I use cooking tongs in one hand to grab the jar and a towel in other hand to hold it as soon as it is out of the boiling water.  Dip a ladle into boiling water to sanitize it too.

8) When strawberries are at boil, add in four cups of honey.  Stir frequently.

9) Allow strawberry/honey to return to boil and then keep at boil for five minutes.  Stir frequently.

10) Turn off the heat.

11) One at a time, fill jars:

  • Funnel jam into santized jars, filling to within 1/8 inch of the top. I use a Stainless Steel Wide-Mouth Funnel to make this easier.
  • Wipe rim with clean towel
  • Place lid centered on top
  • Screw on lid to finger tight
  • Carefully place into canner

12) Fill canner with enough water that all jars are covered by at least one inch.

13) Return canner to high heat.  Boil for ten minutes.

14) Remove jars to a towel.

15) Allow to cool completely (24 hours).

16) Remove rings and wipe away any jam that may have escaped to the sides.

That's it!  I know 16 steps sounds like a lot, but it really isn't hard and only takes about two hours start to finish.  The quality is astounding compared to store bought jam.

Making jam is an investment initally.  Thrift stores often have appropriate pots and sometimes pint jars too.  You can see that I don't use or recommend a canner specific pot - any tall sided pot will do.  Jar tongs are handy but not necessary.  You do need to buy new lids each time to create a proper seal.

Do you make jam? What's your favorite kind?