We're Slaughtering a Pig. Why?

2silos farmA few months ago, Denise Beno from 2Slios farm tweeted that she had an unclaimed Duroc/York pig this season.  She asked if anyone might want to buy a whole or half.  Alex and I and decided that purchasing a side of pig would be a good way to fill our freezer with well raised meat and give him more experience with home charcuterie. In making arrangements with Denise, Alex learned that traditional processors often discard cuts of meat he would prefer to have, including the jowel and offal.  Denise offered that Alex and the other buyer could slaughter the pig with her and process it however they wished.

We jumped at the chance.  Here's why we will wake early, drive to Mt. Vernon and slaughter a pig on Saturday.

Alex: I appreciate sustainably and humanely raised meat.  I have had great experiences with Denise and the meat she raises.  Her meat animals are of the highest quality, and I know her animal husbandry ethics are in line with my expectations.

Rachel: I don't eat meat, expect for the occasional taste of home cured bacon.  After over ten years as a vegetarian, the texture is something I no longer enjoy and I feel I can balance my diet better without meat.  Meat, in particular among foods, is often raised with disgustingly low humane and earth conscious standards.  I am very concerned with the provenance of meat we purchase.

Alex: Per pound this will be low cost meat for the quality I will be receiving.  It's true that because of government props, sustainable meat costs more in the market today.  I don't mind doing a little bit of work to reduce some of the cost.

Rachel: I actually keep a much closer eye on our budget than Alex does.  I often arrange for us to buy ingredients in bulk to save money.  The risk, of course, in freezing meat is that a power loss can wipe out your investment.  I guess we'll just have a huge barbecue if there's a blackout this summer.

Alex: I've been a meat eater all my life, but have bought almost all of the meat I have ever eaten already cut up and packaged.  I've only ever cleaned fish or squirrels I have caught/killed myself.  I have never dressed out a large mammal.  I would like to hunt deer for food this year and feel the experience of slaughtering a pig will be good for when I need to clean a large animal on my own.

Rachel: I too have not witnessed the slaughter or processing of a large animal up close.  I am comfortable handling and cooking meat even when I don't eat it myself.  I know that killing and butchering a pig will be hard work; I plan to do with reverence for the life we are taking.

Alex: I wanted this to be a learning experience that could be shared on Rachel's blog and with our daughter Lil. Lil will not accompany us for the slaughter because we want ourselves to be fully present and distractions when dealing with a large animal, saws, and knives can be dangerous.

Too many people are completely disconnected from their food.  The hamburger they are eating did not grow on a meat tree; it came from an animal that was born, raised and ultimately killed to provide food for another species.  Some people subconsciously push this knowledge out of their head while eating meat.  I'm certainly no vegetarian, but I believe that when I eat meat, I have a fundamental responsibility to know and understand where it comes from.

Rachel: Absolutely.  I will record the slaughter with video and photos to share here.  I'll provide fair warning to those who do not wish to read anymore about it. Though it used to be commonplace to have intimate knowledge of raising and killing meat animals, many people now are far removed from farms.  It is my hope that sharing the experience of the slaughter will inspire more people to question and consider their food sourcing.

Make it Yourself: Sausage Making

You may have read Devie the hound dog's version of making sausage.  Here's my version of the basics. I received the book Charcuterie by Michael Ruhlman last Christmas.  Since then I experimented with making my own bacon, smoking various meats and cooking confit of all sorts.  Until recently, I had not attempted to make any sort of sausage.

Sausage is the heart of charcuterie, whether it is fresh breakfast sausage or a fine aged peperone.  This Christmas, I received the food grinder and sausage stuffer attachments for our Kitchen-Aid and am in the sausage making business.  I purchased enough hog casing from Butcher Packer for about 250 pounds of sausage and have all of the adjuncts (dextrose, sodium nitrite, sodium nitrate and kosher salt) needed to make all the popular styles.

Thus far I have made fresh garlic sausage, breakfast sausage, Sauccison Sec (French dry-cured country sausage) and Spanish chorizo (also dry-cured).  I package each in a vacuum sealed bag to store in the refrigerator or freezer until I eat it.

Whether the sausage is fresh or dried, I have distilled Ruhlman's excellent sausage making advice down to a few rules:

1. Always use at least 30% fat in your sausage.  If you are using a good fatty cut of pork like pork shoulder, this should be no problem.  Sometimes you will want to add extra fat with additional cuts like fresh side or back-fat.

2. Keep everything as cold as possible.  Seriously, almost frozen is where you want to be.  I didn't do this the first time around, and the result was a mushy unworkable mess.  My procedure now is to freeze the entire grinder attachment with blades attached before making the sausage.  I then spread my meat and fat on a cookie sheet i nthe freezer until it is getting stiff and crunchy (but not frozen).  The bowl you grind into and any other tools should also be frozen.  When stuffing your sausage, keep the sausage mix in a bowl set in ice (or snow, if it is plentiful in your area as it was this winter).  Your sausage quality depends on these steps to maintain a low temperature.

3. Keep everything clean.  I haven't had a contaminated batch of sausage yet, but my experience with beer brewing has taught me that cleanliness reduces the likelihood of a batch going bad.

4. Use the specified amount of salt or nitrites.  First of all, this makes the product taste authentic.  Secondly, the proper amount of sodium nitrite is critical for food safety especially in dry-cured products.  This is the ingredient that will keep your product from spoiling, or worse yet developing botulism.  Do not skimp or leave sodium nitrite out with the thought you are looking after your health.

5. Avoid air bubbles in the casing during the stuffing process.  If they develop, prick them with a sterile needle to remove them.  It will take practice and experience to get your stuffing technique down.

Rachel took this short video when I made chorizo:

Follow these rules, use a good recipe, and enjoy homemade forcemeats.  Happy stuffing!

Make it Yourself: Sausage Step by Step

I was writing this basic sausage making post and looking at pictures I took.  I noticed Devie in every.single.picture!  She has been an integral witness to all sausage making events so I thought it would be fun to narrate from her perspective. Sausage making is awesome.  Every time the bald guy (Alex) brings the meat grinder up from the basement, I rise from my day long nap to watch the happenings and wait for the humans to make a mistake.  Someday they will drop the entire batch on the floor and I will be ready to gobble it up.

First, the bald guy gets out the fresh pork.  He chops it into chunks and puts it in the freezer for a little while.

Next comes the grinding.  The very cold pork is forced through the very cold grinder.

The meat goes back in the freezer while the bald guy prepares any seasonings and prepares the Kitchen Aid for mixing. Chilled ground pork is mixed with seasonings and binders according to the recipe.  The bald guy always yammers on about the salt ratio so it must be important.

Sometimes the bald guy stops there and forms the sausage into fresh rounds.

Other times he gets out the stuffer.  He loads up the stuffer with rinsed casing.  Usually the tattooed lady (Rachel) has to help stuff the mixed meat into the casing.  I don't think she eats meat, so I guess it's ironic that she helps make sausage.

The bald guy likes to make one long stretch of sausage and twist it into links at the end.  If it's a fresh sausage, the bald guy packs it into vacuum sealed bags right away.

For an aged sausage, he hangs it in the basement for a week or two.  Oooh does aging sausage smell good!

If I'm really lucky they will cook some sausage for me as a treat.  Sometimes I get scraps of meat along the way by helping myself.  The bald guy and tattooed lady don't seem to like that.

After all this meat observing activity, I have to sleep for the rest of the day.  Watching the people cook is exhausting!

Stay tuned for Alex's view of sausage making including sources and references.

Confit Canard (Duck Confit)

So what do you do with all of the wonderful rendered fat from the roasted duck?  You didn't throw it away did you?  Rendered waterfowl fat is one of the most delicious cooking mediums out there.  One of the tastiest dishes that can be made with it is Confit Canard also known as Duck Confit.

Confit is a term that is usually applies to meat that is slowly cooked submerged in fat.  Is it healthy?  Absolutely not.  It is, however, delicious and not in the least bit greasy despite the cooking method used.

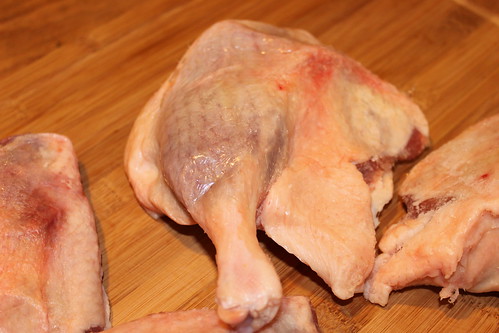
For duck confit you need the the leg, thighs, and fat of a duck.  You can buy whole ducks and butcher them, reserving the breast for other use or buy the legs on their own.  In Columbus, both whole, parts, and fat can usually be found at North Market Poultry and Game in the North Market.

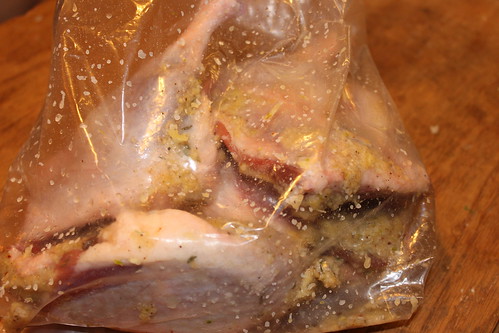
Once you have the legs, trim of any excess skin and pat them dry.  Coat them in a mixture of kosher salt, chopped garlic and thyme and let them rest refrigerated for at least 12 hours.

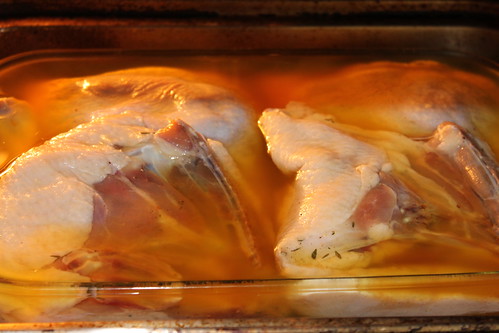
After the resting period, rinse the legs in cold water and again pat them dry.  Place them in a shallow pan and fill the pan with enough rendered fat to cover the legs.  Michael Ruhlman advises that you can use a mixture of 50% fat (any combination of poultry fat) and 50% olive oil.  By our experience he is absolutely correct, and the end result is just as flavorful.

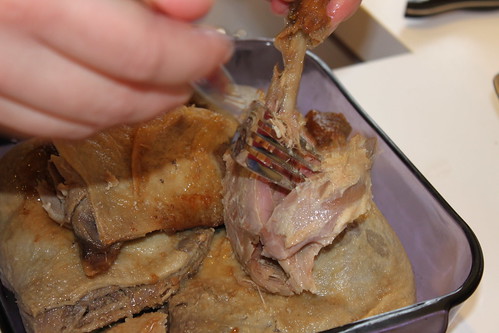
After covering the legs in the fat, place the roasting pan in the oven on 200 degrees and let it cook.  The process can take up to 12 hours and can be completed overnight if you wish.  You will know the cooking is finished when the meat pulls easily away from the bone of the leg.

Traditionally at this point you would let the meat cool underneath a layer of fat and store it refrigerated for many months as a preserved food product.  It is ideal to let confit rest for at least a week to fully develop its flavor but even a few days will do if you are in a time crunch.

After this fat nap, the meat can be used in many ways.  If you warm the fat back up, you can remove the legs easily, pat them dry and shred the meat from the bone.  This can then be used to top toast points, make a creamy spread or as a salad topper.

An alternate treatment is to reheat the leg whole in a saute pan and serve it as a main course.  The fat you cooked it and stored it in can be strained and re-used multiple times; there is no need to throw it away.

For a Rose Bowl party this evening, we served the confit pulled over cranberry sauce on toasted homemade bread.  Guests loved eating it and watching the Ohio State Buckeyes cook the Oregon Ducks!

This post was co-written with Alex.  In the interest of research, even vegetarian Rachel tasted and enjoyed the confit.

How to Cook a Duck

The Rose Bowl is days away. The Ohio State Buckeyes are playing the Oregon Ducks.  Alex and I are both alumni and football fans.  We are bringing a duck confit dish to a Rose Bowl party to poke fun at the opposing team's mascot.

One of the most common complaints about duck (or goose for that matter) is that the meat is greasy or dry and unpalatable after roasting.  Usually this is a result of not cooking it long enough to render away sufficient fat, or cooking it far too long and drying out the meat.

The method we use for waterfowl including duck and goose is based on Julia Child's technique in The Way to Cook.  This method encompasses a preliminary steaming step followed by a more traditional roasting process.  The end result is succulent meat that is tender, moist and not in the slightest bit greasy.

To begin, buy a fresh duck or goose from a reputable source.  Our favorite Columbus sources are North Market Poultry and Game and Weiland's Market.  Brine the bird in the refrigerator for up to twelve hours.

Trim the cavity of the bird of excess fat and trim the wing tips.  Remove any giblets from the cavity and reserve these with the wing tips for making stock/gravy.  You may or may not want to play with the bird at this time, giving a puppet show with Rose Bowl references.

Aggressively salt the cavity of the bird and place it breast up in a metal roasting pan on a rack so that it is at least an  inch off the bottom.  Fill the pan to just below the bird with liquid.  Any mix of water, wine, apple cider or orange juice works well, keeping in mind that flavor will be imparted to the bird.  A few aromatic vegetables like celery and onion are welcome additions to the liquid.
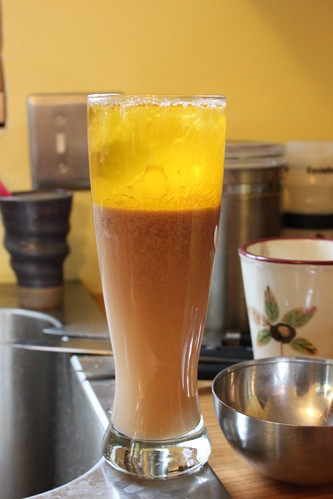
Cover the pan tightly (aluminum foil is fine) and place on the stove top over medium heat to begin steaming.  Keep the liquid at a simmer, and add more as it boils away.  The steaming time will vary by the size of the bird.  A small duck (5 pounds) will take only half an hour while a large goose (12 pounds) will take about an hour.  When the steaming is done, remove the bird to a tray and drain the liquid from the roasting pan.

For a large goose you may collect as much as 3 cups of fat from the steaming process.  Reserve the fat for future cooking use.  It is easily poured into ball jars, cooked, and then refrigerated.

At this point, stuff the bird if that is your plan.  A liver and fruit stuffing suits the flavor of duck and goose well, but your tastes may vary.  If you do not want to stuff it, place an onion and some aromatic herbs in the cavity to add flavor.

After stuffing, truss the legs together and place it breast side down in the roasting pan.  Put it in the oven at 350 degrees.  For a smaller bird, you will want to flip it over to finish roasting after one hour.  For a larger bird, flip it over after one and a half hours.  Finish roasting breast side up for 30 minutes to brown the skin.  The meat should feel tender but slightly springy when pressed.

Remove from the oven and allow the bird to rest for 15 minutes while juices redistribute.  Carve the bird up like you would a chicken and it is ready to eat. As you carve it, you will notice that there is still some fat in the bird.  Because a vast majority of the fat was steamed away, the meat will be moist and taste delicious without being greasy.  Also, you might notice that around the legs the juices will still be slightly red.  This is perfectly fine.   If you buy your poultry from someone you know or trust, there should be no worries about food-borne diseases.

GO BUCKS!   COOK THOSE DUCKS!

Stay tuned for the Confit Conard (duck confit) technique post Thursday.

The Flavor of Christmas

Tastes and smells are a necessary component to memory.  Foods bring us back to a place and time, defining everyday and holiday experiences.

At Christmas time, the formal Christmas Eve dinner is that memory maker for me. The last two years we have hosted a meal for friends and family at our house, as we will again this year. The menu varies slightly each year but typically follows an old English style. Dishes are always made from scratch. This year our menu is:

Stuffed whole goose (raised at 2silos farm) Roasted sweet and white potatoes Steamed green beans Mushroom pie Green salad Cranberry sauce Mini yorkshire puddings Cranberry champagne cocktails

My sister, the pastry school attendee, will be bringing the dessert.  She just finished a chocolate class.

What tastes do you associate with Christmas?  What are you making this year?

Pictures from Thanksgiving

I didn't cook anything on Turkey Day, so I had the whole afternoon to take pictures.  Several series were taken for upcoming posts on cooking duck the Julia Child way and enjoying poultry tail aka pope's nose. Here are the highlights of turkey day from behind my camera:

homemade cinnamon rolls

Alexs duck puppet show

half gallon jar cocktails

evil Lil giving the turkey a rub down

carving the duck

some of my favorite people in a madebyamyd apron

That's it for now as  I have a new camera to explore and Harvest Dinner meal to host.  I hope you all had a lovely Thanksgiving!

Turkey the Hound Way

Poultry is a topic of conversation everywhere these days.   It even came up at the conversation with Thomas Keller and Michael Ruhlman I attended last week.

While I do not eat meat, I have experience assisting Alex in preparing hundreds of whole birds.  Here are our keys to a great turkey:

1) Buy a Quality Bird. Free ranged birds are arguably tastier and healthier.  Buying from local producers also keeps money in the local economy and reduces transportation resource waste.  We have always been satisfied with birds from Bowman Landes farm in Springfield Ohio that are sold locally at Weiland's, The Hill's and the North Market.

2) Brine it. Store your fresh bird in a brine for twenty four hours.  Our basic brine is straight out of Michael Ruhlman & Brian Polcyn's book Charcuterie: The Craft of Salting, Smoking, and Curing: 1 gallon water + one cup kosher salt + 1/2 cup sugar, boiled to dissolve then cooled.  A brine evenly salts the meat and helps it retain moisture.  Aromatics can be added to enhance the flavor.  We usually add peppercorns, juniper berries and tarragon for the Thanksgiving bird brine.

3) Temper it. Michael Ruhlman said forcefully at the Thomas Keller conversation, "Don't cook a cold bird!"  Allow the turkey to come near to room temperature before putting it in the oven.  A partially frozen or very chilled bird will crisp and burn on the outside when the inside is still under temperature.  No one wants partially raw/partially singed turkey.

4) Stuff it.  Stuffing turkeys is a great debate.  Many food service websites advise against it for worries about food poisoning.  However, if you buy quality ingredients (see #1), most cooks agree stuffing is a delightful thing.  If you choose to cook dressing separately, try inserting a few cut onions, garlic, herbs, and lemons in the turkey cavity.  Both drippings and meat will pick up the flavor.

5) Cook It....But Not Forever.  Start your bird in a hot oven to crisp the skin a bit.  Lower the temperature and cook just until it reaches 170 degrees Fahrenheit.  Let the bird rest out of the oven for 20 minutes for juices to distribute.

not my picture - but this year I WILL take one!

6) Transfer Carefully.  The only turkey disaster we have experienced was the year we hosted at our tiny house.  Sixteen people were there and everyone was watching when Alex and my youngest sister moved the bird from the stove to a counter for cutting.  One of them slipped and drippings poured all over the floor!  We cleaned up the mess, the meat was fine, and now we have a good story to retell.

7) Let Nothing Go to Waste.  Provided you don't spill them, use the drippings to make gravy.  Leftovers can become sandwich fillings, salad toppings, or stew fixings.  If you have an over-abundance, chop the meat and freeze in packed containers (or vacuum sealed bags) for soups in winter.  Make stock from the carcass and freeze that.

Happy Turkey Cooking!