Home Canning Peach Pieces

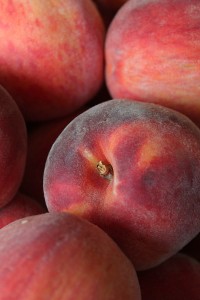
fuzzy Ohio peachAs much as I love canning, I get a little bored with doing the same old things. Faced with 43 pounds of peaches to process, I decided to try something new: canning peach pieces. There are many methods to can peach pieces, including cold and hot pack, with syrup, juice, or water. I sought out the advice of the Ball Canning Book, the National Center for Home Food Preservation and PickYourOwn.org. The combined wisdom suggests that hot packing in at least a very light syrup does the best job of preserving the texture of the peaches.

My Method

1) Blanche peaches in boiling water and shock in ice water to loosen skins.

2) Remove skins.

3) Slice peach in half, remove pit (get a freestone variety or this is nearly impossible), and slice each half into six slices.

4) Place the slices in a large pot. Any pieces that do not hold together for nicely formed slices go in a smaller pot for making into peach jam.

5) Make a very light syrup of 1 cup sugar to 8 cups water by gently heating to dissolve the sugar into the water.

6) Pour syrup over peaches and heat to a gentle boil.  Hold at boiling for 5 minutes.

7) Ladle peach pieces into sterilized pint jars. Use a knife to gently stir and release air bubbles. Pour syrup over top, leaving 1/2 inch headspace.

8 ) Secure sterilized two piece lids on jars and place in a boiling water bath. Process for 20 minutes.

9) Admire the jars.

10) The following day, remove the rings. Wipe the residual sticky-ness from the jars with a warm wet cloth and label each lid with the product and date. Store in a cool, dark place until use.

home peach canning products

Waste Not, Want Not

As I noted, any mushy bits or tiny pieces were reserved for peach jam. I added whole crushed allspice, cinnamon stick, and cloves in a sachet to my standard Pomona's peach jam recipe.

When I ran out of space in the canner and time in my afternoon, I scooped out remaining peach pieces and made them into cobbler.

Peach juice in light syrup was left. There was no way I could toss the beautiful nectar so I reheated it and canned some in pint jars the next day. Three pints went straight into the fridge for Momo Sake drinks.

Quantity

I reserved approximately 10 pounds of peaches we picked at Branstool for fresh eating. With the remaining 33 pounds, about 2.5 pecks, I ended up with:

12 pints pieces 7 half pints jam 6 pints nectar 6 cups leftover pieces (i.e. I could have canned 3 more pints if I had the time and space)

Using Canned Peaches

We don't buy canned peaches because what's available in the grocery does not remotely resemble the fruit I know and love. I plan to use what I made myself in smoothies, poured over yogurt and as an addition to fruit desserts. Though the kitchen was outrageously sticky at the end of the peach canning extravaganza, I know I will not regret the mess in deep winter when I taste summer by simply opening a jar. Have you canned peaches at home? How do you do it?

Tomorrow, I will conclude Peach Week by sharing my trick for canning peaches in record time and five songs to enjoy while doing so.

Experimental Jamming

blueberry and peach jamsHomemade jam is a perfect canvass for creativity. Fresh seasonal fruit packs plenty of flavor on its own but thanks to the high acid content, fruit jam can be safely canned with herb and spice additions. Tired of the same old peach jam I usually make, I asked the family for new ideas. Lil wanted to combine our freshly picked peaches with farmer's market blueberries. Alex suggested playing with fresh basil from our garden.

And so it was that on Tuesday night I had three pots of jam on the stove. trio of homemade jams on the stove

For the blueberry basil, I added 1 tablespoon washed and chopped fresh basil to 1 cup of blueberries. The peach basil included 1 tablespoon basil to two cups mashed fresh peaches. For the blueberry peach, I mixed 1 cup blueberries with two cups mashed fresh peaches. I added a bit of Pomona's pectin and sugar to each pot, mostly relying on the natural pectin to set the jams.

With a few years of experimenting in the can, I offer these tips for creating your own flavors:

  1. Use an existing recipe as a base. The National Center for Home Food Preservation has lots of them that have been tested for safety.
  2. Can in small jars. Highly flavored jams tend to be used in specialty dishes and don't get eaten as fast as standard jams around my house. I like cute quarter pints because there's less to go through before the jam spoils.
  3. The less sugar you use, the quicker it will spoil after opening. Finding homemade jam spoiled in the fridge is one of the worst feelings in the world so plan jar size and usage carefully for low sugar recipes. I've found over time that I prefer the taste, set, and preserving effect of using about 1 part sugar to 4 parts fruit.
  4. Use Pomona's Pectin if you use pectin at all. Pomona's can be adjusted to any batch size and any amount of sugar, unlike most brands. I recommend starting with 1 teaspoon calcium water and 1 teaspoon pectin powder per cup of fruit.
  5. Do a set test. If you are experimenting off recipe, you definitely want to test the set or gel-ness of the jam. I do this by putting a small spoonful in the freezer for one minute. If it sets then, I know it will set in the jars.
  6. Flavors concentrate over time. What tastes like a hint of spice will become stronger as it ages in the jar. Err on the side of fewer flavor agents.
  7. Use caution when mixing in fresh non-fruit ingredients. To safely can jams, the mixture must maintain acidity above 4.6 pH. Fresh herbs and most vegetables are low acid foods, so they must be used in moderation and/or corrected for acid balance by adding lemon juice.
  8. If you are concerned about canning safely, freeze the jam or store in the fridge for short term use.

Have fun, canning friends!


Added to Simple Lives Thursday.

Home Pickled Cornichons {Recipe}

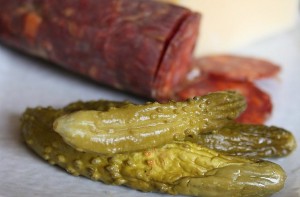
home pickled cornichons recipeMmmm...cornichons. Oh...gherkins. I like to say your names. I love how your vinegary taste and crunchy texture excite the palette, especially in between bites of rich charcuterie. The tiny cucumbers needed to make cornichons are difficult to find raw. To fulfill my homemade pickle desires, I did what any self-respecting homestead would do: grow my own.

I started with Parisian Pickling Cucumber seeds from Seed Savers Exchange. Last year the plants grew a little and produced just enough cucumbers for a single jar of cornichons before rust withered the plant away.

This year, I planted six seeds from the same packet our sunniest compost rich raised bed. The plants are ten feet long, trellising on anything that stands still, and covered with hundreds of yellow flowers.

Each flower matures into a bitty cucumber overnight. Given another 24 hours, the cucumber is perfect for cornichon making. If left un-picked, the cucumber grows to 8-inch long relish-making size in another 24 hours. This rapid development seems magical, as is the camouflaging effect of all those green leaves hiding the cucumbers.

I pick off the correctly sized cucumbers daily and store them in the fridge. When I have 8 to 10 collected, Lil and I wash and pickle them with this simple recipe. Pickling is great for young cooks because they can stuff the jars and count the spices. If all goes well, we will have a stash of jars in the larder before winter.

I created this recipe based on several versions I found in cookbooks. It is tart but not too tart and rich with spices. Many recipes call for salting the cucumbers overnight and rinsing them to ensure a crisp pickle. Because these babies are so tiny, I skip this step and they are plenty crunchy for me. If you have access to fresh grape leaves, tossing in one per jar is reported to help the texture of pickles.


[print_this]

Homemade Cornichons for each half pint jar

2 tablespoons kosher salt 1 cup white vinegar 1/3 cup water 5-8 whole 2-4 inch cucumbers, washed thoroughly with spines rubbed off 1 clove garlic, peeled 1 small bay leaf 1/2 tablespoon pepper corns 2 whole cloves 1 bay leaf 1 fresh grape leaf, washed, optional

1. Heat salt, vinegar, and water in a pot over medium heat until boiling. 2. Pack cucumbers into a sterilized jar with peeled garlic clove. Sprinkle spices over cucumbers. 3. Pour boiling vinegar brine into the jar, leaving 1/4 inch head space. 4. Wipe rim and place new lid on the jar. Finger tighten a ring on the jar and place in a hot water bath. 5. Boil in hot water for 15 minutes. Remove from water bath and allow to cool to room temperature.

[/print_this]

Added to Simple Lives Thursday 53 and Punk Domestics.

Neglected Cucumber Relish {Recipe}

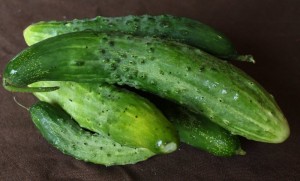
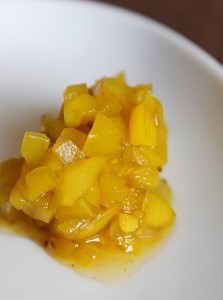
too-big pickling cucumbersI am a mad woman harvesting Parisian pickling cucumbers every morning and night. I want them at exactly 2-3 inches in length to make into cornichons. Too small and they aren't worth processing. Much larger and the skin is bitter. cucumber relish recipeBut try as I might, little cukes camouflage themselves under umbrella green leaves. Seemingly overnight, they turn into big honkin' cucumbers. They can't be eaten raw and will not make pleasant pickles with thick sharp skin.

I enjoyed this cool pallete cleanser between bites of homemade hot dog (recap of the hotdog making fiasco tomorrow), though I'm not typically a relish eater. The texture is pleasantly crisp and the flavor mildly spicy.

I'm not sure how I feel about the yellow hue given by the tumeric. If Chicago can have fluorescent green relish, maybe Ohio yellow relish is ok?


[print_this]

Fresh Cucumber Relish makes approximately 1 1/2 pints

3 cups cucumber peeled, seeded, and minced 1/4 cup onion, minced 3 tablespoons kosher salt 3 cups water 1 cup vinegar 1/2 cup packed brown sugar 1/4 teaspoon tumeric 1/2 teaspoon celery seed 1/4 teaspoon caraway seed 1/2 teaspoon ground white pepper 1/4 teaspoon red pepper flakes

1. Place onions and cucumber in a bowl. Top with salt and water and rest in fridge for 2-6 hours. 2. Drain liquid. 3. Place onions, cucumber, vinegar, sugar, and spices in a pot. Heat to boil over medium heat for 5-10 minutes or until the liquid begins to reduce. 4. Meanwhile, sterilize 3 half pint jars, 3 lids, and 3 rings. 5. Ladle hot relish into sterilized jars. Wipe rim, top with lids and rings. Place in hot water bath and process for 15 minutes. 6. Cool to room temperature. Label and store in a cool dry place until ready to use. After opening, store in fridge for 3-4 weeks.

[/print_this] Added to Simple Lives Thursday 52 and Punk Domestics.

Sour Boozy Cocktail Cherries {Recipe}

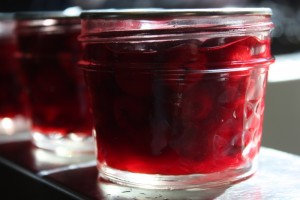
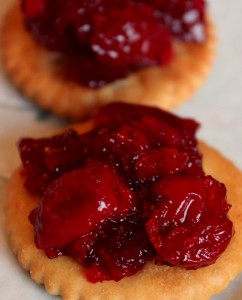
canned cocktail cherriesI love a good cocktail but I despise maraschino cherries. The rubbery red-flavored spheres resemble the natural fruit in name alone.

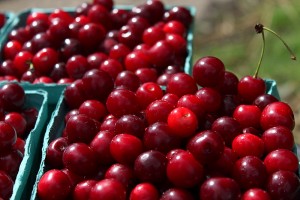
I decided to tackle creating cocktail cherries at home when faced with an extra quart of fresh local sour cherries after making sour cherry preserves.

While searching for a recipe, I discovered a bit of history. Apparently cocktail cherries used to be pitted cherries soaked in maraschino liqueur, hence the name.

During prohibition, one of America's cultural mistakes, cocktail cherries had to be remade without the alcohol. The sickeningly sweet, artificial maraschino cherry was born.

Most recipes for DIY cocktail cherries either fall in the camp of the traditional (soak in maraschino liqueur) or modern (can in sweet, flavored syrup).

All recipes recommended pitting the cherries but I came across a suggestion that the pits themselves could make a liqueur.

I combined all these ideas into my sour boozy cocktail cherries. They are boiled in vanilla syrup and canned with pits and bourbon. The result is a flavorful hybrid with balanced sweetness that begs to be made into an old fashioned.

My hope is that the pits will age and flavor the syrup so that when the cherries are gone, the syrup will be an enticing liqueur of its own.

[print_this]

Sour Boozy Cocktail Cherries

makes 4 half pints

1 1/2 cups demara sugar

1 cup water

4 allspice berries, crushed

1 vanilla pod, sliced open

4 cups fresh sour cherries, pitted with pits reserved (approximately 1 quart)

2 cups bourbon (we like Bulleit)

1. Mix sugar, water, allspice, and vanilla in a heavy bottomed pan. Heat over medium high until boiling.

2. Add the sour cherries and pits. Boil for 5 minutes.

3. Turn off the heat and allow to cool for 5-10 minutes. Pour in bourbon.

4. Ladle cherries into sterilized jars. Cover with some of the steeping liquid and pits to quarter inch head space.

5. Top with a new lid and finger tighten a ring. At this point, cherries may be stored in the fridge for up to one month. If you desire to preserve them longer, can using the following directions.

6. Boil in hot water bath for 10 minutes. Remove to a level surface and allow to cool completely. Remove rings and wipe off jars.

7. If excess syrup remains, strain and use for cocktails or dessert topping. Store in refrigerator.

[/print_this]


Added to Hearth and Soul 55.

Sour Cherry Preserves {Recipe}

We're dealing with some health issues, hence posting is light. I'll fill y'all in when there is some resolution. In the meantime, find some sour cherries. sour cherry preserves recipeThese are the best preserves ever.

If I could only eat one jam for the rest of my life, this would be it.

Sour cherry preserves kick the lid off all other preserves.

<insert your favorite superlative here>

I rarely make such declarations and in fact poke fun at Alex who overuses superlatives. But seriously folks, I love sour cherry preserves.

The luminescent crimson cherries yields a rich yet adaptable flavor. Sugar mellows the tart just enough to not cause a pucker but a piquant zap to the tongue.

Tart cherry jam is as at home in a crepe as on a charcuterie plate. A schmear on cheese sandwich elevates the everyday to the remarkable. On a buttermilk biscuit? Oh my...

The sour cherry season in central Ohio is nearly over but don't dismay. Our friends to the north are just beginning their harvest. Lisa the Waitress, in her sorely missed blog, suggests ordering cherries from Michigan through Jacquemin or Yutzy's Farm. The most recent Yutzy's newsletter said "SOUR CHERRIES. ARRIVING IN 2 SHIPMENTS 2nd AND 3rd WEEKS OF JULY. PLEASE CALL TO ORDER AND FOR PRICING. 614-873-3815"

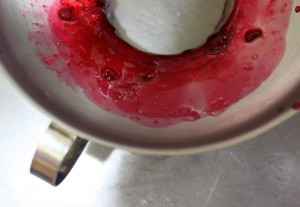
sour cherriessour cherry jam cookingsour cherry jam on funnel

[print_this]

Sour Cherry Preserves

makes 6-7 half pints

7 cups sour cherries, pitted and crushed 4 teaspoons calcium water (comes with Pamona's pectin) 2 cups sugar (add more or substitute honey as your taste dictates) 4 teaspoons Pamona's pectin

1. Stew sour cherries in their juice over medium heat in a heavy bottomed pan for 5-10 minutes.

2. Meanwhile, sterilize jars, lids, and rings. I like to heat clean jars in boiling water in my canning pot and put lids and rings in a smaller pot of boiling water.

3. Stir calcium water into cherries.

4. Measure sugar in a bowl. Stir pectin into sugar.

5. Add sugar/pectin mixture to the cherries. Stir and heat to boiling.

6. Once at a boil, turn off the heat. Put a teaspoon of jam in a bowl and place in freezer for 1 minute to test for the set. If it gels, proceed with water bath canning. If it does not set, stir one half cup sugar, 1 teaspoon pectin, and 1 teaspoon calcium water into hot cherries. Return to boil and test again.

7. To can, ladle hot jam into hot jars, leaving a quarter inch head space. Place lids and rings on jars and tighten to finger tight. Return jars to the hot water bath and process at boiling for ten minutes.

8. Remove jars from boiling water and allow to cool on a dishcloth covered counter for 24 hours. Remove rings, wipe away leaks, and store in a cool dry place for up to two years.

[/print_this]

Related notes:

  • My other favorite thing to do with sour cherries? Steep them in vodka for a month or two, sweeten with simple syrup to taste, and drink the most amazing liqueur for the rest of the year. Yum!
  • Read Lil's post about sour cherries.
  • Come to my strawberry canning demonstration at Easton Farmer's Market this Thursday to relieve yourself of fears about canning. I'll be in the Local Matters tent at 4 pm. I get to give away some canning supplies and samples too.

Added to Hearth & Soul 54.

Homemade Biscuits From The Freezer

wwii ending celebrations At the Tayse family Xmas extravaganza, Grandma Joyce, of Rhubarb Crunch and Ginger Snap fame, inquired about freezer biscuits. She is a fantastic biscuit maker, trained by the best I've ever known, her mother (my late great grandmother) Leona.

Now living alone, she would like to have a biscuit or two for dinner but doesn't want to consume a whole batch. She could buy some of those dough boy frozen ones, but she is too thrifty (like all good Tayses) to spend more than a dollar a dozen. What's more, she suspects they don't taste as good as her own.

Always up for a challenge, I set out to find out the best way to store homemade biscuits in the freezer. The next time I made biscuits, I froze two before baking (raw) and two after baking just before they were browned. Holler in the comments if you want the recipe I use - it's a standard from Betty Crocker.

This weekend, I took all four biscuits out of the freezer. I immediately put one raw and one baked in the toaster oven, preheated to 350 degrees F. The baked one I pulled after about five minutes when the top browned; the raw baked for about 25 minutes until the top was brown. The other two were allowed to thaw in room temperature, and then I baked the thawed raw dough for 20 minutes until brown.

homemade freezer biscuit comparison

Both frozen-raw biscuits had less than desirable texture, though the rich buttery taste remained. Neither rose to the height of the pre-baked biscuits. You can see that in the biscuit pictured below and to the right, the raw frozen one, the fat pooled in pockets rather than lofted the flour into flaky layers as usual.

pre baked biscuit texturefrozen raw biscuit texture

The pre-baked biscuits held their flaky texture and tasted great. Lil judged the one reheated in the oven as the very best and I agree. The thawed and not re-baked biscuit was perfectly passable.

My advice to Grandma and any person wanting to save the trouble of baking a mess of biscuits for a small gathering is this: bake a large batch of biscuits, removing what you wish to save for later just a minute or two before they are fully 'done'. Freeze these on a cookie sheet and then pop into a freezer safe bag, squeezing out the air. When you later wish to eat a biscuit, cook one in a 350 degree oven for 5-10 minutes, or until brown on top.

Added to Simple Lives Thursday 46.

Preserving at Wild Goose!

join a preserving class columbus ohIn partnership with Wild Goose Creative, I am pleased to announce a new series of home preserving classes. Join me on third Tuesdays from 6:30 - 8:30 to preserve local fresh foods by freezing, canning, drying and curing. Each workshop will include hands on experience, tastings, recipes, and a sample to take home.

Schedule

6/21: Jam Canning -  We will use a seasonal fruit to make jam and freeze berries. The basic water bath methods in this class are the same as those to can jelly or fresh fruit.

7/19: Tomatoes - What to do with an excess of tomatoes? I will teach how to make and can sauce, demonstrate dehydrating, and share recipes for canning-ready barbecue sauce and ketchup.

8/16: Pickling - Using traditional vinegar and lacto-fermented methods, we will create pickled cucumbers and peppers.

9/20: Apples - I will share my favorite ways to enjoy apples year round including dehydrating, canning applesauce, and storing long term.

10/18: Home Charcuterie - Learn how to make pancetta and bacon at home with no special tools or equipment. Alex and I will also demonstrate how to make sausage and sample a variety of home cured meats.

Pricing

We are offering several pricing options, starting at $30 per class. Choose the whole series and save over 10%.

Visit the Wild Goose Creative Preserving Series page to register. Class size is limited, so sign up today to fill your jars and freezer this summer!

Wild Goose Creative

Wild Goose Creative is about a lot of things. It’s about sustainable partnerships and artistic collaborations. It’s about giving artists resources and facilitating their work. It’s about creating a space for people to experience art and engage each other. Mostly, Wild Goose Creative is about building a vibrant community of people who care about art and who want to change the world.

The Wild Goose gallery and class space is located at 2491 Summit Street in Columbus, OH 43202, just north of Ohio State University campus.