Handmade Holidays: Cocoa Mix

Last week I shared how to make hand-rolled beeswax candles. This week I offer recipes for spice rub and cocoa mix in addition to the many jarred recipes at the bottom of this post. The series will conclude next Monday with ideas for perfectly packaging your handmade gifts. Have you ever read the ingredients on a box of commercial hot cocoa mix? Very often they are full of unpronounceable additives and artificial flavors.

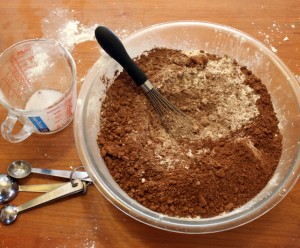
cocoa mix made at home handmade cocoa mix gift

Cocoa mix is stunningly easy to make at home without all that icky stuff. The final quality will only be as good as the quality of the individual ingredients, so I use organic milk and sugar, fair trade cocoa powder and fresh spices in this recipe.

Package some hot cocoa mix in a vintage jar with a personalized top and you'll have a soul warming present in a matter of minutes. For a truly gourmet gift, add in a waxed paper envelope of homemade marshmallows!

Hot Cocoa Mix fills approximately 5 half pint jars from Alton Brown's foodtv recipe

2 cups powdered sugar (or regular sugar pulsed in the food processor until very fine) 2 1/2 cups powdered milk 1 cup cocoa powder 1 teaspoon salt 2 teaspoons cornstarch 1 pinch cayenne powder (or cinnamon or chili powder)

1. Mix all ingredients together. Whisk to remove caked bits or pulse in the food processor. 2. Pour into containers. 3. Clean up. This is a messy mix to make! 4. Use 2 tablespoons to one mug (8 oz) of hot water.

Other handmade food gift ideas: Liqueur Fruit Jam (apple, peach, or strawberry) Applesauce a loaf of bread (no-knead or cranberry) Sugared cranberries

Buffie Wellies

If you take a beef wellington, shrink it, and substitute buffalo (bison) for beef, behold the Buffie Wellie. minature buffalo wellington appetizer tray

These bite sized bison wellingtons were a hit at my birthday party and as an appetizer for our Thanksgiving meal.  They would be a welcome addition to any special occasion hors d'oeuvres spread.

The Wellie is made of three components: roasted bison, mushroom duxelles, and puff pastry.  The bison can be roasted and duxelles prepared two to twenty four hours in advance and kept cool in the refrigerator.

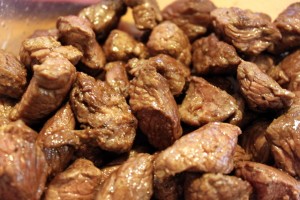
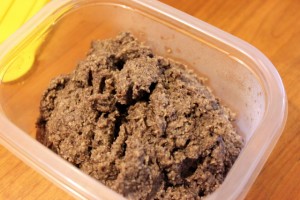
roasted meat for buffalo wellingtonmushroom duxelles for buffalo wellington

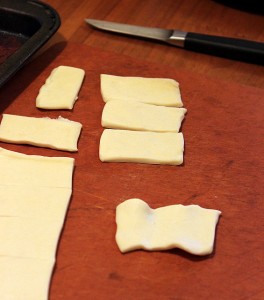
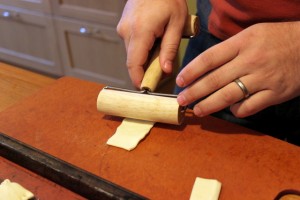
To assemble, spread out the puff pastry and cut into rectangles with a very sharp knife. Roll each rectangle slightly, keeping everything cool as your work.

cut puff pastry for buffalo wellingtonsrolling puff pastry for buffie wellies

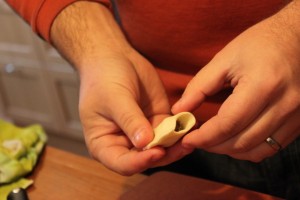
Picking up a piece of bison, spoon a little duxelles on top.  Lay the bison on one half of the rectangle and  wrap the rest of the puff pastry over top, pinching the edges.  If making this recipe for a party, fill a few pieces of dough with mushroom only to accommodate vegetarians.

placing buffalo and mushroom closing buffalo wellington

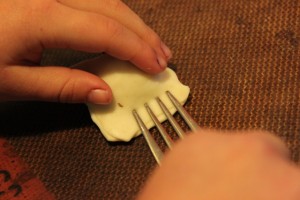
Crimp the open edges with a fork.  Lillian loves to help seal these little snacks. Place on a cookie sheet lined with a Silpat or parchment paper.

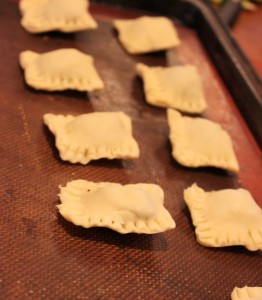
fork crimping buffalo wellingtons buffalo wellingtons before baking

Bake the buffie wellies in a hot oven and serve warm.  In my experience, they are eaten before they have a chance to cool!

buffalo wellington bites

Buffie Wellies

makes 36 bite sized servings 1 hour cooking and assembly time, 3 hours cooling time 11 ounces frozen puff pastry (we prefer Pepperidge Farm brand or use this method to make your own) 3/4 pound bison roast (round, sirloin, rump) in half inch cubes 1 tablespoon olive oil

1 1/2 cups finely chopped crimini mushrooms 1/2 cup finely chopped shallots 3 tablespoons red wine or port 2 tablespoons unsalted butter 2 teaspoons finely chopped fresh oregano salt and pepper

prepare the bison

1. Salt and pepper the meat.

2. Heat skillet over high heat until hot.

3. Add olive oil.

4. Sear bison in skillet, tossing continuously to reach all sides.  Cook just until browned on the outside.  The inside will still be very rare.

5. Allow to cool to room temperature and then refrigerate until cold.

prepare the duxelles

1. Melt butter in a skillet over low heat.

2. Sweat shallots until translucent.

3. Add mushrooms and cook for two to three minutes.

4. Season with salt, pepper, and oregano.

5. When mushrooms begin to release their own liquid, add the wine or port.

6. Continue to cook until liquid has almost evaporated.

7. Transfer mixture to the food processor and pulse until a smooth paste consistency.

8. Allow to cool to room temperature and then refrigerate until cold.

assemble

1. Thaw puff pastry.  It is important for all steps working with puff pastry to keep it as cool as possible, touching gingerly.

2. Use a very sharp knife to cut dough into 36 pieces, approximately 1 inch by 2 inches.  Keep dough you are not working with in the refrigerator.

3. For each piece, roll or press dough into a slightly larger rectangle.

4. Place 1/2 to 3/4 teaspoon duxelles on top of a single piece of buffalo.

5. Place buffalo on one end of the dough.  Wrap remaining dough overtop.

6. Crimp three open sides with a fork.

7. Place on a cookie sheet.

8. Bake for 15-20 minutes in a pre-heated 425 degree oven.  Buffie wellies are done when they are browned all over.

Notes:

It is possible to make buffie wellies ahead and freeze them.  Thaw thoroughly before baking.

When we attempted to keep assembled wellies in the fridge overnight before baking, the pastry was less puffy and browned unevenly.

Added to Hearth and Soul.

Alex's No-Knead Bread

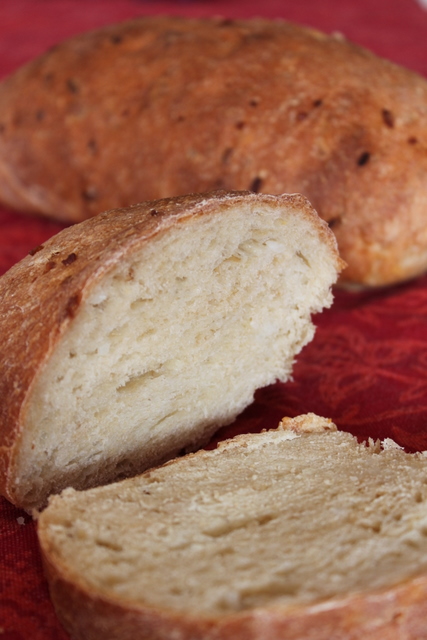
no knead cooked bread

Alex is interested in the workings of yeast for all fermented things, so he naturally fell into bread baking. At first he tried many recipes with as many failures as successes. Now, he now bakes a batch of bread twice a week to feed our family.

Alex does not, however, like to get messy. His bread is made either by kneading with the kitchen-aid or with this no-knead method. The rhythm of the overnight no-knead rise fits with our schedules well and this recipe has been his bread of choice for a few months now.

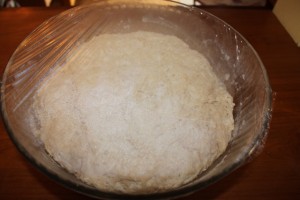
First, mix together the ingredients with a spoon. This recipe uses 1/2 cup of odds and ends grains which can use up leftovers in the fridge or any grain you want to experiment with. For this batch, Alex added cooked white rice to the dough which baked off into the brown bits visible in the first picture. Cover the dough and allow to rise at room temperature 12 - 18 hours.

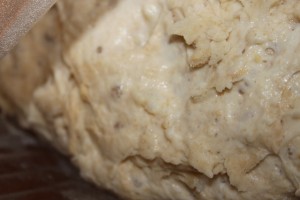
no knead bread doughno knead bread dough risen

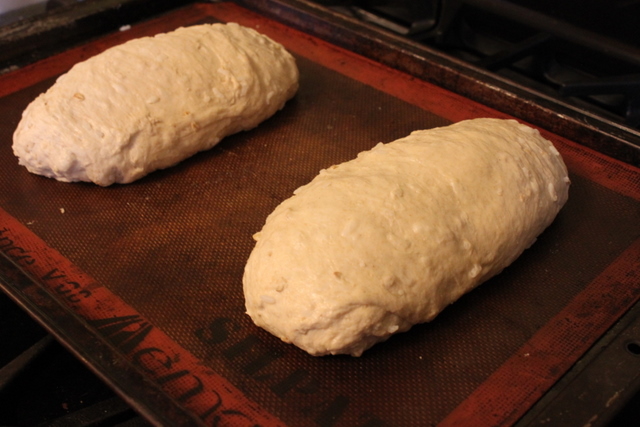
When little bubbles cover the surface, punch down the dough and form loaves. It's important to stretch the dough over the top and curl it under to form a solid shape. We put our free-form loaves on a sheet pan but you could use a loaf pan instead.

no knead bread loaves before baking

Allow to rise a second time until double in size and bake. Voila! Homemade bread that is cheap, tasty, free from odd additives sometimes found in store bought bread and made without the messiness or work of kneading!

Alex’s No-Knead Slicing Bread makes one large or two small loaves

Ingredients 2 cups water 2.5 cups bread flour 1.5 cups white whole wheat flour 1/2 cup dry oats, corn meal, cooked rice, cooked lentils, or additional flour 1/2 teaspoon yeast 1 tablespoon salt 1 tablespoon sugar

Directions 1. Stir together all ingredients in a large bowl until a very solid dough forms. Add more flour if necessary until dough is so thick pieces appear stringy when stirred. 2. Cover with plastic wrap or a towel, and let sit at room temperature overnight or for 12 - 18 hours. Rising takes longer at cooler temperatures. 3. When dough has doubled and surface is covered in bubbles, punch down and form into loaves. 4. Allow loaves to rise at room temperature until doubled in size again, about 2 hours. 5. Bake for 20 minutes at 450 degrees F. 6. Lower temperature to 350 degrees F. and continue baking until bread is browned on top and sounds hollow when tapped on bottom, approximately 15 minutes. 7. Allow to cool slightly before slicing.

Alternatives: Substitute 1 tablespoon honey or molasses for sugar Add up to 2 tablespoons flaxseed meal Use ½ to 1 cup sourdough starter in place of equal portion of water Use less flour for a wetter dough to make a ciabatta-like holey bread Can be formed into breadsticks, dinner rolls, or pizza crust

Added to Hearth and Soul BlogHop

How to Make Fruit Liqueur

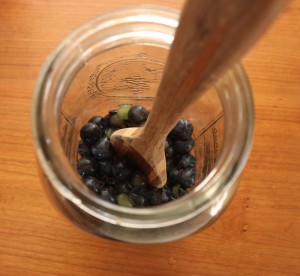
Homemade flavored liqueur is one of the simplest ways to preserve the flavor of fresh fruit.  I posted a recipe for cranberry liqueur last year, but one can make liqueur with any fruit with the following simple method. fresh grapes to make liqueurmascerating grapes for liqueur recipe

Local, in season fruits make the best liqueurs because they have the strongest fresh flavor.  Choose clean washed fruit.  Smash berries, chop stone fruits, or juice citrus and place in a clean large glass container, like a half gallon ball jar.  This series of photos uses some local concord grades from our fruit CSA.

sugar syrup added to grape liqueur recipeadding vodka to liqueur recipe

Add an equal volume of cooled sugar syrup or honey. (Make sugar syrup by boiling an equal amount of sugar and water until the sugar is dissolved.)

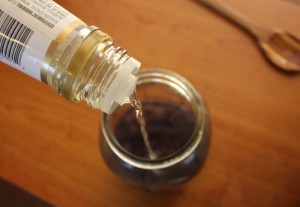
Top that off with an equal amount of full strength (80 proof) or higher vodka.

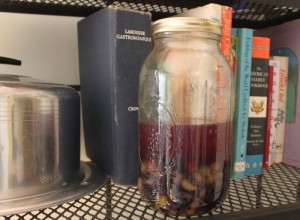
liqueur resting on cookbook shelf

Add the lid and give the mix a swirl.  Find a spot for the jar to rest at room temperature.  Swirl once a day, tasting each day. At first the taste will be very alcohol forward, but the flavors mellow the alcohol over time.

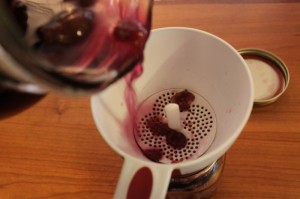
straining grape liqueur recipe

When the taste is to your liking, usually in five to seven days, strain out the fruit.  Strain through cheesecloth for the most clear result.

finished grape liqueur

Bottle in a jar with a tight fitting lid.  You can reuse jars or buy new Swing Top or Flask Bottles online.  Add a personalized label, perhaps with a suggested cocktail recipe, for a special gift.

The color may mute over time but the flavor will remain fresh for years.  Serve in a cordial glass or mix into a cocktail.

Homemade Fruit Liqueur

1 part crushed fresh fruit

1 part sugar syrup or honey

1 part 80+ proof neutral tasting vodka

1. Mix all ingredients in a clean glass container.

2. Keep at room temperature, swirling and tasting once a day.

3. When the flavor develops as you like, strain out the fruit through cheesecloth.

4. Adjust alcohol content or sweetness by adding vodka (to strengthen), water (to weaken), or sugar syrup.

5. Store in a closed bottle in a cool dark location for best results.

Post added to Hearth and Soul.

Brandied Pears

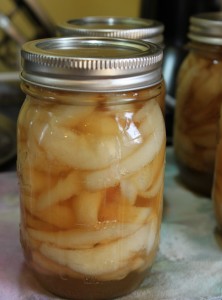
canned brandied pears recipeMy aunt Deb picked and delivered a large box of pears from her farm.  We ate some fresh, but soon the pears begged to be preserved before they rotted. My thoughts turned to pear sauce and pear butter, but I have a large store of applesauce already in the pantry and I'm not sure I would enjoy pear butter.  Then I considered, what about brandied pears?  They contain alcohol, which puts them head and shoulders above most canned fruits in my book.

I searched my regular Internet sources and found plenty of recipes but they all required refrigeration.  My fridge is full, thanks.

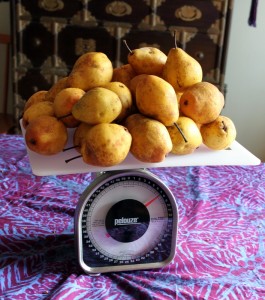
eight pounds of home grown ohio pears

The gold standard, the Ball Blue Book Guide to Preserving, has one recipe that sanely recommends pantry storage.  I modified it just a bit by adding a few spices and adjusted quantities for the 8 pounds of pears I had versus the 10 pounds in their recipe.

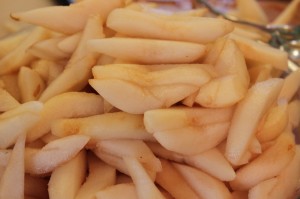
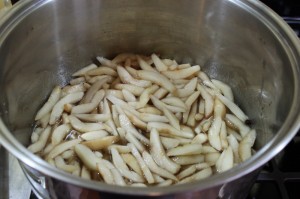
peeled and sliced pearsPeeling, coring and slicing the pears consumed about an hour of time.

pears in syrup

Then the pieces bathed in a sugar syrup gently flavored by whole allspice and clove.

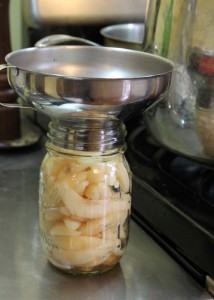
ladling pears into sterilized jars

The syrup reduced while I filled sterilized jars with hot pears.

Off the heat, I added brandy to the syrup and poured the liquid over the pears.

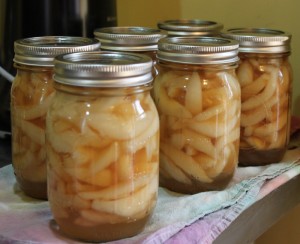
recipe for six pints of brandied pears

Fifteen minutes in the water bath canner and the brandied pears are complete!  They are resting in the pantry until I pretty them up for holiday gifts.

Canned Brandied Pears

makes about six pints

adapted from Ball Blue Book of Canning

8 pounds pears (approximately 30 small ones) aged at room temperature until ripe and tasty

1-2 tablespoons lemon juice

4.5 cups sugar

3 cups water

6-10 whole spices like cloves, allspice berries or cinnamon stick, optional

2.5 cups brandy

1. Peel and core pears.  Slice.  Toss with lemon juice to prevent browning.

2. Heat sugar and water in a large stock pot until boiling.  Add spices if you wish.

3. Add pears to sugar syrup and cook at boiling for five minutes.

4. Ladle pears into hot sterilized jars.

5. Meanwhile, continue to boil sugar syrup.

6. Remove syrup from heat.  Discard spices.

7. Add brandy to syrup and stir well.

8. Ladle brandy syrup over pears in jars leaving 1/4 inch headspace.

9. Fit sterilized rings and lids onto jars and place in hot water bath.

10. Boil for 15 minutes.

11.  Remove jars from water bath and allow to cool completely.

12. Remove rings and wash any syrup leaks off rims.  Label the jars and store at room temperature for up to a year.

This post is part of Simple Lives Thursday and Fall Fest.

New England Roasted Pumpkin Seeds

pumpkin seeds and pith Don't throw away (or compost) the innards of your pie or jack-o-lantern pumpkins!  Amongst the tricky pith are treats, delicious seeds! By the way, a serrated grapefruit spoon is my favorite tool for scooping pumpkin flesh.

Soak the pumpkin innards in water for a bit and then separate seeds from stringy pulp by hand. 

rinse pumpkin seeds before roasting

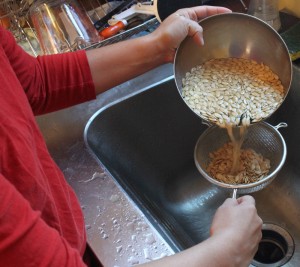
Rinse the seeds in clear water again until they are completely free of orange goop. Strain through a sieve to remove most of the water.

toss pumpkin seeds with soy sauce and old bay

Place seeds in a shallow layer on a cookie sheet pan.  Sprinkle them with soy sauce and Old Bay. For this batch of seeds from 8 pie pumpkins, I used about a teaspoon of each.

Roast in a 300 degree oven for about an hour, turning every 15 minutes.

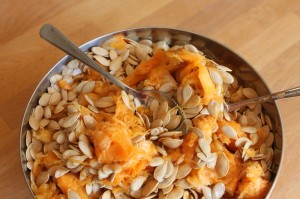
roasted pumpkin seeds recipe

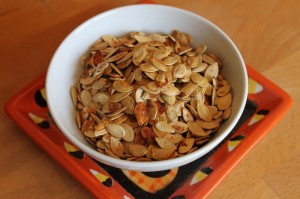
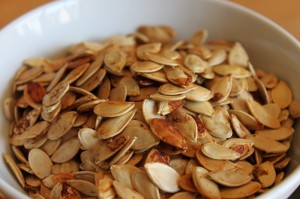
Let cool and enjoy! Unlike candy treats, home roasted pumpkin seeds are a good source of protein, fiber, and zinc.

roasted pumpkin seeds

Keep leftovers in an airtight container at room temperature for up to a year.

NB: You can save raw (un-roasted) seeds for planting next year by removing them from the pith and placing on a coffee filter to dry completely. Most pumpkins are non-hybridized, meaning they will readily grow and produce fruit from seed. Store thoroughly dry seeds in a paper envelope and direct sow in June for ripe pumpkins near Halloween time.

This post was added to Hearth and Soul Volume 19.

Apple Pie Jam

In early September, I agreed to host a canning demonstration at Oakland Nursery's Fall Festival.  I said I would make a local fruit jam, figuring that I would pick up something in season the day before at the farmer's market. With very warm early fall temperatures, fruits ripened far ahead of what's typical for this season.  I looked at several markets this weekend and could only find one Ohio fruit ripe and available: apples.

fall ohio apple jam recipe

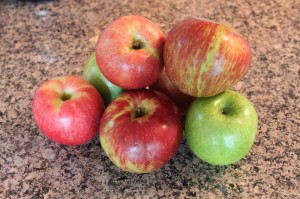
Thus, the invention of apple pie jam.  Spiced gently with cinnamon, clove, and nutmeg and sweetened with brown and white sugar, this jam is reminiscent of apple pie filling.  Spread on buttery crackers or toast, apple pie jam is a great way to treat yourself to fall flavors year round.

apple pie jam recipe

Apple Pie Jam

For four to five half pints:

8 cups finely diced or shredded peeled apples of at least two varieties 1 cup water 1 teaspoon cinnamon 1/2 teaspoon ground cloves 1/4 teaspoon ground nutmeg 5 teaspoons calcium water (comes with Pomona's Pectin) 1 1/2 cup packed brown sugar 3/4 cup white sugar 5 teaspoons Pomona's Pectin

1. In a heavy bottomed pan, combine apples, water, cinnamon, cloves, nutmeg, and calcium water.  Heat over medium heat until apples are tender, approximately 15 minutes. 2. Meanwhile, mix sugars with Pomona's pectin. 3. Bring apple mix to a boil. 4. Stir in sugars and pectin. 5. Return to a boil for one minute, stirring constantly. 6. Turn off heat. 7. Immediately ladle into sterilized half pint jars.  Leave 1/4 inch head space. Screw on two part lids. 8. Process in boiling water bath for 5 minutes.  Remove from water and let rest for 24 hours to fully set. 9. Store sealed jars at room temperature. Once opened, store in refrigerator and eat within three weeks.

This recipe added to Hearth and Soul blog hop.

Goat Cheese Stuffins

goat cheese dressing muffin recipeA few years ago, I started making these stuffing-muffin creations.  I created the recipe based on what was in the kitchen at the time and decided to put the typically large pan dish into muffin cups to maximize the crispy edges I love. When Foodbuzz (my ad network) offered me a chance to win a trip to San Francisco and their annual conference for a recipe with Nature's Pride bread, I knew these muffin hybrids had to be my submission.

Never having named the recipe before, I tossed around a few ideas.  Was it a spoon bread?  Bread pudding?  Not exactly.  It is, I thought, stuffing (or more appropriately dressing because this mix isn't stuffed into anything) in a muffin shape...stuffing muffin...stuffin.  Ah!  Moment of brilliance!

I searched around the internet to see if anyone else was using such a ridiculous name.  It turns out that a more famous cooking personality who shares my name, a certain Ms. Rachael Ray, in fact has published a recipe for stuffin' muffins.

Oh well, I'm sticking with my name and my recipe is still totally my own!

But not-so-famous Rachel, you say, don't you promote making your own bread?  Why use store bought bread?

We do make our own bread in this house.  However, I realize many people don't have the luxury of time or interest to make bread.  When we do buy bread, I carefully read ingredients to find the best nutrition with the least junk additives.  I really was impressed at the ingredient list for Nature's Pride; they include no high fructose corn syrup, no preservatives, no trans fat and no unpronounceable anything.  For this recipe, or every day use, the bread is tasty too.

Anywhoo, on to the Stuffins!

cutting bread cubes for stuffing

Slice bread into one half inch cubes.  I stack the slices, cut one half inch slices all the way across horizontally and then cut half inch slices vertically.  I like to use two varieties of bread for added texture, in this case the country white and 12 grain varieties of Nature's Pride bread.  Slightly stale bread works great.

Mix up a batter of milk, eggs, herbs, and salt and pepper.

bread soaking for goat cheese stuffing recipe

Soak bread in batter for 10 minutes minimum, or the time it takes you to prepare the other ingredients.

Chop the onion, garlic, and apple as directed and add to the soaking bread.  Chunk the goat cheese into the mix and stir gently.

goat cheese stuffing ready to bake in muffin tins

Spoon mixture evenly among a dozen muffin cups.  A stoneware muffin pan works perfectly for this though a metal tin will work too.  A test batch I prepared in a silicone pan did not crisp well or cook in the same amount of time.

Bake and let rest.  The resting part is important as the stuffins set up in that last few minutes allowing for easy removal.

goat cheese stuffing muffin ready to eat

Serve as a side dish to a autumnal meal or appetizer with fresh tomato topping as pictured.  The leftovers are fantastic warm or cold.

Goat Cheese Stuffins Time: 15 minutes active cooking, 30-40 minutes baking Makes 12

2 cups milk (whole, 2% or skim) 2 large eggs 1 teaspoon salt 1 teaspoon freshly ground black pepper 2 tablespoons fresh rosemary, chopped 3 tablespoons fresh oregano, chopped 8 slices (approximately 8 cups) of two varieties of slightly stale bread 1 medium onion 3 garlic cloves 1 large apple 8 ounces goat cheese 1. In a large bowl, whisk together milk, egg, salt, pepper, and herbs.

2. Slice bread into 1/2 inch cubes.

3. Place bread into milk mixture.  Stir gently and allow to soak for 10 minutes.

4. Meanwhile, dice onion into even 1/4 inch pieces.  Place in large bowl with bread.

5. Peel apple and chop into 1/4 to 1/2 inch pieces.  Place in large bowl with bread.

6. Chop garlic finely.  Place into large bowl.

7. Use fingers to separate goat cheese into small pieces on top of large bowl.  Stir gently to combine all.

8. Spoon mixture evenly among oiled stoneware 12-cup muffin tin.

9. Bake at 350 degrees for 30 - 40 minutes or until tops brown.

10. Let rest out of oven for five minutes before removing from muffin cups.

11.  Serve warm or at room temperature.  Leftovers make an excellent addition to a packed lunch!

Disclosure: I received one loaf of Nature's Pride bread from the Foodbuzz Tastemaker program to create this recipe. Then my dog ate the loaf of bread (true story!) and I had to buy another one.