Sour Boozy Cocktail Cherries {Recipe}

canned cocktail cherriesI love a good cocktail but I despise maraschino cherries. The rubbery red-flavored spheres resemble the natural fruit in name alone.

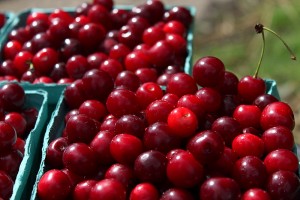
I decided to tackle creating cocktail cherries at home when faced with an extra quart of fresh local sour cherries after making sour cherry preserves.

While searching for a recipe, I discovered a bit of history. Apparently cocktail cherries used to be pitted cherries soaked in maraschino liqueur, hence the name.

During prohibition, one of America's cultural mistakes, cocktail cherries had to be remade without the alcohol. The sickeningly sweet, artificial maraschino cherry was born.

Most recipes for DIY cocktail cherries either fall in the camp of the traditional (soak in maraschino liqueur) or modern (can in sweet, flavored syrup).

All recipes recommended pitting the cherries but I came across a suggestion that the pits themselves could make a liqueur.

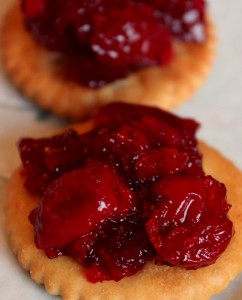
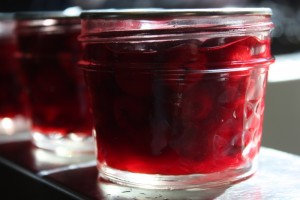
I combined all these ideas into my sour boozy cocktail cherries. They are boiled in vanilla syrup and canned with pits and bourbon. The result is a flavorful hybrid with balanced sweetness that begs to be made into an old fashioned.

My hope is that the pits will age and flavor the syrup so that when the cherries are gone, the syrup will be an enticing liqueur of its own.

[print_this]

Sour Boozy Cocktail Cherries

makes 4 half pints

1 1/2 cups demara sugar

1 cup water

4 allspice berries, crushed

1 vanilla pod, sliced open

4 cups fresh sour cherries, pitted with pits reserved (approximately 1 quart)

2 cups bourbon (we like Bulleit)

1. Mix sugar, water, allspice, and vanilla in a heavy bottomed pan. Heat over medium high until boiling.

2. Add the sour cherries and pits. Boil for 5 minutes.

3. Turn off the heat and allow to cool for 5-10 minutes. Pour in bourbon.

4. Ladle cherries into sterilized jars. Cover with some of the steeping liquid and pits to quarter inch head space.

5. Top with a new lid and finger tighten a ring. At this point, cherries may be stored in the fridge for up to one month. If you desire to preserve them longer, can using the following directions.

6. Boil in hot water bath for 10 minutes. Remove to a level surface and allow to cool completely. Remove rings and wipe off jars.

7. If excess syrup remains, strain and use for cocktails or dessert topping. Store in refrigerator.

[/print_this]


Added to Hearth and Soul 55.

Carolina Chocolate Drop Cookie {Recipe}

On Monday, my aunt sent an email telling the Columbus Tayses that the old timey band the Carolina Chocolate Drops were coming to Dayton tonight, July 1, for a free performance during CityFolk Fest. Moments after the news hit my inbox, my Mom called. "Did you hear? Where will we stay?" There was no hesitation - this band is a family favorite and we had to go. Lil and I have been buzzing with anticipation. We love the dance-able tunes, especially because so many reference food.

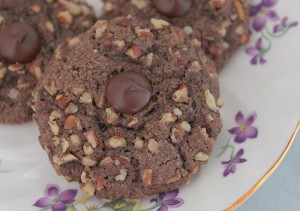
carolina chocolate drop cookie recipe"Doesn't Carolina Chocolate Drop sound like the name of a cookie?" I asked my girl while we were counting down the days to the concert. She agreed and we started brainstorming what a Carolina Chocolate Drop would look and taste like.

Chocolate would be an obvious major flavor component. I thought a drop shape, perhaps with an over-sized chocolate chip on top, would be achievable if the dough were similar to a peanut butter blossom cookie.

What about the Carolina? The band hails from the Piedmont region of North Carolina, specifically. They happen to be known for their pecans, which would make for a lovely addition to a chocolate drop cookie, don't you think?

We hit the kitchen with ferocity, accompanied by CCDs' Cornbread and Butterbeans (my fave) and Knockin' (Lil's favorite, though I hope she can't understand the lyrics).

A few batches and tweaks later, I present the Carolina Chocolate Drop Cookie.

[print_this]

The Carolina Chocolate Drop

makes 4 dozen two-bite sized cookies

1/2 cup vegetable shortening 1/2 cup unsalted butter 2 ounces dark baking chocolate, melted and cooled to room temperature 2/3 cup granulated white sugar 2 tablespoons milk 1 egg 1 teaspoon vanilla extract 1 teaspoon baking soda 1 teaspoon salt 1 1/4 cup all purpose flour 1/4 cup high quality cocoa powder 1/2 cup pecans, chopped finely 2 tablespoons granulated white sugar 48 oversized dark chocolate chips, such as Ghiradelli

1. Cream butter and shortening in a mixer.

2. Add chocolate and sugar, mixing thoroughly.

3. Stir in milk, eggs, and vanilla. Cream for one minute until light and fluffy.

4. In a separate bowl, stir together baking soda, salt, flour, and cocoa powder.

5. With the mixer on low speed, slowly add flour mixture to creamed mixture. Stir just until mixed.

6. Stir pecans and 2 tablespoons sugar together in a small bowl, set aside.

7. Roll 1 tablespoon sized portions of dough into a ball. Roll in pecan sugar.

8. Place dough on a silpat lined cookie sheet. Press one chocolate chip into the top.

9. Bake at in preheated 350 degrees F oven for 10-12 minutes.


[/print_this]

Sour Cherry Preserves {Recipe}

We're dealing with some health issues, hence posting is light. I'll fill y'all in when there is some resolution. In the meantime, find some sour cherries. sour cherry preserves recipeThese are the best preserves ever.

If I could only eat one jam for the rest of my life, this would be it.

Sour cherry preserves kick the lid off all other preserves.

<insert your favorite superlative here>

I rarely make such declarations and in fact poke fun at Alex who overuses superlatives. But seriously folks, I love sour cherry preserves.

The luminescent crimson cherries yields a rich yet adaptable flavor. Sugar mellows the tart just enough to not cause a pucker but a piquant zap to the tongue.

Tart cherry jam is as at home in a crepe as on a charcuterie plate. A schmear on cheese sandwich elevates the everyday to the remarkable. On a buttermilk biscuit? Oh my...

The sour cherry season in central Ohio is nearly over but don't dismay. Our friends to the north are just beginning their harvest. Lisa the Waitress, in her sorely missed blog, suggests ordering cherries from Michigan through Jacquemin or Yutzy's Farm. The most recent Yutzy's newsletter said "SOUR CHERRIES. ARRIVING IN 2 SHIPMENTS 2nd AND 3rd WEEKS OF JULY. PLEASE CALL TO ORDER AND FOR PRICING. 614-873-3815"

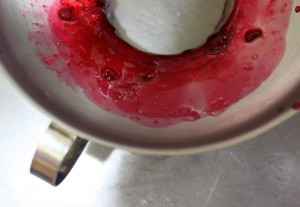
sour cherriessour cherry jam cookingsour cherry jam on funnel

[print_this]

Sour Cherry Preserves

makes 6-7 half pints

7 cups sour cherries, pitted and crushed 4 teaspoons calcium water (comes with Pamona's pectin) 2 cups sugar (add more or substitute honey as your taste dictates) 4 teaspoons Pamona's pectin

1. Stew sour cherries in their juice over medium heat in a heavy bottomed pan for 5-10 minutes.

2. Meanwhile, sterilize jars, lids, and rings. I like to heat clean jars in boiling water in my canning pot and put lids and rings in a smaller pot of boiling water.

3. Stir calcium water into cherries.

4. Measure sugar in a bowl. Stir pectin into sugar.

5. Add sugar/pectin mixture to the cherries. Stir and heat to boiling.

6. Once at a boil, turn off the heat. Put a teaspoon of jam in a bowl and place in freezer for 1 minute to test for the set. If it gels, proceed with water bath canning. If it does not set, stir one half cup sugar, 1 teaspoon pectin, and 1 teaspoon calcium water into hot cherries. Return to boil and test again.

7. To can, ladle hot jam into hot jars, leaving a quarter inch head space. Place lids and rings on jars and tighten to finger tight. Return jars to the hot water bath and process at boiling for ten minutes.

8. Remove jars from boiling water and allow to cool on a dishcloth covered counter for 24 hours. Remove rings, wipe away leaks, and store in a cool dry place for up to two years.

[/print_this]

Related notes:

  • My other favorite thing to do with sour cherries? Steep them in vodka for a month or two, sweeten with simple syrup to taste, and drink the most amazing liqueur for the rest of the year. Yum!
  • Read Lil's post about sour cherries.
  • Come to my strawberry canning demonstration at Easton Farmer's Market this Thursday to relieve yourself of fears about canning. I'll be in the Local Matters tent at 4 pm. I get to give away some canning supplies and samples too.

Added to Hearth & Soul 54.

Saucy Mama Asparagus Potato Salad

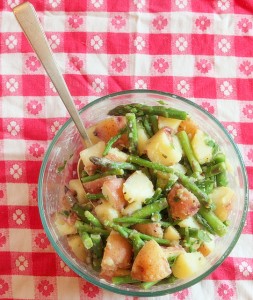
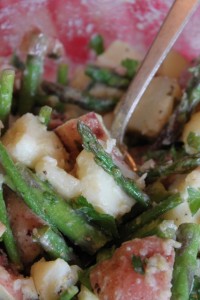
Another Saucy Mama Fabulous with Five recipe is coming at you today. There are twelve hours left to enter the Saucy Mama giveaway on my Egg Cups post! saucy mama potato salad recipe Last week, when it was sunny and warm, we fired up the grill for our first cookout of the year. I created this potato salad featuring local and seasonal asparagus to serve with Ohio bison burgers on homemade buns.

This salad is perfect for picnics or potlucks because with no eggs or mayonnaise, it can safely be served at room temperature. If asparagus are not in season when you make this, blanched sugar snap peas, green beans, or broccoli would be a great substitute.

I chose parsley as a fresh flavoring agent because it is growing wildly in my backyard garden. If you prefer another taste or have an abundance of a different herb in season, substitute at will.

potato salad ingredients

asparagus potato salad recipeThe trick to a great potato salad is properly blanching the potatoes and vegetables. Here's how:

Trim each vegetable to size and heat two large pots of water to boiling. Salt the water heavily and toss the vegetables in their respective pots. When tender, remove from the boiling water and dunk in a bath of ice water. This will rapidly cool the vegetable, preserving the crisp texture and appealing color.

To make the vinaigrette, mix the mustard, vinegar, salt and pepper in a bowl. While whisking, slowly drizzle in olive oil to make an emulsion. The oil will be held in suspension by the mustard to create a uniform tasty coating for all the vegetables.

I like this dish best after resting in the fridge for 12-24 hours. All the flavors have mingled by then. It is best served at or near room temperature.

[print_this]

Picnic Asparagus Potato Salad

serves eight

1 pound red skin potatoes (about nine small), cut in eighths 1/2 pound asparagus, chopped into 2 inch lengths 3 tablespoons fresh flat leaf parsley, chopped 2 tablespoons Saucy Mama Lemon Tarragon Mustard 1 tablespoon white wine vinegar 1 teaspoon salt (plus additional for blanching) 1 teaspoon ground black pepper 3 tablespoons olive oil

1. Blanch the potatoes and asparagus: Heat two pots of water to boiling over high heat. Salt water with 2-3 heavy pinches of kosher salt. Add potatoes to one pot and asparagus to another. When vegetables are tender (10-15 minutes for potatoes, 3-5 minutes for asparagus), remove from boiling water and dunk in an ice water bath until cooled to room temperature. Transfer to a serving bowl.

2. Make the vinaigrette: Whisk together mustard, vinegar, salt and pepper in a medium mixing bowl. Slowly drizzle olive oil into the mustard mixture while whisking. Continue to add olive oil slowly until all is emulsified.

3. Pour the vinaigrette over the potatoes and asparagus. Add the chopped parsley. Stir gently to coat the vegetables evenly with the sauce.

4. Serve at room temperature. Store before and after service in a cooler or refrigerator for up to four days.[/print_this]

Baked Egg Cups & Saucy Mama Giveaway

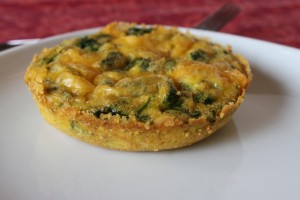
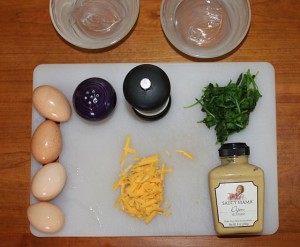
baked egg cupI like a good cooking challenge. When I heard about Saucy Mama's Fabulous with Five contest for food bloggers, I had to give it a shot. The competition required creating a recipe with a Saucy Mama condiment and only five additional ingredients. baked egg cup ingredients Having an abundance of backyard chicken eggs, I devised a simple and healthy breakfast or lunch dish. Each individual serving includes plenty of protein and, thanks to wilted spinach, a good dose of vitamins and minerals.

The recipe is perfect for a family on the go: make a triple batch and keep in the fridge for quick breakfasts or healthy packed lunch protein. It can easily be adapted to include the type of optional cheese and vegetables your family likes best.

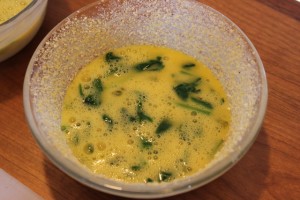
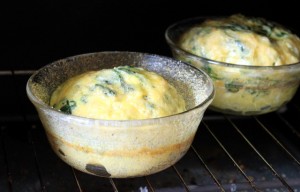
baked egg cups before bakingbaking egg cups To make Saucy Mama baked eggs, butter two dishes. Swirl in cornmeal for a crunchy crust. In a separate bowl, whisk together eggs, mustard, salt, pepper, and wilted spinach. Don't like spinach? Try steamed broccoli, wilted kale, cooked carrots, or boiled potatoes.

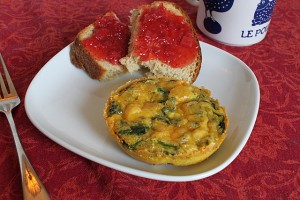
Pour the egg mixture into the prepared bowls and top with your favorite kind of cheese if you like. The pictured dish includes a cheddar cheese topping.

Bake for 25 minutes and serve warm or at room temperature. Store in the fridge for up to four days.

baked egg cup recipe

In addition to providing me with a sampler of mustards and sauces, Saucy Mama wants to give away a condiment package of Saucy Mama Sweet Heat Marinade, Saucy Mama Tarragon Lemon Mustard, and Saucy Mama Pacific Rim Ginger Dressing to one of you!

{Update 5/20: Giveaway has now closed.} To enter the giveaway, comment below with your favorite way to use mustard. Comments must be received with a valid email by midnight on Thursday, May 19. A winner will be chosen by random.org and announced on the Hounds in the Kitchen facebook page and via email on May 20. The winner will have 48 hours to respond or a new winner will be selected.

[print_this]

Saucy Mama Breakfast Egg Cups makes 2 meal sized servings

1 teaspoon butter 2 tablespoons cornmeal 4 eggs 1/2 teaspoon salt 1/2 teaspoon freshly ground black pepper 1/2 cup wilted fresh spinach (about two large handfuls) or thawed frozen spinach or your favorite vegetable 1 teaspoon Saucy Mama dijon mustard 1/2 cup shredded cheese (optional)

1. Butter two one-cup sized oven safe dishes. 2. Place 1 tablespoon cornmeal into each dish and turn to coat the butter with cornmeal. 3. In a small bowl, whisk eggs, salt, pepper and mustard. Stir in wilted spinach. 4. Pour egg mixture between two dishes. Top with shredded cheese, if using. 5. Bake in a 350 degree F oven for 25 minutes or until cooked through and browned on top. 6. Eat in the cup or turn out of cup to serve.

NB: You can bake these cups ahead and store in the fridge for up to four days. Eat chilled or reheat for 30 seconds in a microwave.[/print_this]

Taco Truck Chorizo Sopito

Often described as a 'cow town', Columbus, Ohio is actually full of cultural treasures. One such subculture is the taco truck scene. Food carts across the city highlight delicious specialties from the owners' regions of their home country. One of my favorite trucks, Taqueria Jalisco, serves a menu reflective of the Jalisco state of Mexico. Their meat is perfectly seasoned, service is prompt and attentive, and everything is clearly homemade.

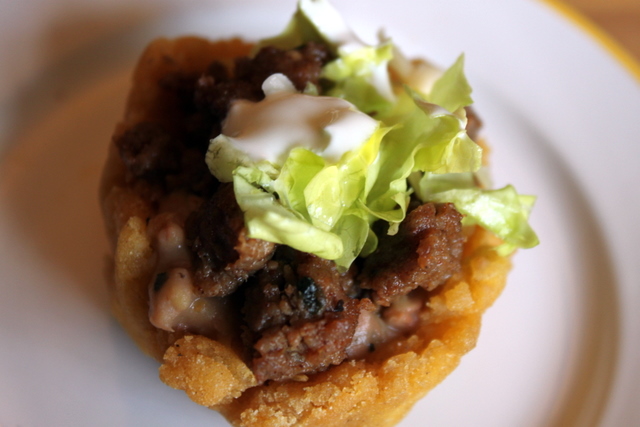
taqueria jalisco chorizo sopito

My favorite menu item? The chorizo sopito, pictured above. A sopito is a small thick corn shell topped with beans, meat, lettuce, and crema, at a minimum. When the Charcutepalooza challenge for May was announced, bulk ground sausage, I knew I had to recreate a taco truck chorizo sopito at home.


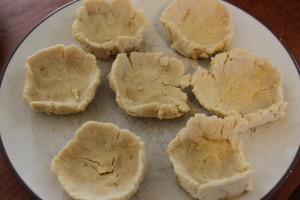
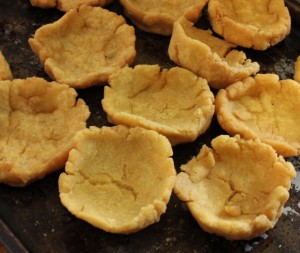
sopito sopes doughpre-baked hand formed sopitosfried sopito shells


I started by making the sopito shell. The dough is a simple mixture of 2 parts masa harina corn flour to 1 part water and a dash of salt. After it rested for about half an hour, I hand formed thick shell shapes out of the dough. Alex fried them in four inches of oil at 350 degrees F for four minutes, turning once during cooking.

While homemade chorizo browned in a skillet, we cooked down pinto beans with onion and green chili and blended them to a fairly smooth texture, ideal for topping. Shredded lettuce, grated queso blano cheese, and faux crema (sour cream mixed with a little milk) were the frosting on the sopito cakes. Had I remembered it in the fridge, I would have added chopped avocado ala another of our favorite trucks, The Eighth Taste.

homemade chorizo sopito


I am, of course, biased, but I believe our homemade sopitos bested Taqueria Jalisco. The freshly fried shells were mouth-wateringly crisp on the outside and densely corn flavored inside. The cheese and crema cooled the slight heat chorizo. The only downside to making this dish is that after two hours of preparation, the sopitos were gobbled up in a matter of minutes!

[print_this] Chorizo Sopitos makes eight-twelve appetizer sized servings

3 cups masa harina 1 1/2 cups water 1/2 teaspoon salt

1 cup homemade chorizo, browned ((I refer you to the book Charcuterie or Mrs. Wheelbarrow's tutorial for instructions on making bulk chorizo at home.)

1 teaspoon olive oil 1 yellow onion, diced 1 clove garlic, minced 1 4 oz can diced green chilis 1 can pinto beans 1/2 teaspoon salt 1 teaspoon chili powder

oil for frying (1-2 quarts)

1 cup shredded lettuce

1/4 cup crema or 1/4 cup sour cream plus 2 teaspoons water

1/2 cup shredded queso blanco cheese

1/2 avocado, diced

your favorite hot sauce (optional)

1. Mix masa harina, water, and 1/2 teaspoon salt in a bowl. Allow to rest for 20 minutes.

2. Meanwhile, heat olive oil in a medium sized pot over medium heat. Add onion and garlic and cook until translucent.

3. Add chilis, beans, chili powder, and salt to the pot. Cook until beans begin to break down.

4. Turn off the heat. Use an immersion blender, or carefully transfer to a stand blender, to blend until almost smooth. Set aside.

5. In a dutch oven or wide pot, heat oil to 350 degrees F. Oil should be at least 4 inches deep.

6. Form sopito shell shape by forming a disc with approximately 1/2 cup of the dough. Press it into your palm while raising the sides up.

7. Carefully fry two-three shells at a time, turning once during cooking. When they are golden brown all over (approximately 4 minutes total), remove to a paper towel lined plate.

8. Assemble the sopitos: Top each shell with blended beans, chorizo, cheese, lettuce, and crema. Allow guests to add hot sauce as they desire. Eat with gusto! [/print_this]

Fruity Dutch Baby Recipe

The lovely Catherine of Photo Kitchen came over last week to take photographs for Hounds in the Kitchen Egg Week 2011. On Monday and Tuesday I shared how to blow out eggshells and decorate eggs with natural dyes. Stay tuned for tomorrow's eggshell seedlings and Friday's tips and tricks.

cutting apples for dutch baby recipe

Today I am sharing a recipe that is not only delicious and simple, but has a name that will delight kids and garner odd stares from unsuspecting adults.

A dutch baby is a popover-like breakfast baked good, often sweetened. Useful for using up excess backyard fresh eggs, we add fruit for a hearty and nutritious meal.

Like so many simply delicious foods, a dutch baby requires proper preparation, or mise en place. I usually start with the fruit. Core and slice apples, pears, or plums thinly. Washed and halved cranberries or cherries are welcome additions. Have flour, egg, milk, and salt on standby.

The other key to this recipe is the proper pan, in this case a cast iron skillet.  A properly seasoned skillet discourages sticking and the pan holds heat to cook the pancake quickly.

dutch baby recipe melt butter

Preheat the oven with a cast iron skillet inside. When the oven comes to temperature, add in the butter to melt but not burn.

dutch baby batter and apples

Meanwhile, whisk up the batter of eggs, flour, and milk, flavored with vanilla, cinnamon or nutmeg if you like. The batter is measured with the simple the popover ratio below. I also listed the exact measurements to fill a 12 inch cast iron skillet and feed four.

making a dutch baby recipe

Just as the butter is melted, layer brown sugar and fruit on the bottom of the skillet. Top with batter and return to the oven.

cooked dutch baby in pan

20-30 minutes later, a golden puffy pancake is ready to emerge. Turn it out of the pan, slice, and serve as is or with powdered sugar and/or lemon juice. Crisp on the outside, warm and soft on the inside, a fruity dutch baby is a textural treat.

homemade apple dutch baby serving

[print_this]

Fruity Dutch Baby

Popover Ratio

1 egg : 1/2 cup milk : 1/2 cup flour : 1/4 teaspoon salt

Recipe to fill a 12 inch skillet serves four

3 tablespoons unsalted butter 3 eggs 1 1/2 cups milk 1 1/2 cups all-purpose white flour 3/4 teaspoon salt 1/2 teaspoon vanilla, optional dash, nutmeg, optional 1 large apple, peeled and sliced, or 1 cup of other fruit 1/4 cup brown sugar 1/2 teaspoon cinnamon, optional

1. Heat oven to 350 degrees F. with skillet in the oven on middle rack. 2. When warm, place butter in the skillet to melt. 3. Whisk eggs, milk, flour, salt and optional vanilla and nutmeg. 4. When butter is melted, carefully sprinkle brown sugar and cinnamon over the bottom. Arrange apple sliced on top of that. Pour batter over the apples and return to the oven. 5. Remove the dutch baby from the oven in 20-30 minutes, when top is browned. Turn out from pan and serve warm with powdered sugar and lemon juice, if desired.

[/print_this]


All photos with the Photo Kitchen watermark belong to Catherine and were generously shared with me. You may purchase copies and view the whole set of photographs in the online gallery with password lileaster. Use the coupon code houndscrossover to receive 25% off prices until May 15.

Road Trip Treats: Grandma's Ginger Snaps

We are leaving for a road trip vacation to Massachusetts on Thursday. One way we conserve money and stay away from overly processed food is to make our own treats for the trip. Stay tuned for several homespun road trip ideas over the next two weeks.grandma's ginger snaps recipe

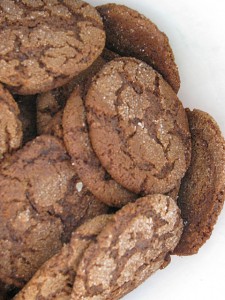
My grandmother makes Ginger Crinkles, aka ginger snaps, for family gatherings. My dad, his siblings, and their kids (that is, myself, my sisters, and cousins) all love these cookies and have been known to hoard them from each other.

Ginger snaps are the favorite of Dad's side of the family with good reason: they are perfectly spiced, have a delightfully crispy texture, and pair easily with hot coffee, milk or beer.

Making Ginger Snaps

These cookies cook up easily and travel well. Lil and I make them with a single bowl and only dirty a one cup dry and 2 cup liquid measure. No mixer is required. The hardest part of the recipe is getting the sticky molasses out of the measure into the mixing bowl! My trick for this is to measure the oil into a liquid measure and pour the molasses in next so the oil acts as a nonstick barrier.

After they are baked and cooled, I store ginger snaps in a wide mouthed half gallon canning jar or plastic container. They keep this way for...well, I'm not sure. They disappear in a few days around my family!


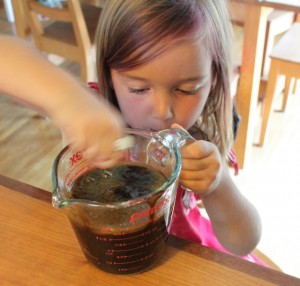
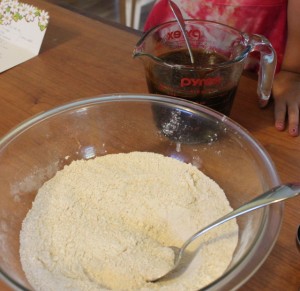
child mixing gingersnaps recipechild mixing gingersnap cookies recipe Substitutions


This recipe is originally dairy free and can be made vegan by substituting flaxseed meal and water for the egg. Follow the link for a thorough post about making and using this substitute by GNOWFGLINS.

I have made this recipe substituting white whole wheat flour for the all-purpose flour. It bakes up fine but the texture and taste is noticeably different. A 50/50 mix of white whole wheat and white is almost imperceptible.

child friendly gingersnap recipesisters enjoying gingersnap cookiesmunching on gingersnap Goofy Tayse girls enjoying gingersnaps at a rainy tie dye party last summer.

[print_this]

Grandma's Ginger Crinkles, aka Ginger Snaps

2/3 cup vegetable oil 1 cup sugar + 2 tablespoons sugar for rolling 1 egg (or 1 tablespoon flaxseed meal and 3 tablespoons water, whisk and let stand for 5 minutes) 4 tablespoons molasses 2 cups flour 2 teaspoons baking soda 1/2 teaspoon salt 1 teaspoon ground ginger 1 teaspoon ground cinnamon

1. Heat oven to 350 degrees F.

2. Measure flour, soda, salt, ginger, and cinnamon into a mixing bowl. Stir together.

3. Measure vegetable oil, sugar, egg, and molasses into a glass liquid measure. Whisk together until thoroughly combined.

4. Pour the liquid into the dry ingredients and stir together until mixed completely.

5. Drop by teaspoonfuls into a small bowl that contains the 2 tablespoons sugar. Form into balls and coat with sugar.

6. Place on a silpat lined cookie sheet 2 inches apart. Bake for 15 minutes. Cool on a rack.

[/print_this]


My grandmother is a great cook. You may also enjoy Grandma's Rhubarb Crunch recipe.

Added to Hearth and Soul Volume 43.