It's Garlic Planting Time!

We cook with garlic almost every day.  Did you know that garlic is simple to grow and so delicious when picked right from your yard?  It is! homegrown garlic

The hardest part of growing garlic is that you must plan ahead.  Garlic needs to be planted in the fall, overwintered in the ground, and then harvested in mid summer.

To grow garlic, first you need a space in the garden.  Garlic only needs to be spaced about two inches apart, so you can have a good harvest in a small area if you don't have an expanse of beds.  Garlic does best with full sun in well turned soil.

Next, you need seed garlic.  The simplest, cheapest way to get these is to buy organic garlic from the grocery store and plant the individual cloves.  The risk in planting grocery store garlic is that you have less control over the variety and if the garlic has not been stored properly it might not grow.

Local nurseries sometimes carry seed garlic.  Be sure to call ahead, as the dates when garlic arrives vary by location.

This year we are ordering from thegarlicstore.com because we want to try some of the unique varieties they offer.  In Ohio, hardneck varieties grow best and store best, so that is what we recommend.

Plant your cloves in early fall.  For Ohio, you can plant anytime in the fall through early winter.  Our biggest lesson learned last year is that spacing can be tight.  Just leave enough space for a head to grow between each clove.

The cloves will overwinter with no visible growth.  They need the cold temperatures to signal side buds to grow.

As spring warms the ground, those side buds will develop into cloves.  The garlic will send out tall shoots over the soil.

mid spring garlic babies in the front of this bed

In late spring or early summer, a garlic scape will develop.  This strangely shaped growth will develop into a flower, but is it best picked off to allow the garlic to develop into cloves.  The scape has a rough texture but tastes like mild garlic or strong chives and is delicious in stir fry or salad.
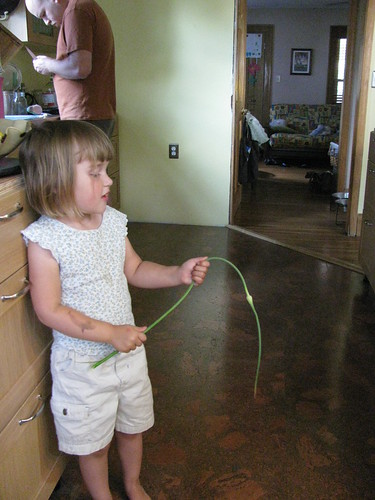
if you dont want to eat the scape, it makes a great magic wand

When the shoots finally start to turn brown and droop, it is time to harvest your garlic.  Pick one plant to make sure it is well developed.  When you like the size of the bulbs, pick all the plants.   Allow to dry in open air.  After a few days, remove the shoots from the top leaving at least a few inches of the hardneck. Scuff off the roots and outer sheath.

Store your harvest in a cool (around 50 deg F), dry, well ventilated place. Garlic  is deliciously milky and soft when it is young and will turn more pungent as time passes.

Mmmm....garlic!

Camp Food

This weekend we went to our annual Labor Day Camp with family and friends.  Every year we have a theme night with costumes and related food.  This year our friend Leonard went all out on the theme, Hawaii. I could write about the tiki hut trike, our chant to counter the hellfire and brimstone preaching group across the way, the 25 mile bike tour including a confederate prisoner of war camp, or the bald eagles we saw fly over East Harbor State Park many times.  But since this is largely a gardening and eating blog, I will focus on the food.

We started our drive early Saturday morning.  With some extra pizza dough as inspiration on Friday night, I made a pear and mozzarella pie to take on the road.  I chilled the cooked pie overnight in the fridge.  It was filling, yummy, and easy to eat in the car.

The camp stove saw heavy use in the mornings at camp.  Breakfasts are my favorite because someone else (usually my dad or grandfather) always does the cooking!  Being that I have food and only food on my mind early in the morning, I took no pictures of our actual breakfasts.

It is harvest time here in Ohio, so the food table was laden with seasonal fruits and vegetables.  My grandmother brought some delicious yellow melon pictured below.

Camp lunches for us are simple sandwiches, fruits and veggies, and chips.

For the Hawaiian themed meal, Alex braised a pork shoulder with pineapple and cinnamon.

Other theme dishes included mai tais, beanie weanies with cocktail umbrellas, and a poi substitute: mashed potatoes with a beet adding color.

alcohol = not allowed in state parks

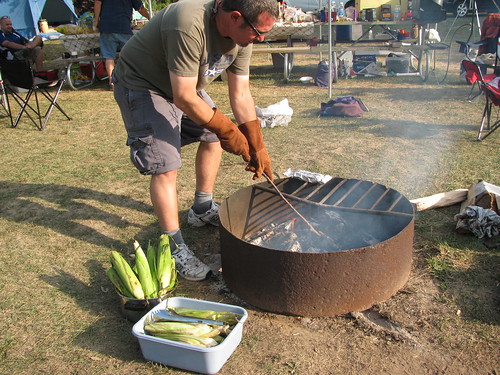
The next night we had grilled meats, salads, fork mashed guacamole and roasted corn.

Dad preparing the fire for water soaked ears

Grandma brought her famous gingersnap cookies, my favorite of the snacks.

And there were s'mores, of course.

What do you eat when you are car camping?

Ideas for the Tomato Tonnage

After you have made tomato sandwiches, salads, stews, and more, it is tempting to just toss the rest of you CSA or home garden tomato harvest in the compost heap.  Preserving tomatos is not that hard and you will thank yourself in the fall for putting up farm fresh goodness.  Here are a few ideas for easy preserving: Make pseudo sun-dried tomatos: Halve and dry in a dehydrator or low temp (as low as you can get it, ideally 145 deg F.) oven for 12 - 24 hours.  They will be ready to store at room temperature when you can break one in half and see no beads of moisture.

Make easy sauce: Most tomato sauce recipes call for blanching the tomatoes, which is the most time consuming (and burn inducing) part of the work.  It is easier to just skip the blanching and puree the whole tomato.  Freeze your sauce for less work than canning.

Make ketchup: Ketchup (catsup?) requires a tremendous amount of tomatos.  Just yesterday I made a batch with about 15 pounds of tomatos and ended up with a meager three half pints of ketchup.  Homemade ketchup is fabulously delicious, making it worth the effort.  These are basic directions, which I modified by substituting molasses and honey for sugar and juniper berries for aromatics.  If you aren't obsessed with canning like me, just freeze in small containers.

brought to you by the ketchup advisory board

Freeze: As a last resort, throw your maters in the freezer.  Whole is fine.  Put them in a container to reduce freezer burn.  When you thaw frozen whole tomatoes, the texture will be completely broken, but they are still useful to add to stews and sauces.

Even if you do compost rotten tomatos, all is not lost.  Our compost heap volunteers have turned out to be fabulous producers!

check out this volunteer fivesome

'Easy' Tomato Sauce

One of the more difficult parts of most tomato sauce recipes is blanching the tomatos.  Removing the skin has to be done in small batches and then you are left with slippery juicy innards to chop.  Not to mention that one more pot of boiling water on the stove means more chances to burn oneself. Sometimes when we make sauce, like when we made pepper tomato sauce last week, we skip the skinning.  The resulting sauce has a meatier texture than sauce made with blanched tomatos.  It's a fair trade in my book at the end of a long canning season.

The 'easy' routine is:

Chop tomatos and other ingredients roughly

Stew until soft

Blend until smooth

Simmer until thick

Can or freeze

Viola!

Work in Quarts and Pints

I put in six hours at the kitchen today.  My work was measured in quarts and pints; four and twenty one, respectively. It started with these fifty pounds of organic tomatoes from Green Edge Gardens.  (Daughter pictured above is only thirty eight pounds.)
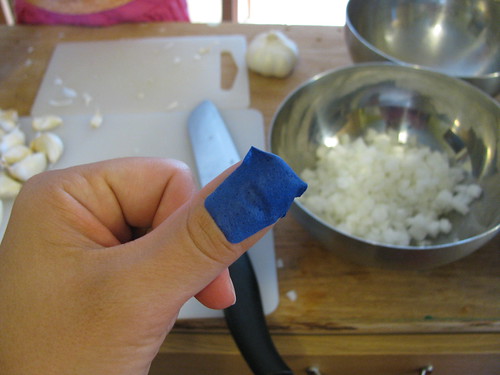
Then my friend Sarah and I chopped and sauced.  Thank you Sarah not only for your help but for bringing your sons to entertain Lillian.

knife was indeed sharp as the devil himself

2 large onions, 2 heads of garlic, handfuls of basil, 25 lbs tomatos, balsamic vinegar, salt, pepper

Next was the canning.

And finally, pints and quarts of chopped tomatos and tomato sauce to put up for the winter.

I will not lie: canning tomatos is hella more work than jam.  Like jam, the results are outrageously more delicious than what you can buy from the store.  In mid-winter all the work seems to be worth it.  At least that's what I remember from last year.

Make It Yourself: Dried Herbs

Herbs are big and bushy around Central Ohio right now, which means it's time to think about drying some for the winter. Many people also grow herbs inside and we'll certainly try that, but indoor gardening remains difficult for me.

Here's how I dry big leafed herbs like basil, oregano and mint:

1) Pick whole stalk (or buy from the farmer's market)

2) Wash and pat dry

3) Hang by clothes pins on the clothes line in bright sun. If you don't have a clothesline, look for a sunny spot where air circulates well.

4) Bring in at night (to avoid dew re-wetting them)

5) Hang one more day

6) When herbs are completely dry (they will be crispy textured), bring inside

7) Use fingers to rub off the leaves

8 ) Package in labeled glass jars or ziploc bags

homegrown mint tea awaits us in winter

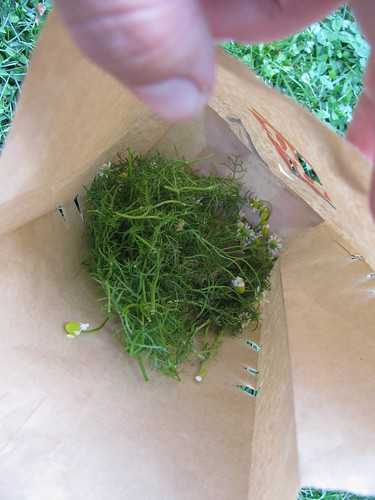
For more delicate herbs (thyme, chamomile), I modify the above steps by hanging them inside a cut up paper bag on the clothes line.

notice the tiny cut holes in the sides

The bag catches any little pieces that might dry and fall off. This is particularly important for chamomile, as the best tea is made from the flowers.

Come visit me on Saturday 12 - 3 at Wild Goose to make your own drying bag and take home a stalk of herbs to dry for yourself!

Best Ways to Store Fresh Foods

When I was co-leading the Freezer to Table class at Wild Goose last weekend I realized that we completely missed the first step in produce preservation: proper storage of raw fruits and vegetables. Many foods can be preserved in their raw state for a long time if done at the right temperature and humidity.  Here are tips for extending the life of your fresh local foods, whether from your garden, farmer's market, or CSA:

~Eggs: If you get eggs directly from a farmer, develop a relationship and ask them to give them to you unwashed.  Unwashed eggs will keep at room temperature (just set them in a bowl on the counter) for 4 -5 weeks.  Washed eggs keep in the fridge for weeks at a time too.

~Bread: We store our fresh baked bread in a bread box.  It stays moist but doesn't mold for at least 3 -4 days, by which time it has usually disappeared in our house.

~Carrots/Beets/Rutabagas: These root vegetables last for months if you store them unwashed (dirty) in a loosely tied grocery sack in the refrigerator.  They would also keep well in a proper root cellar, but we don't have one of those.

lop off the tops and put these right into a bag

~Winter Squash/Pumpkins: Hard skinned squash stay fresh for months if kept unwashed at cellar temperature and low humidity with plenty of air flow.  Leave at least some stem on, as stemless squash will often rot at the top.  We keep them in a single layer on shelves in the basement near the dehumidifier. Use squash with blemishes first.

hokkaido blue ready for storage

~Tomatos: Always leave on the counter for best flavor and texture.

~Lettuce/greens: Store unwashed in the refridgerator in a loosely tied plastic sack. Only wash and cut what you will use in the span of a day or two.

~Onions/Garlic/Shallots: Store in a cool low humidity environment with skins on.  Don't put these bulb vegetables with your potatos or the potatos will develop eyes more quickly.

~Blueberries/Stone fruit (plums, peaches, etc.): Flavor and texture is best preserved by leaving them unwashed at room temperature.  These healthy beauties get eaten much faster when we leave them on the counter too.

And my favorite tip, shared by Charlie of Windy Hill Apple Farm:

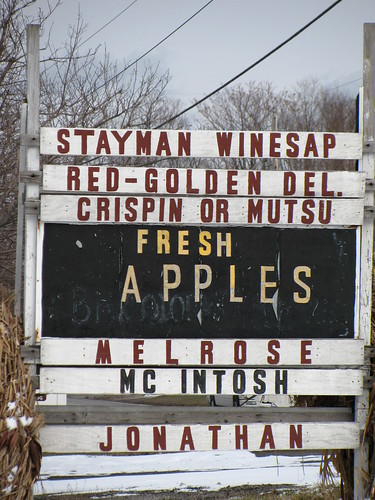
~Apples: Wash your fresh apples, place WET in a loosely tied plastic grocery bag, and store in your fridge.  Every month or so, re-wet apples to keep them crisp.

This changed my life and I was able to enjoy delicious Ohio apples from fall picking all the way through late spring!

Do you know any tips to share for storing raw foods?  Questions about foods that go bad quickly?  Leave a comment!

Shellfish

I have always loved shellfish. Both sides of my family originated in New England, so maybe it runs in the blood. Growing up my family regularly visited the northeast coast every summer to see relatives and relax on the beach. At a young age I had already begun digging up razor clams and quahogs on the sand flats of Cape Cod Bay. I loved the clam chowder we could make from quahogs, but the razor clams always tasted rubbery to me. I was to later find out that we were simply not cooking them properly.

I am writing this post on our way back from another summer vacation in Massachusetts, and I thought it should be about my shellfish experience this year. For me, part of the fun of shellfish has always been harvesting them myself. Of course I like a good fried clam platter from Turks in Mattapoisett, but there is something very satisfying about digging up my own clams and mussels. As a general rule, shellfish are much more prevalent in sheltered waters versus open ocean. Let’s look at the different types of shellfish and where they can be harvested.

collecting

Mussels

Mussels can be found attached to most anything in the inter-tidal zone, but are most easily harvested from beds in flat sandy/muddy areas with plentiful sea grass growing.

mussels in situ

These mussels are at Planting Island in Marion, MA. The mussels will be submerged ½ to 2/3 in the muck and need to be firmly pulled out. They will still have their ‘beard’ attached and may have seaweed stuck to their shells. Don’t clean off the beard until you are ready to cook them. Mussels are best prepared by steaming in a pot with wine or broth and plenty of aromatics. They are delicious and staple seafood of the Portuguese communities on Massachusetts’s south coast.

mussels in paella

Clams

Clams in New England come in two main varieties in Massachusetts. Quahogs or littlenecks (cherrystone) are a thick shelled clam that is only differentiated by their size upon harvesting. They are delicious when eaten raw, but are the primary ingredient in traditional New England clam chowder (unlike Manhattan clam chowder, this is a creamy milk-based soup). The other variety is softshell clams (steamers). These clams are primarily consumed like mussels after they are steamed in an aromatic broth and dipped in butter prior to eating. These clams are also the clams used for fried clams or clam strips. Both varieties are found in sandy or muddy flats at low tide. The send up small siphons and can be spotted by the holes in the sand. Sometimes stepping near the hole will cause the clam to squirt water into the air. Quahogs reside very close to the surface, but softshell clams are much deeper dwellers and must be dug for vigorously as they will try to escape by burrowing deeper.

Oysters

In New England, oysters are present, but not as common as in warmer southern waters. They are usually found at low tide having washed off of theirs beds and ending up in the inter-tidal zone. They can be collected laying on the surface, but are not too frequent. Usually enough can be gathered for a small appetizer. A proper shucking knife, hand protection and a good demonstration is recommended before attempting to open oysters.

Scallops

Scallops are not usually encountered as they generally live far out to sea and dwell on the bottom. Occasionally, they will be washed into the inter-tidal zone and can be collected on the beach.

So what other issues surround shellfishing?  Like most types of hunting/fishing, every state regulates the practice to one degree or another.  Do you need a license to shellfish? The answer varies from state to state. Generally, most states allow a limited amount of harvesting for personal use with no license required. Additionally, you should always pay attention to fishery postings in a particular area prior to shellfishing. Conditions such as red tide or pollution can lead to serious sickness or death if warnings are not heeded. Also as a rule any shellfish that cannot hold its shell closed should be discarded out of hand as it could be diseased or dead and not fit for consumption.

always watch your harvest

So next time you are at the beach, look around and see what you can find. Dinner might be as simple as a few minutes work of gathering. Your efforts will be rewarded by a delicious meal fresh from the sea.