Honey Blondies

Tomorrow's Kids Cook class is all about honey.  I searched for a dish that featured honey and would be appropriate for us to make and package as a Valentine gift.  Enter honey blondies.

Really a short dense cake, these treats are sweetened by honey alone.  They are delicious and super easy to make.  I baked them in a heart shaped silicone mold for this occasion, though they bake up just fine in an 8x8 inch pan as well.  Chocolate chips would be an tasty addition.

[print_this]

Honey Blondies Makes: 16 small bites Time: 15 minutes preparation, 20 minutes baking

1/2 cup good quality honey 1/2 cup (4 oz) butter, softened 1/2 tsp. vanilla extract 1 egg 1 1/2 cup white whole wheat or all-purpose flour 1/2 tsp. baking powder 1/2 tsp. salt

1. Preheat oven to 350 degrees F.

2. Cream honey with butter until fluffy.

3. Beat in egg and vanilla.

4. Mix well and then gently fold in flour, baking powder, and salt.

5. Line 8x8 pan with butter and bake in preheated oven for 20 minutes. Let cool, then cut into squares or pop out of molds.

[/print_this]

I received discounted honey for this recipe from the fine folks at Honey Health Farms at the Clintonville Winter Farmer's Market. Visit their detailed website to learn more about honey harvesting and benefits.

Tips to Save Time Cooking

I recently revealed that on a fairly average week, we spend a little less than 13 hours cooking.  That's a lot for some families, but there are ways to spend your time in the kitchen efficiently and still prepare whole food driven meals.  Here are some tips:

  • Prepare or pack lunch the night before, ideally as you are cleaning up dinner leftovers.
  • Prep veggies for the week on a single day.  Cut apples can be kept fresh in the fridge with a splash of lemon juice, carrot sticks can be kept upright in a little water, washed dry greens will keep for a few days in a barely closed container.
  • Build bread baking into your weekend routine.  Maybe start it before brunch, allow to rise during, and bake after.  Or, start on saturday night, rise overnight in the fridge, and bake on Sunday morning.
  • Unload or load the dishwasher as breakfast is cooking.  I typically put a pot of oatmeal on the stove, heat up water for french press, and then unload the dishwasher as those are cooking.  By the time I sit down five minutes later, the kitchen is ready for the day.
  • Keep knives sharp.  Sharp knives cut better, saving you time and making the task more satisfying.
  • Plan simple meals.  Home made cooking need not be complicated.  Soups are great simple meals often made in one pot.  Vegetables can be roasted alongside a simply seasoned serving of meat or tofu and served with a salad.
  • Use leftovers.  Eat them as is for lunch or transform into the next night's meal.
  • Eat fresh raw foods.  Sides at dinner are often cut fruit or veggies.  Lunch usually includes a whole piece of fruit.  Snacks are nuts, dried fruit, or veggie sticks.  Not only are raw foods easy to prepare, they are great ways to get vitamins and fiber in your diet.
  • Use high heat quick cooking methods.  Trim foods into bite sized portions and cook over high heat for a stir fry.  Invest in a pressure cooker to cut roasting and bean cooking times by half or more.  Use a hot pan and sauté individual servings of meat or tofu.
  • Try quick cooking grains.  Pasta, quinoa, and couscous can all be made in under 30 minutes.  Look for whole grain varieties to get a little more fiber in your diet.
  • Double your recipes.  Freeze the extra portion for a quick heat and eat dinner sometime later.  This works especially well for soups, stews, and casseroles.
  • Practice.  The more often you trim carrots, peel potatoes, or bone chicken, the faster you become.  As you become more proficient at cooking, it will also become more fun.

What helps you save time cooking?

Time in the Kitchen

We aim to make most things from scratch.  To that end, we spend plenty of time cooking.  Because we love to eat, cooking does not feel like a chore.  Still, I was curious exactly how much time we spend in the kitchen. Like last year's gardening time study, I recorded every person hour in the kitchen this week.  This was a fairly typical week for our three person family with one lunch at a conference, one dinner at friends', one dinner at family, two dinners hosted here, and breakfast and lunch at home every day where not noted. Our menu for last week is here. There were also two 'special' events: sausage making and stock making.  In sum, we spent 12 hours 40 minutes cooking this week.

The breakdown is as such:

Sunday - 10 min. breakfast, 2 hours sausage grinding and stuffing, 15 min. prep dinner at friends.  (We snacked our way through lunch.)

Monday - 10 min. breakfast, 10 min. lunch, 30 min. beans, 20 min. dinner

Tuesday - 20 min. active bread mixing, 60 min. bread baking, 10 min. breakfast, 15 min. lunch prep, 20 min. food saving, 30 min. dinner prep., 15 min. dinner serving.

Wednesday - 10 min. breakfast, 10 min. lunch packing, 30 min. dinner prep, 30 min. making stock, 10 min. loading stock in freezer

Thursday - 10 min. breakfast, 5 min. knife sharpening, 15 min. cookie prep, 20 min. cookies baking, 10 min. lunch prep, 30 min. dinner prep, 30 min. dinner cook

Friday - 10 min. breakfast, 5 min. lunch prep, 5 min. afternoon snack, 30 min. pizza prep, 15 min. bread prep, 15 min. pizza baking, 60 min. bread baking

Saturday - 10 min. breakfast, lunch at volunteer event, 15 min. dinner salad prep (communal dinner with Rachel's parents)

I know that nearly 13 hours sounds like a lot.  For us it is time well spent because we enjoy cooking and eating simple made-from-scratch foods.  We also know that home cooking is healthier than processed food and cheaper than dining at quality restaurants.

Coming later this week: Tips to Save Time Cooking

Meal Plan Week of January 25, 2010

Before we get to the goodies of this week's plan, I wanted to feature a few things that help us follow our plan: the whiteboard and refrigerator shopping list. I write out the meals on the whiteboard so those who aren't paying attention when we meal plan and don't keep up with their RSS feed (ahem, Alex) have another reference point during the week.

I keep the post-it pad on the front of the fridge to write down foodstuffs as we run out of them.  When I go grocery shopping I add to the bottom of that list and take it to the store.  Does anyone else have a system like this?

Mindful MenusThis week's Mindful Menus will be:

Monday - salmon, salad, rice (Rachel will have dinner at Whole Foods before book club with Food Matters Columbus.)

Tuesday - root vegetable gratin topped with fried egg, applesauce

Wednesday - parmesan rind soup with chickpeas and kale, spaghetti and home canned sauce

Thursday - leftovers or quesadillas

Friday - vegetable pie with cornbread top crust

Saturday - Rachel's parents?

Sunday - Alex's parents

How to Store Bulk Flour

I recently organized a group buy for flour.  On Wednesday I unloaded a half a ton of flour for distribution to bakers in Columbus! The flour came to us in double walled paper bags holding fifty pounds of flour each.  Fifty pounds of flour is a lot for even the most prolific home bakers so proper storage is a must.

Flour will spoil if it gets too moist.  Bugs love to nest in it.  Mice and other rodents are attracted to flour too.

The first step in flour storage is to put it in the freezer for at least two days.  It can stay right in the paper bag.  The purpose of freezing is to kill any insect eggs that might have found their way into the flour.

We are fortunate to have a deep freezer but you could do this in batches in a refrigerator freezer too.  If you don't need the storage space you can keep the flour in the freezer indefinitely.

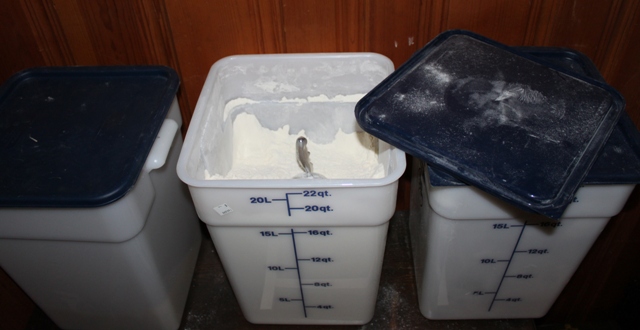
bulk flour bins

Next, portion the flour into airtight opaque storage containers.  Keeping air and light out will retain freshness.  We use bulk bins purchased from Wasserstrom restaurant supply.  Foodsafe five gallon buckets with tight fitting lids are another good choice.

Store your bulk bins in a cool dry place.  Our basement stays dry so we keep them there.  Other alternatives include a cool closet or root cellar.

Portion a few week's worth of flour into a storage container to keep where you bake.  We keep a large scoop in the bulk bin for this purpose.  We keep about three pounds of bread flour and white whole wheat in the kitchen plus a smaller portion of all purpose.

Finally, examine the bins regularly.  Clean any spills from around the area to keep pests at bay.

Our flour has remained fresh in this manner for up to twelve months.

Botulism: What Home Canners Need to Know

I promote home canning to extend the availability of seasonal foods.  Home canned goods also happen to be delicious. There's only one potential downside: foodborne botulism.

Alex and I were talking about preservation yesterday in relation to someone we know who doesn't use salt, but is taking up charcuterie.   Bad idea, I say.

I had some questions about botulism that neither of us could answer so I dug through some internet and print sources to come up with this guide about the potential risks of botulism.

What I found is that botulism is not much of  a risk.  It is preventable, very rare, and curable.  That said, all of us who are preserving at home should be aware of the signs, symptoms, and prognosis of botulism poisoning.

What it is: a rare poisoning from proliferation of the bacteria Clostridium botulinum.  An average of 30 cases of foodborne botulism are reported per year in adults in America.

Causes: bacteria in the soil or untreated water, improperly canned food, especially vegetables, cured meats, honey, corn syrup.

Symptoms: difficulty breathing, swallowing and speaking, abdominal cramps, vomiting, weakness, double vision.  Symptoms begin 6 hours - 8 days after eating a botulism infected food.

Treatment: Botulinus antitoxin, breathing treatments.

Prognoses: Botulism is fatal in up to 60% of untreated cases.  Treatment is effective, especially when started quickly after symptoms begin.

Prevention during canning: Can to recipe specifications.  Be sure to use the advised amount of salt or acid and keep at temperature or pressure for specified amount of time.  Use current recipes from the Ball Guide to Canning.

Prevention after canning: Inspect canned goods regularly.  Discard any with disruptions in the seal, a bulging lid, one with pinprick holes, or rust on the lid.  Botulism toxin can be destroyed by boiling the canned food for 20 minutes.

How concerned am I? Not concerned.

I do many things that are far more risky than eating home canned food, like driving, being tattooed, road cycling, eating peas off the vine, etc.  I'm glad to know more about the very slight botulism risk and I will continue to enjoy and promote home canned food.

Open Sky Store is Open!

There's a new way to find goodies to help you grow, cook, and eat simply: shop the Hounds in the Kitchen Open Sky Store.

I was first introduced to the Open Sky concept through bloggers Michael Ruhlman of Rulman.com and Tina of Carrots and Cake.  Open Sky provides the business background to source, ship, and accept payment for unique goods that bloggers want to share with their readers.  In return for promoting their items, bloggers get a share of the purchase price.

I would love to make a little income running this blog, but I ultimately decided to open a store because it allows me to share items I truly recommend.  The store currently has a small selection of cooking and gardening tools.  I have a long list of requested products in the Open Sky system from small producers, many here in Ohio.

Open Sky is a supportive community.  This weekend, for instance, they are donating 100% of their profits to Haiti earthquake relief efforts.  They often offer discount codes that I will share via twitter and facebook.  I promise to keep mentions and links discreet and always in line with my educational mission.

I encourage people to shop locally first.  I know that many of us do shopping online, however, and I hope the new shop can be an online resource.

In My Kitchen Cupboards

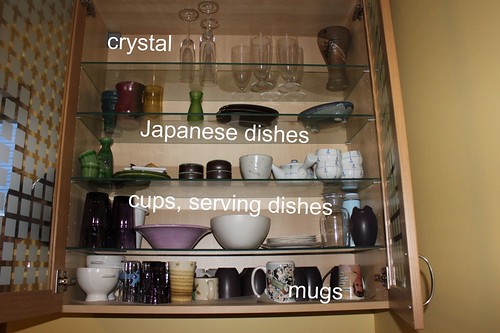
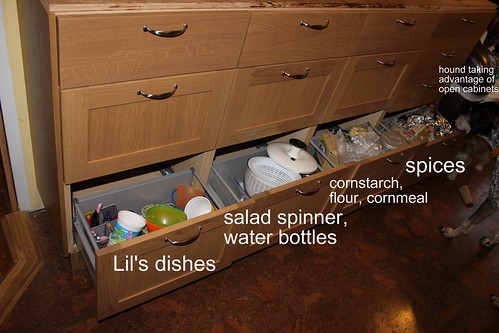
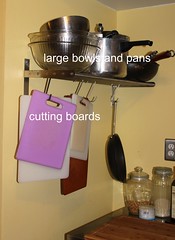
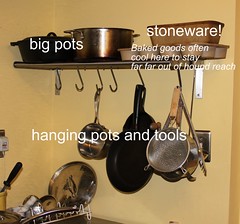
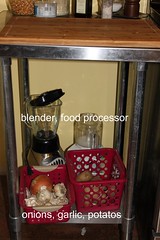
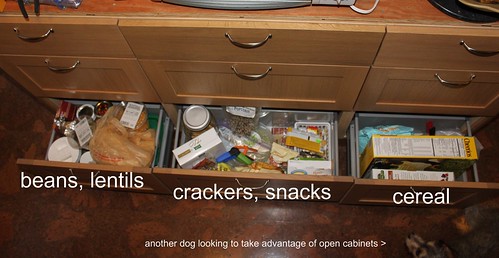
Friends were recently discussion kitchen cupboards.  A well organized kitchen thrills me, so I offered to photo-document what's going on in my cabinets. When I designed this kitchen in the fall of 2008, I centered my thoughts around working zones and storage. I'm a 'everything in it's place and a place for everything' sorta girl, so I designated space for what we use where we use it.  Primarily I selected IKEA drawers because they keep things organized.

In the photos below, I decided to keep it real and not style a thing.  That means some cupboards are messier than ideal. Here goes:

The sink and dishwasher are in the washing zone along with most of our serving dishes.

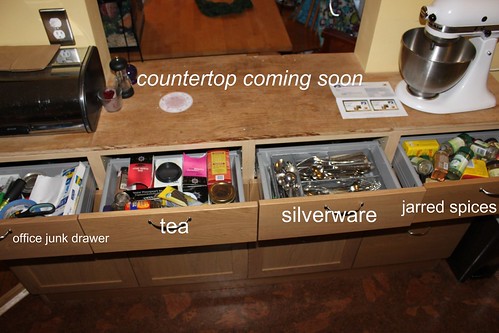
The counter on the pass through holds the Kitchen Aid Mixer on top and baking supplies in drawers below.
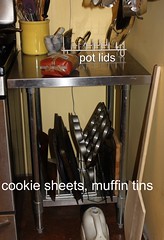
Surrounding the stove is open storage for pots and pans.

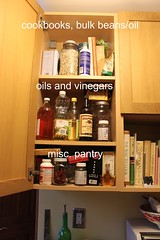
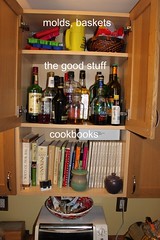
Pantry items and mixed drink supplies are in skinny cabinets along the wall opposite.

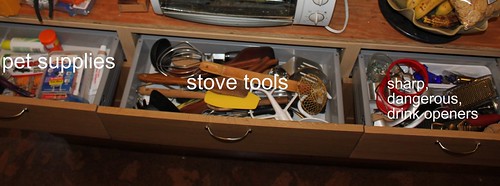
Cooking tools and more pantry items are in drawers below.

So there's a quick and dirty tour of my kitchen cupboards!  What's in your kitchen?  If you would like to join the bare-all party, leave a link to a post about your kitchen cupboards or pictures in the comments.