A New Woodshed

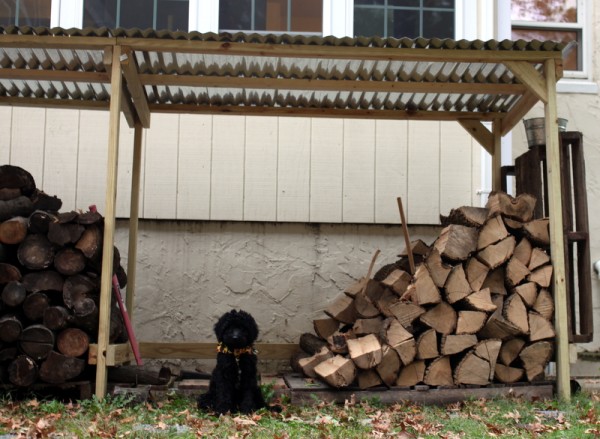
puppy with new woodshed

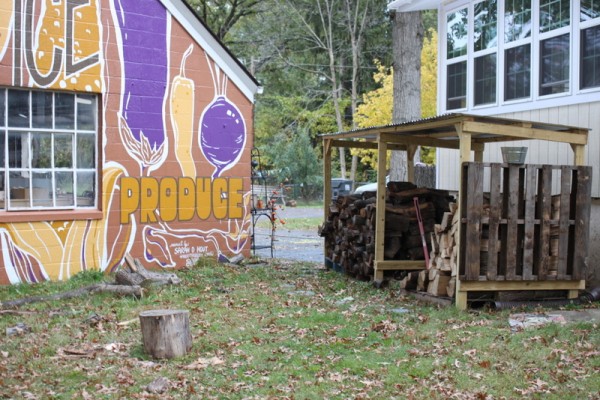
After hobbling through one winter with a tarp-covered pile of not-quite-aged-enough wood, we're doing it right this year. In a couple afternoons, Alex built a small woodshed. We're filling it with logs that were taken down over a year ago on the left and standing-dead ash on the right.

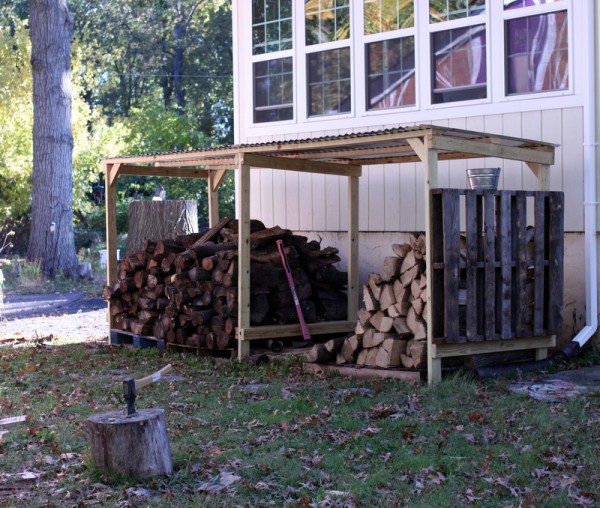
simple woodshed with pallet sides

Alex designed the woodshed as a lean-to with a reclaimed pallet floor and wall sections and a corrugated steel roof. We'll add pallets to the back if needed but for now want to allow the greatest air flow possible.

We chose steel for the roof because it is more durable and reusable than plastic sheeting or asphalt shingles and we wanted some experience with it for when we might need to replace our house roof. Steel roofing also has the distinction of being able to support itself with minimal joists which reduced our supply cost.

The woodshed is freestanding on cement blocks. We didn't want to dig a foundation and if our past is any indication we might want to move the structure in a couple years.

woodshed with muralOur homestead seems more homesteady with a real woodshed - stacked wood is like money in the bank, after all. Because the shed is adjacent to Sarah Hout's amazing mural, I know that gathering logs for winter wood stove heating will be more pleasant this year.

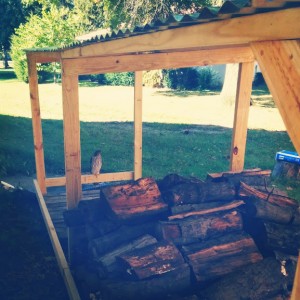
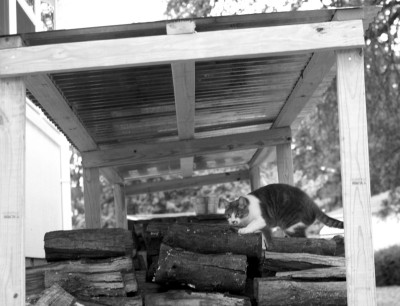
hawk on woodshedcat climbing on woodshed (2)

Already, we're not the only ones enjoying the new woodshed. We caught a hawk spying on a chittering chipmunk and Ms. Moonshine the cat regularly patrols for creatures.

How are you preparing for winter?

The DIY Kitchen Master Plan

I asked on Facebook about what parts of our DIY kitchen renovation you want to hear about and people commented that they want it all. Ok, here we go: The master plan.

Overall Vision

We plan to create a highly functional cooking space by updating to more powerful appliances and adding much more storage. We're aiming for a clean farmhouse look with stained white cabinets and warm, earthy accents.

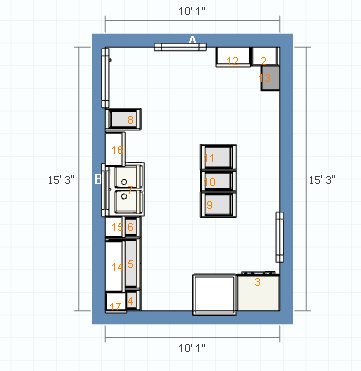
kitchen renovation plan

From The Bottom Up

After the old cabinets are re-purposed in other areas of our home and the old flooring is sent to the dump (sadly, we can't think of anything to do with cracked tile and worn vinyl), we'll lay in new wood or bamboo flooring. Unlike last kitchen when we spent big bucks for cork, this go-round we will choose something within our budget from whatever's in stock at a local flooring company.

Leonard Krashoc, mastermind behind the mudroom and children's book author (go buy his books!), will help us out with the kitchen. He's a whiz with drywall, so he's going to expand a doorway to allow easier flow through the house. He'll also help extend the gas line, fix the goofy wiring, and troubleshoot any unexpected projects we might uncover. Everyone cross your fingers that we don't find too much trouble behind the walls.

child sleeping in ikea

We went to IKEA today to order cabinets during their 20% off kitchen sale. It's not as boring as Lil makes it out to be - if you've done your homework with the 3D kitchen planner like we did, staff just does a double check, prints the list of every individual part, and collects payment. We opted for $149 delivery to our house which could have come as soon as this Sunday! (But we pushed them off a week because we aren't quite ready for stacks of cabinet boxes.)

All the base cabinets we ordered, including those in the island, are full of drawers. We miss drawers! Because we despise corner cabinets, we arranged for straight runs of cabinet only. Straight lines will make counter construction easier too.

We're going to make our own countertops again - this time with zinc over a plywood base. Zinc is food safe, easy to work, and will patina over time to add to the farmhouse feel. Catch up with how we made wooden countertops at our previous house in 2009.

The next big purchase to be made is the gas range top, double ovens, and outside vent hood. We're going with large, semi-professional grade cooking appliances in brushed stainless finish. We are not replacing the dishwasher and refrigerator right now because they're still working fine and we're wanting to stay within our budget of cash saved.

Lighting, paint, and decor will be simple and comprised of some pieces we already have.

Our plans sound straightforward when I write them out and perhaps that's why I only have ten days set aside for the project. I'll share our schedule and why I think we can remodel a kitchen in this timeline soon.

What do you think of the master plan? Will our third IKEA kitchen be our last?

Constructing the Hillbilly Hamhouse

Rachel's dad Mitch is contributing to the blog this week with his Mark Twain-esque story about making a hillbilly ham house. Start with Part 1 where he reasons out why to engage in the project. Today's part 2 reviews the construction process.hillbilly ham house construction Fer me, makin’ Christmas presents has jest one rule—I gotta use stuff I got aroun’ the house. I’s not spose to go roun’ buyin’ special tools an’ such. But that ain’t no big thang aroun’ my place—I saves me ‘bout ennythin’ a body’d ever need. I figger one day my life’ll depend on me makin’ me a washin’ machine or somethin’ outta the scrapwood, sheetmetal, and electric motors lyin’ roun’, and I’ll be set.
I already had me a durn good barbecue pit, so’s all’s I gone do was rig me up somethin’ to give that smoke fu’ther to go, a smoke-stack, to chill that smoke down, so i’d not be cookin’ that meat, but smokin’ it. Then I had to come up wi’ the house, somethin’ big enuf to lay the meat in, at t’other end.

For the stack, I’s thinkin’ I’d use me some o’ that CPVC tube I been savin’, fer when I put me in some indoor plumbin’. But I ain’t no dumbbell, whatever the little woman says, and I knowed that tube might likely melt, up near the pit end anyway. Plus, I done worked with that tube before, and turnin’ corners and glue and cuttin’ and all…sounded like more work than this ol’ briarhopper’s signin’ up fer. Then I lit on this ideer of usin’ tinfoil—it orta cool that smoke right quick, an’ I gots me a pile of it already—or the little woman do, anyway, an’ she won’ miss it.

That ol’ tinfoil tho’, I did ‘low it wouldn’t hold up by hisself. But I keeps chickenwire aroun’, jest in case I need to ketch me sum critters or whatnot, so’s I hacked me off a coupl hunks o’ that chickenwire and took to wrappin’ it roun’ a piece o’ that ol’ CPVC, for to get me that tee-yoobyoo-lahr shape on that chickenwire , don’t y’ know. Then I took an’ slid that ol’ chickenwire off that CPVC, slick as u please, and commenced to bendin’ it and crimpin’ it to itself, till I got me bout’ half the bend I was wantin’. I done that whol’ thang again with t’other hunk o’ that ol’ chickenwire, an’ I hooked them two pieces up together, crimpin’ them little hexie mesh bits down t’ each other, till I had me a tube lookin’ kinda like a P-trap under a sink (if I had me a sink, that is), maybe six feet long and ‘bout 3 or 4 inches wide.

I’s ‘bout ready to slap together some kinda box to be the hamhouse, mebbe some 1x2’s or 2x2’s knocked together and covered with more o’ that tinfoil, when my eyes lit on an ol’ roastin’ pan, ‘r box, ‘r whatever y’ call it, covered, sheet aluminum, a nice piece, what we’d not used in y’ars. Fact is, I’d bought it at a church ga-rage sale way back when, and the little woman never wanted to use it. It’s a big ol’ thing, only good for turkeys ‘r hams r such. Turns out when she cook them turkeys she likes to leave ‘m up open an’ uncovered most o’ the time anyway. Says she get better skin that way. Well, I reckon so. I sure gots no complaints where my vittles is concerned, I eats right good for an ol’ briar, so I’ll leave it up to her.

Ennyway I took me this ol’ covered roaster and figgered it’d finally get some use. The onliest problem I had was how to hook that there smokestack tube to this roastin’ box I had. I kept starin’ at that thang, wondering if I should maybe drill me some holes and’ hog ‘em out till they’s a big enough hole fer the stack, or mebbe try a hacksaw. I’s about ready to just beat on the thang with a hammer, that allus works good for most thangs.

Then I had me another ideer, and here’s whar another Christmas tradishyun come in—I allus have to borry some tools from my son-in-law Alex. Sometimes I even axe ‘im first ‘fore I takes ‘em. This time I stole a coupla hole saws. I chucked the bigger one—3 or 4 incher I dunno—and commenced to cuttin’ on the bottom of that roastin’ box.

Man I’ll tell you what, that steel cuttin’ tool went thru that aluminum like my ol’ clasp-knife slicin’ a sausage, and I was hummin’ and feelin’ good, like a pig in slop, why I’s just as pleased as I could be. Then that ol’ hole saw done cut thru on just a teeny little spot, and that drill she done grabbed that roastin’ pan and ripped it clean outta my hands. Yeah, I’m tellin’ y’ what, it like to busted my wrist-bones, right that, and that roastin’ box flew by my knee goin’ like sixty. I’s commencin’ to cussin’ a blue streak, an’ felt my ol’ wrist throbbin’ like I’d been muckin’ out stalls all day, but I picked him back up off that floor and I kep’ at it. That ol’ box, y’d think he was an ol’ catfish I’s guttin’, the way he shook and whined and twisted and bounced aroun’. Ennyway it did finally cut enough I could punch thru, an’ I had me the hole I’s wantin’.

hillbilly ham house smoke entrance

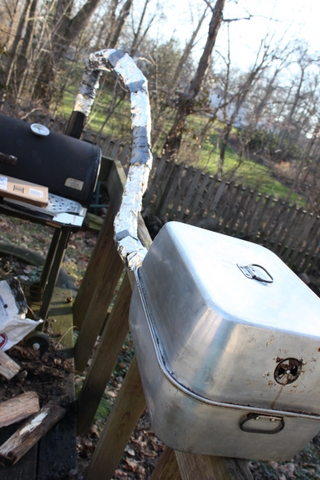
Now it was time to hang this whole thang together so’s I could get to smokin’ me some meat. I wired that stack right up to the chimney pipe o’ that barbecue pit out on m’ back deck, and I lay that stack along the top of the deck rail. I snugged that hamhouse right up ag’in that ol’ chickenwire stack. I drilled me a few holes to take a few sheetmetal screws into that hamhouse, right up nex’ ter that hole I done cut out o’ it, like maybe at the 90-degree spots around the circle, about a quarter-inch from the hole. I wrestled that ol’ chickenwire stack thru the hole so’s I had an inch ‘r two of it stickin’ thru, and I bent it back like the bell on my ol’ pal Glenn’s trumpet, so’s I could screw it down to the hamhouse from the inside. I used a couple washers to glom onto that chickenwire a little better, but I di’n’t worry much bout it—it aint lak I’s fixin’ to put enny load on it, it ‘uz just to keep it hangin’ together..

Then that ol’ hamhouse wanted to move around. Yes it did, I sw’ar! It wuz gonna fall off the deck, or tip that good ol’ meat off into the woodpile or somethin’. I sw’ar that ol’ hamhouse, he ‘bout alive, the way he fought me and fought me…ennway, that deck what I’s workin’ on, the one on the back o’ my house? Well, it’s a downright tradgedy, is what it is, it’s so old and fallin’ apart, I figgered what’s one more mess on’t. I coulda done somethin’ purty like build me a nice OSB shelf on it—I done used that stuff to make that front door, don’t y’know, and it looks right nice there once I used a couple leftover cans o’ Rustoleum to cover up the saw marks. But that ol’ deck, it needs burned down or somethin’, and I ain’t about to spend time makin’ it look purty. Ennywho, to make a short story long, as it were, I just drilled a coupla more holes in the bottom of that hamhouse and jammed a coupla drywall screws right into the top rail o’ that ol’ deck, and thar he sat, tight down to that deck.

Then I commenced to wrappin’ that stack up with that tinfoil. I reckoned it’d cool’at smoke right down, and I foun’ out later I warn’t wrong on that too. I wrapped a few spots what looked like they’d leak some with that briarhopper band-aid, duct tape, but I warn’t too worried bout’t. In fact, I’s worry’tin about the fire gettin’ enuf draft, is what I was worry’tin about. I had it figgered if it wouldn’ draft good, I’d just rig me up a fan outta one o’ them ol’ cornpewters I keep lyin’ around fer just that reason, but I’s still a lazy ol’ hillbilly and I’s happy to leave that off if I could, and a few leaks here and there would help her to draft good, I figgered.

blackened glass lifts in DIY cold smoker

An’ so it was, in th’end—one I had her all wired up I started a fire in th’ ol’ pit, and sure enuf, she drew just fine. That hillbilly hamhouse, she filled up with smoke till it’d make yer eyes water, I sw’ar. Last thang I did wasta take and put in a couple ol’ short jelly glasses in the bottom o’ that ol’ hamhouse. I reckoned that meat needed to be up high in the house where all that smoke’d be, so them glasses raised the rack I up off the floor o’ that hamhouse. Turns out them glasses kep’ the meat up out o’ the juice and funk what drip down and collect on the bottom of her, too, which I hadn’t thunk of, but I didn’t let on that when I’s showin’ off to my fambly; it jest look like I’d been knowin’ that all along, an’ a man in my condition don’t need to be givin’ his fambly more ammunition when it come to pokin’ fun at ol’ Dad, y’see..

Tomorrow, the conclusion of the hillbilly ham house hootenanny: smoked meat!
DIY Historic Ammunition

home reloaded springfield 1873 rifleAlex and I make all sorts of things ourselves: confit, counter tops, hard cider, chicken coops...stuff most people prefer to buy.  We like getting a little messy and learning exactly how things are created. Even given our penchant for handmade goods, we freely admit that Alex's birthday gift of homemade ammunition for his father this year is bit of do-it-yourself over-achievement.

The Back Story

Tom, Alex's dad, has a Springfield Model 1873 rifle, more commonly known as the Trapdoor Springfield.  He was gifted the firearm, made around 1880, from Alex's mother's mother twenty years ago.

It is likely that the rifle hasn't been shot in about a hundred years, knowing the family history.  Neither Tom nor Alex have fired the gun, and can't but for the birthday present.

You see, modern commercial ammunition is loaded to higher pressure levels than the black-powder era Springfield.  Firing with modern ammunition could be unsafe and would likely cause heavy wear on the rifle. Ammunition can't be easily purchased, so the gun cannot be shot.

Until now.

home cast lead bullet brass casing for home reloading loading smokeless powder Click pictures for biggerness.

Making Ammunition

Starting in November, Alex melted several blocks of 'clean' lead radiation shielding from a Brownfield cleanup project he and his father worked on.  He poured the lead into a historically accurate profile in a modern mold and allowed the bullets to cool.

Next he loaded casings with smokeless powder and crimped the casings to the bullets. He tumbled the cartridges to clean off residual grease. Then, Lil and I wrapped what is certainly the most weight-per-volume gift in our family history.

Now Tom has twenty opportunities to shoot with this historic rifle. Alex invited his dad to an afternoon at an outdoor range once the weather turns warm again so they both have a chance to see how the old gun performs.  More than a useful present, this gift was a labor of love.

Happy Birthday Tom!

Recipe for Black Powder Equivalent 45-70 Load

for any reloaders who found this post through a search engine, as typical Hounds in the Kitchen readers are unlikely to cook up ammunition any time soon

405 grain cast lead bullets

33.5 grains Alliant Reloder 7 powder

Winchester large rifle primers

New Starline brass cases

1. The cases can be sized using any commercially available reloading dies.  In this case, Hornady 45-70 New Dimension Reloading Dieswere used in a Lee Cast Iron 4 Hole Turret Press.

2. After sizing and priming, add the powder charge.  Reloder 7 is a fast-burning powder for use in small varmint calibers, but also in the larger, older 45-70.

3. Seat the bullet and crimp the case.  Overall length of the cartridge is 2.65 inches.

Maybe someday I'll write about my journey from a gun fearing pacifist to a person whose spouse produces ammunition. Would any of you care to read about my views on weapons?