Where Can You Get Real Food?

Wow! How do I follow up my most viewed, most commented, most retweeted post?! I am so appreciative of the interest in real food*. I am glad to be in community with people who support and practice choosing sustainable foodstuffs.

Slaughtering your own animals is not practical for most people, not even us, on a regular basis. So where are the best places to purchase real food?
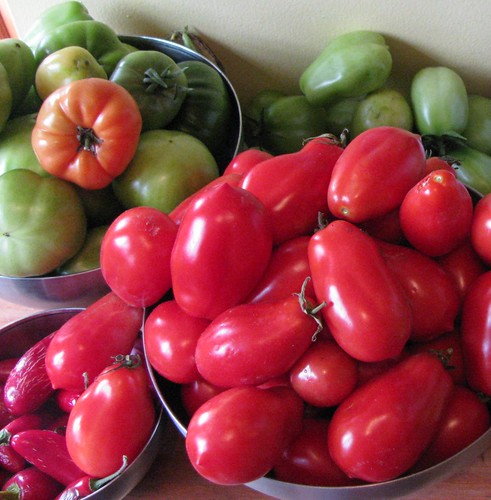
tomato harvest october 2009

1) Your Backyard - growing your own fruits and vegetables is easily the most local, delicious, and cheapest way to pack your meals with fresh ingredients. My Grow Your Garden series gives tips about how to start or expand backyard gardens. If you don't have space for a backyard garden, search for a community garden plot.

2) Direct from the Farmer - Local farmers are the best source of what you might not be able to grow yourself. Sustainable farmers are excited to share their raw milk, small batch cheeses, free ranged meat, vegetable CSA shares, and more. Find them at a farmer's market (see below) or Local Harvest. Ask around at work and in the neighborhood, as many people know a small farmer or know someone who does.

shopping the wayward seed stand at north market

3) Farmer's Market - Our favorite markets are full of stands directly representing individual farms. Some offer CSA pickups. Producers are eager to answer your questions about the variety, farming practices, and cooking use of their produce. Many will take time to chat with you at length, forming friendships and partnerships in the food revolution.

4) Local Grocery - An independent grocer, like our local favorites Weiland's and The Hills, is more adaptable to consumer desires than a chain. If your grocery doesn't carry products you want, request that they stock seasonal produce from local farms. Ask more than once and be prepared to help source the ingredients you desire.

5) Chain Grocery - Even in a chain, you can find real food if you search it out. Read labels and choose seasonal items from as close to your location as possible. Select whole ingredients to make foods from scratch. When buying processed food, read carefully and question contents whose names you can't pronounce or understand as foodstuffs. Local managers at your grocery are sometimes willing and able to take special requests. It never hurts to ask for seasonal and local food.

Where do you shop for food?

*Real food is just another buzz word among 'organic', 'local', 'seasonal', 'sustainable', etc. What I mean in this article is food you can source to a specific producer; whole ingredients that are free from unnecessary additives and processing.

Recycle Your Plant Pots!

Did you know that the black and green plastic pots seedlings come in are not recycleable in Rumpke pickup?  (Non-Columbus locals may have a different recycling situation.) They aren't, but you need not dismay.

The Ohio State University Chadwick Aboretum and Learning Gardens are hosting a pot and tray recycling event on Saturday June 19.  From 8 am - 2 pm gardeners can drop off their plastic goods at the Vivian Hall parking lot, 2120 Fyffe Rd.  This will be a simple drive through event with volunteers directing traffic and unloading cars.  Clean non-food grade syrofoam (such as packing peanuts and TV/computer forms) will also be accepted.

The group is looking for volunteers as well as recyclers.  Contact Mary Maloney, Director, at 688-3479 if you can spare a few hours to help.

The "Other" Garden

This year we purchased a space in a community garden in addition to our backyard space.  It's a 10 x 20 foot plot located approximately 5 miles from our house.

Our plan is to use the other garden for space loving plants that are harder to fit in our urban backyard.  It might be crazy as we already have a lot to keep up with, but we wanted to give it a shot.

We started with three rows of potato hills.  If all goes well between these rows, the potato tower, buckets, and a strawbale pile, we will be eating homegrown potatoes all winter!

In a few weeks we will direct sow squash, popcorn and quinoa.  All should require infrequent care and hopefully will survive with once or twice weekly checkups.

We are committed to sharing our harvest.  Just like last year, at least 10% of what we grow will be donated to Clintonville Community Resource Center.

Are you community gardening this year?  Are you donating any of your harvest?

Build a Salad Container Garden

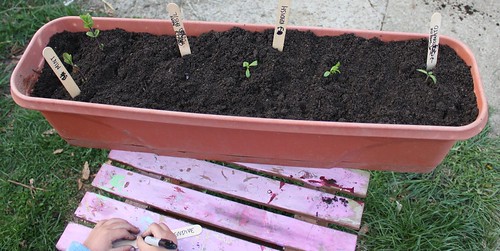
Yesterday I lead a edible container building workshop for members of Food Matters Columbus. We claimed a few picnic tables at Whetstone Park and planted away. Today, Lil wanted to make a garden just like the workshop. So we did!

container gardening with kids

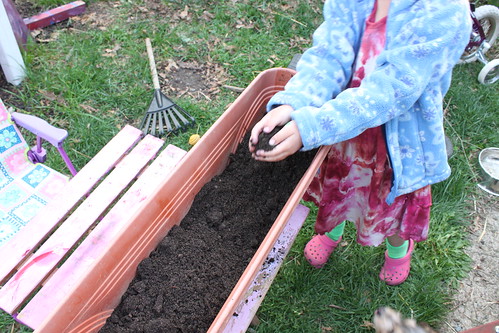
Lil was happy to get her hands dirty filling the container.

child filling a container garden

She planted a tomato seedling, radishes, endive, and basil for me and mint for her.

Could her hands be any dirtier?  I say that one good measure of a child's happiness is the variety of grime on their body. ;)

Lil decorated each label with her interpretation of what the vegetable looks like.

container garden radish label

Just before going in for bed, Lil used the rain barrel hose to water her new garden.

watering a child made container garden

I will repeat the container building workshop with families this Saturday, April 17, from 2 - 3 pm at Sprout Soup. Each container that participants will fill with soil, seedlings, and seeds costs $20. Spaces are limited! Reserve your experience by emailing me.  Or, make your own salad garden by following the steps below:

Supplies:

Container, preferably at least 20 inches wide by 7 inches deep

Potting soil or topsoil mixed with peat moss

Seedlings (herbs, tomatoes, radishes)

Seeds (lettuces, spinach, radishes)

Row markers, tongue depressors, or popsicle sticks

Trowel

Procedure:

1.Label row markers with the plants you choose.  At a maximum, choose one variety of tomato, two herbs, and two seeds.

2. Fill container with soil to within one inch of the top, mixing in two scoops of peat moss if you have it.

3. Place row markers.  Tomatoes should be planted at an end so they will not shade everything.  Herbs and lettuce need 4 or 5 inch spacing.

4. Plant seedlings by hollowing out a small hole in the soil.  Plant deep enough that the dirt covers a quarter inch of the stem.  Cover with removed soil.

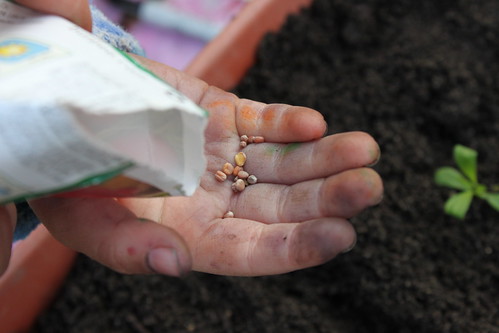
5. Scatter seeds (five to eight seeds per variety).

Care of the Container:

1. Place in a sunny location.  If necessary, move throughout the day to chase the best sunlight.  Orient the container such that the tomato will not shade the rest of the plants (generally towards the north east).

2. Water immediately upon placement.  Continue watering whenever soil is dry a half inch deep.

3. Watch the weather for hard frosts.  If one is forecast, bring your container inside for the night or cover with a sheet or tarp for the evening.

4. When plants develop, harvest tomatos by plucking them off the vine.  Lettuces and herbs can be snipped with scissors or gently torn from the plant.  They will continue to produce new leaves.

5. If herbs or lettuces develop flowers, snip or pinch those off.  When plants go into flower production, the leaves become bitter.  If you remove the buds you can enjoy the leaves longer.

6. When it gets very hot, lettuce will become bitter.  Remove the plant.  In late August or early September you can replant lettuce and it will grow outdoors until the first fall hard frost.

Fruit Blossoms and How I Care for Them

peach tree blossom care No flower is more welcomed in my garden than the first buds of our fruit trees and bushes.  With the warmth of the past few days, the peach trees in the treeyard bloomed.

strawberry blossomI spotted a strawberry flower in the bed yesterday.  These beautiful flowers will soon develop into sweet nutritious fruit. dwarf cherry blossomThe dwarf cherry has buds just waiting to burst.  I have no idea what to expect out of these knee high trees.  They are purported to produce edible fruit and time will tell whether that is true.

plum tree leaves Leaves on the plum tree are unfurling.  Because this is the first year for the plum, with a heavy heart I will pinch off any blossoms before they go to fruit.  Allowing the tree to grow with no fruit for at least one full season helps it establish roots, branches, and height. raspberry vinesRaspberry vines are growing and leafed out.  I buried several vines to establish some new plants. The blueberry bushes are just starting to sent out leaflets.

A part of me lives in terror this time of year.  A good hard frost can ruin the growing season for all of these fruits.  I follow forecasts looking for evening temperatures below 32 degrees.

The beauty of living on a tiny urban homestead is that I can cover these trees and plants if there is a frost warning.  I pull out sheets and tarps, anchor them with rocks, and give a little protective insulation to my precious fruit blossoms.

Once past May 15, the frost free date for central Ohio, I let down my frost guard.  The fruits slowly grow.  I keep an eye out for pests that might be invading and will treat accordingly, though I've never had any problems.

When fruits are just barely mature, changing from chartreuse to full color, my blood pressure rises again.  I want the juicy sweet berries and fruit for myself and my family.  Squirrels and birds have the same desire.  To reap the full harvest, I cover the strawberries, blueberries and raspberries with bird netting.  We reuse netting from year to year, getting our money's worth out of the $7 investment.  When I am ready for berries, I lift the netting or pick right through it.

This will be our first year allowing the peach and cherry trees to fruit.  I hope that pests will not be a problem either during development or harvest time.  I am armed with information from Mother Earth News and Back to Basics should I need to naturally treat animals invading my micro-orchard.

Keeping fruit trees is an emotional process for me.  I love fruit so very much that I take special, some might say obsessive, care of my plants.

Do you have fruit trees?  How do you care for them?

Easter Weekend Workout

We weren't in a gym, but Alex, Lil and I exercised our bodies this weekend!  We were outside almost all day Friday, Saturday, and Sunday.  We're exhausted and exhilarated.  Here's what happened:

The deck was torn down.  Lucky for us, the builders were poor at concrete setting and posts came out fairly easily.  They also used subpar techniques for covering the crawl space and we got to replace wood on the sides of the house; not so lucky.

hounds in the kitchenAlex built new stairs.

hounds in the kitchen, raised bedI built a raised bed from some reclaimed deck wood.  And I took a crummy picture. The sun was setting and I was TIRED.

backyard chickens, farm fresh eggsOur hens gave us three eggs yesterday. It's fascinating to me that each breed has a different egg shape and color. From top to bottom, these eggs are from the Sussex, Australorp, and Orpington breeds.

hounds in the kitchen, free range kidsLil played in a post hole.  Why not?

Lil and the dogs hunted for Easter eggs this morning.

We planted one potato tower, two potato buckets, and one straw bale potato bed.  We have even more seed potatoes to plant in our rented plot.

I dug furrows and planted three asparagus crowns in the new raised bed.  I also tucked three crowns into the strawberry bed.  I'll write more about asparagus later because it's a fascinating plant.

We hiked, slowly and with many stops, around Highbanks Park today, studying wildflowers, birds, and the sound rocks make when thrown in streams.

hounds in the kitchenWe shared dinner with my parents and sisters, Alex's parents and brother, and two of my grandparents.  Lil was showered with more gifts including the bunny above, hand sewn by my grandmother.

Our faces are sun kissed and the floor inside is muddy.  Dirt and seeds have new homes as we have new stairs to walk upon.  It was a great weekend.  How was yours?

Building Garden Beds

grow your garden: raised bedsNow that you've decided what to plant and where to plant, it's time to build your beds! The most basic technique for creating a garden bed is double digging.  As the name implies, double dug beds are carefully turned with a garden shovel once over the whole surface.  Some peat moss and/or compost can be sprinkled on top and then the whole bed is dug again.  Each round of shoveling should be at least four inches deep.

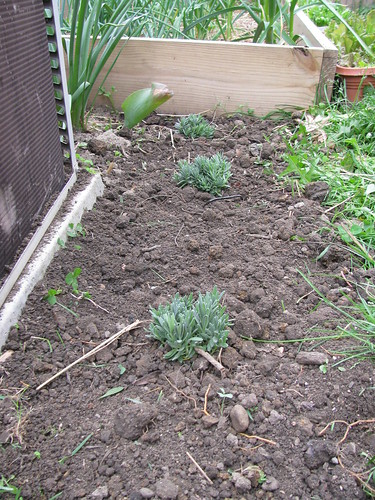
Our strawberries, garlic, and kale are all relegated to double dug beds.  It takes me approximately 1 hour to double dig a 4 foot square bed.  My body is achy for a few days after because double digging is hard work!!  We line the beds with rocks or bricks if we have them to provide a visual reminder to little feet that plants are growing there.

double dug bed, lavendar

A tiller will do the same job as a double digging in far less time with less effort.  Most of us backyard gardeners do not have a gas powered tiller easy accessible, but they can be rented.  We have never chosen a tiller to avoid the rental fee or the hassle of transporting it.

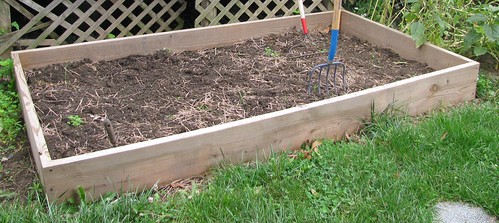
empty raised bedThe next common bed style is the raised bed.  Here, sides are built from lumber and dirt is filled in the top.  The Pioneer Woman has a great tutorial for building your own raised bed.  We follow a similar procedure except we use 2x8 or 2x10s instead of using two layers of 2x4s for the sides.
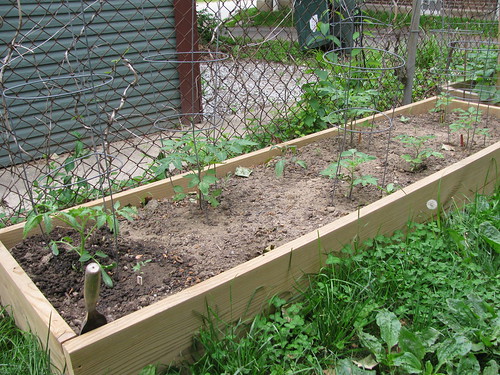
Sides may be built from treated or untreated lumber, recycled plastic lumber, or cement blocks. Cedar is a naturally occurring wood that resists rot.  Plastic lumber will last for a very long time, though it is heavy and costly to transport initially.  Cement blocks are a popular choice at community gardens because they can be easily reconfigured or moved.

Some publications will tell you to avoid treated lumber at all costs. I was skeptical so I asked Alex, a material scientist by education and profession, to review research about the safety of treated lumber in the garden.  He concludes that vegetables grown in treated lumber beds do not uptake the chemicals in treated lumber.  While I still have hesitations about the worker safety of those who make treated lumber, we do use it for our raised beds because it is the cheapest long lasting material.

To anchor or not to anchor?  Many plans recommend digging 6 to 12 inch holes and setting posts in them to anchor the sides of the raised bed.  Others use stakes.  We subscribed to this philosophy for the first few beds we made.  It's not that hard, but we questioned why it was necessary.

unanchored raised bedIn our second round of bed building, we skipped the anchors.  In our experience, the raised beds sides do not bow or move.  The weight of the soil holds everything in place just fine.  If you are looking to save some labor and cost, skipping the corner anchors might be a good choice.

Soil for raised beds can be purchased from a plant nursery, the city, or a dirt and mulch company.  If you have a hearty compost bin you can use that too.  Last year we filled our beds with soil 'thrown' from the Jones topsoil Slinger truck.  We mixed in our homegrown compost and some peat moss too.  This year we will purchase some compost from Denise at 2Silos farm.

If double dug and raised beds aren't your style, there are alternative beds.  You might plant in a bucket, straw bale, or potato tower.  The most recent edition of Mother Earth News details a simple soil bag plan.  Several companies make raised bed corners or corners and sides that gardeners need to simply assemble.

Are you building new beds this year?  How are your existing beds made?

April Kids Cooking Classes

April has five Thursdays, which means five Kids Cook classes!  Children aged 3 - 6 years can join me at Sprout Soup (4310 N High St) from 11:15 am - 12 pm.  Here are the topics for April: Thursday, April 1 - Butter

Thursday, April 8 - Veggie Sushi

Thursday, April 15 - Lettuce

Thursday, April 22 - Earth Day Eats

Thursday, April 29 - Mint

Each Kids Cook class costs $4 per child.  We make at least two dishes together, taste them, and kids go home with a recipe card.  All classes are nut and meat free.  Allergies can be accommodated with advance notification to Rachel.  RSVP is not required.

April's special event is Edible Container Gardening!  Families or individuals will learn how to grow vegetables and herbs in pots by making a salad container garden to take home. Saturday April 17 from 2 - 3 p.m. at Sprout Soup.  $20 per container which can be shared among a family.  Please reserve your space by emailing Rachel.

Last but not least (and not in April!) don't forget about the Edible Urban Gardening class this coming Tuesday, March 30, at Greenovate (9 E. Second St) from 7 -8  pm.  Free, no RSVP required.