Be Thankful for the Whole Bird: Make Turkey Stock

pie with turkey illustrationWe at Hounds in the Kitchen have many things to be thankful for this year: family and friends, a garden that filled our pantry with home canned goods, a dog finally healed, and new projects like cider pressing.

On Thanksgiving, especially, we are thankful for animals that give their life to feed us.

In turn, we use every bit of the nutritious goodness in each animal we cook. When we buy, brine, cook, and carve a turkey, we first enjoy the meal.

Afterward, we consider the gift left in the carcass: turkey stock makings.

turkey carcass bones

To release the final delicious tastes and nutrients from the bones, use a cleaver or kitchen shears to chop the bones into manageable pieces. Break the breastbone, and un-joint all previously joined bones. (If you aren't ready to make stock, bag all the bones in a ziploc and store in the freezer until you want to proceed.)

Brown them in a large stock pot (or roasting pan or deep skillet) over medium heat with a little olive oil for fifteen to twenty minutes.

adding water to turkey stockturkey stock made in oven

Add water to cover, one to two roughly chopped onions, a few bay leaves, and a tablespoon of salt. (If your bird was heavily or lightly salted to begin with, adjust salt here.) Bring to a simmer.

Move the pan to the oven and cover it. Cook at 200 deg F for six to ten hours or overnight. The oven is preferable to the stove top because it keeps the water just at simmering.

turkey stock finished cooking finished turkey stock

Cool and strain the bones, herbs, and onions from the bone broth This stock method releases the gelatin from the bones, creating a stock with creamy smooth mouth feel and rich deep flavor.

Keep broth refrigerated and use within a week or freeze for an indefinite time period. We freeze stock in two to four cup portions to always have a ready source for soup and braising recipes.

Homemade turkey stock is not only useful and delicious, it is the best way to show thanks for the whole bird.

From our family to yours, Have a very happy Thanksgiving

Alex's No-Knead Bread

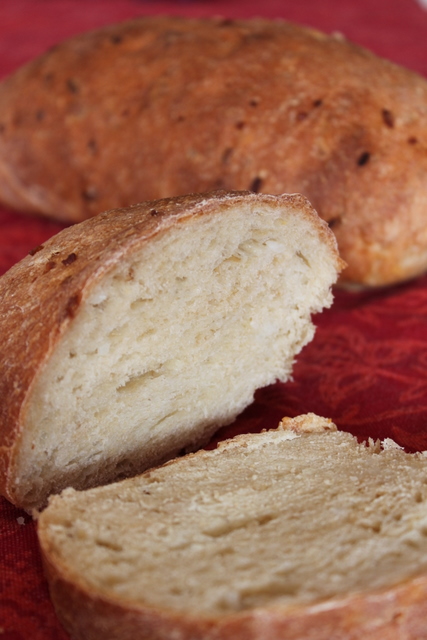
no knead cooked bread

Alex is interested in the workings of yeast for all fermented things, so he naturally fell into bread baking. At first he tried many recipes with as many failures as successes. Now, he now bakes a batch of bread twice a week to feed our family.

Alex does not, however, like to get messy. His bread is made either by kneading with the kitchen-aid or with this no-knead method. The rhythm of the overnight no-knead rise fits with our schedules well and this recipe has been his bread of choice for a few months now.

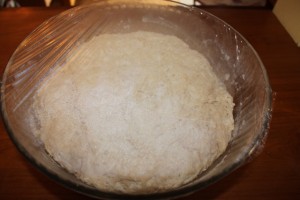
First, mix together the ingredients with a spoon. This recipe uses 1/2 cup of odds and ends grains which can use up leftovers in the fridge or any grain you want to experiment with. For this batch, Alex added cooked white rice to the dough which baked off into the brown bits visible in the first picture. Cover the dough and allow to rise at room temperature 12 - 18 hours.

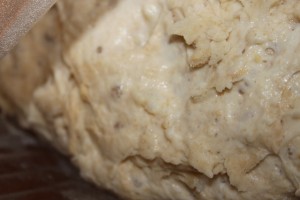
no knead bread doughno knead bread dough risen

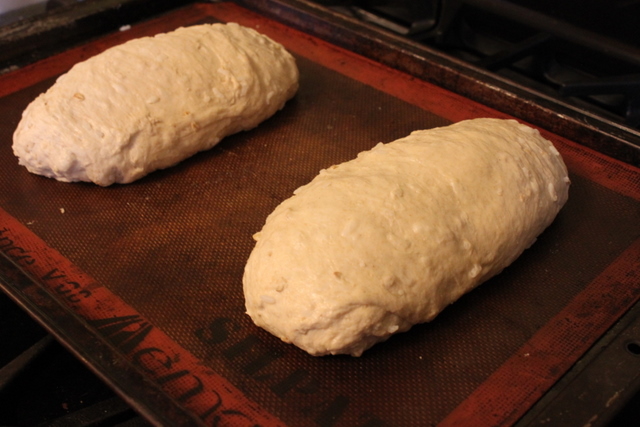
When little bubbles cover the surface, punch down the dough and form loaves. It's important to stretch the dough over the top and curl it under to form a solid shape. We put our free-form loaves on a sheet pan but you could use a loaf pan instead.

no knead bread loaves before baking

Allow to rise a second time until double in size and bake. Voila! Homemade bread that is cheap, tasty, free from odd additives sometimes found in store bought bread and made without the messiness or work of kneading!

Alex’s No-Knead Slicing Bread makes one large or two small loaves

Ingredients 2 cups water 2.5 cups bread flour 1.5 cups white whole wheat flour 1/2 cup dry oats, corn meal, cooked rice, cooked lentils, or additional flour 1/2 teaspoon yeast 1 tablespoon salt 1 tablespoon sugar

Directions 1. Stir together all ingredients in a large bowl until a very solid dough forms. Add more flour if necessary until dough is so thick pieces appear stringy when stirred. 2. Cover with plastic wrap or a towel, and let sit at room temperature overnight or for 12 - 18 hours. Rising takes longer at cooler temperatures. 3. When dough has doubled and surface is covered in bubbles, punch down and form into loaves. 4. Allow loaves to rise at room temperature until doubled in size again, about 2 hours. 5. Bake for 20 minutes at 450 degrees F. 6. Lower temperature to 350 degrees F. and continue baking until bread is browned on top and sounds hollow when tapped on bottom, approximately 15 minutes. 7. Allow to cool slightly before slicing.

Alternatives: Substitute 1 tablespoon honey or molasses for sugar Add up to 2 tablespoons flaxseed meal Use ½ to 1 cup sourdough starter in place of equal portion of water Use less flour for a wetter dough to make a ciabatta-like holey bread Can be formed into breadsticks, dinner rolls, or pizza crust

Added to Hearth and Soul BlogHop

Cider Pressing

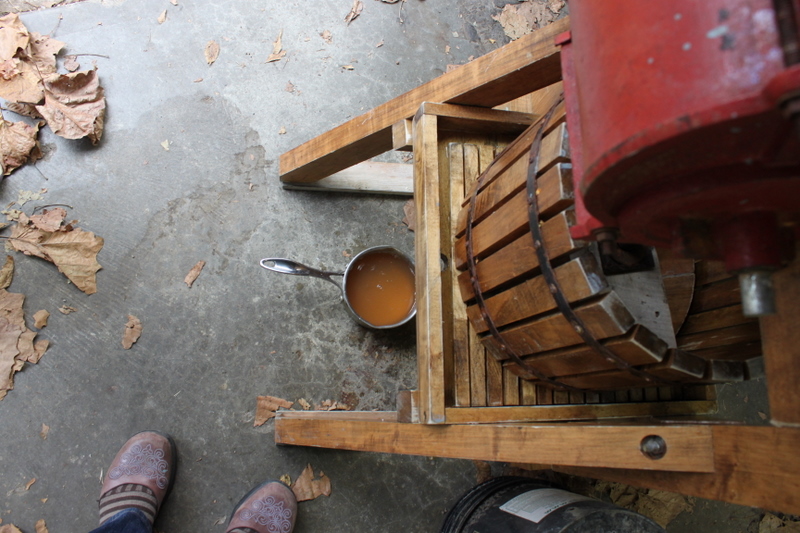
rachel tayse home produced cider Our cider press has seen lots of action since we acquired it a month ago. Here is what it produced so far:

October 26 - 1 liter pear cider

November 6 - 1.5 gallons winesap cider, 1 gallon gold rush cider + lots of tastes consumed at our Cider Pressing Party

November 21 - 5.75 gallons winesap cider, 1/2 gallon pomegranate cider

We still have seven bags of winesap apples, some gold rush apples if we aren't able to keep them fresh, and several odds and ends amounts from friends left to press.

Some of the juice, including the four gallons I'm hugging at left, is bubbling away in fermentation vessels to make hard apple cider. The pear cider matched with sierra nevada yeast produced a lovely sweet perry that we shared with family this weekend.

Some people get excited about the stock market or political news or the latest car. We are hot for home pressed cider and the resulting fermented products.

How to Make Fruit Liqueur

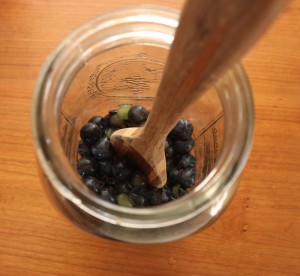
Homemade flavored liqueur is one of the simplest ways to preserve the flavor of fresh fruit.  I posted a recipe for cranberry liqueur last year, but one can make liqueur with any fruit with the following simple method. fresh grapes to make liqueurmascerating grapes for liqueur recipe

Local, in season fruits make the best liqueurs because they have the strongest fresh flavor.  Choose clean washed fruit.  Smash berries, chop stone fruits, or juice citrus and place in a clean large glass container, like a half gallon ball jar.  This series of photos uses some local concord grades from our fruit CSA.

sugar syrup added to grape liqueur recipeadding vodka to liqueur recipe

Add an equal volume of cooled sugar syrup or honey. (Make sugar syrup by boiling an equal amount of sugar and water until the sugar is dissolved.)

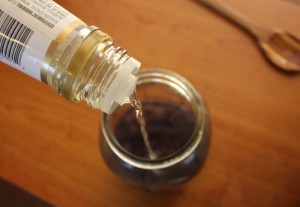
Top that off with an equal amount of full strength (80 proof) or higher vodka.

liqueur resting on cookbook shelf

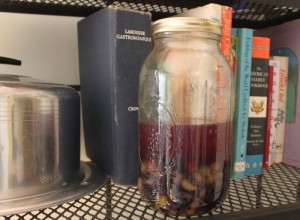
Add the lid and give the mix a swirl.  Find a spot for the jar to rest at room temperature.  Swirl once a day, tasting each day. At first the taste will be very alcohol forward, but the flavors mellow the alcohol over time.

straining grape liqueur recipe

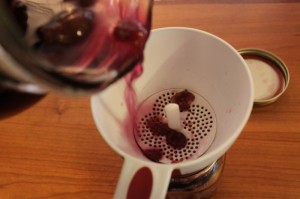
When the taste is to your liking, usually in five to seven days, strain out the fruit.  Strain through cheesecloth for the most clear result.

finished grape liqueur

Bottle in a jar with a tight fitting lid.  You can reuse jars or buy new Swing Top or Flask Bottles online.  Add a personalized label, perhaps with a suggested cocktail recipe, for a special gift.

The color may mute over time but the flavor will remain fresh for years.  Serve in a cordial glass or mix into a cocktail.

Homemade Fruit Liqueur

1 part crushed fresh fruit

1 part sugar syrup or honey

1 part 80+ proof neutral tasting vodka

1. Mix all ingredients in a clean glass container.

2. Keep at room temperature, swirling and tasting once a day.

3. When the flavor develops as you like, strain out the fruit through cheesecloth.

4. Adjust alcohol content or sweetness by adding vodka (to strengthen), water (to weaken), or sugar syrup.

5. Store in a closed bottle in a cool dark location for best results.

Post added to Hearth and Soul.

Making Pickled Beets with a New Knife

Roasted beets are my favorite.  Earthy, sweet, and purple, my favorite color!

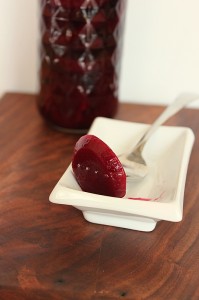
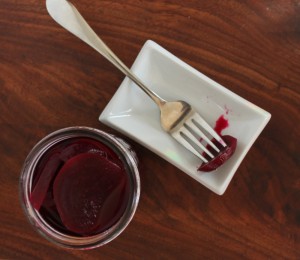
pickled fresh ohio beet recipePickled beets are my grandmother's favorite.  Last year my mother made them for her and this year I decided to do the same.

I shared that I was pickling on twitter and discovered that my friend Susan of Travels with Pirates also loves pickled beets.  We made a deal that if she bought the beets (locally from Sippel Farm) I would pickle them.

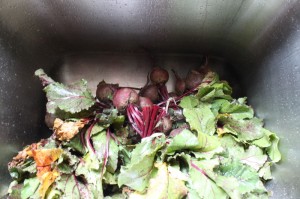
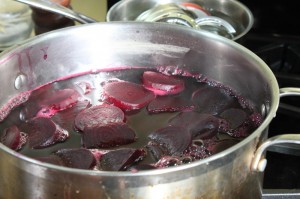
beets in the sinkbeets boiling before picking

So it was on a recent Saturday that I set out to make pickled beets for the first time.  I removed the greens from the beets and scrubbed off the dirt. I boiled them in water until tender.

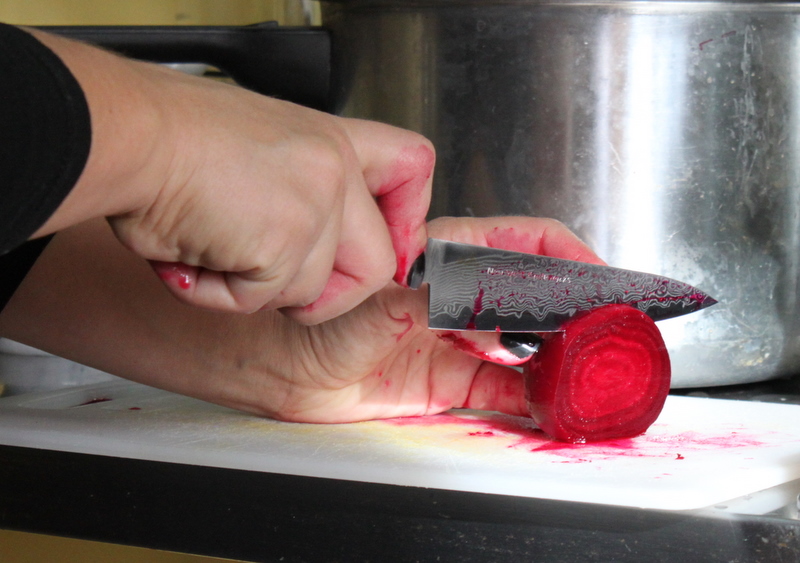
cutting beet with new west knifeworks

I removed skins, trimmed, and sliced the beets with my New West Knifeworks Petty Utility Knife.  I won this knife by correctly guessing the weight of the White on Rice couple's biggest beet.

new west knifeworks perry knife cutting beets

I LOVE this knife.  It is perfectly suited to my sized hands, ridiculously sharp, thin enough to be flexible and full tanged for sturdiness.  It came with a custom fit sheath and I know it will accompany us often on camping and road trips. beets pickling in brine Anyways, back to the beets.  After slicing the beets boil in a vinegar brine flavored with allspice, clove, and cinnamon for five minutes.  Then I hot packed them into jars and water bath canned the jars.

pickled beets in jar

One jar didn't seal so I kept that for myself and am learning to like pickled beets.  Pickling adds flavors that marry well with the natural earthiness of beets. The color remains as stunning as a harvest sunset.

Pickled Beets

I used the recipe from PickYourOwn.org without onions.

  • 7 to 8 lbs of fresh beets
  • 4 cups vinegar (5% acidity)
  • 1½ teaspoons canning or pickling salt
  • 2 cups sugar
  • 2 cups water
  • 2 cinnamon sticks
  • 12 whole cloves  - about 1 tsp
  • 12 allspice nuts (whole) - about 1 tsp

1.  Scrub beets and remove tops.

2. Boil in water for 20-30 minutes or until beets are cooked through but not mushy.

3. Remove skins (they should fall right off after being in boiling water) and slice evenly into 1/2 inch slices

4. Meanwhile, mix vinegar, salt, sugar, water, and spices.  Bring to boiling in a large pot.

5. Add beet slices to vinegar brine and simmer for five minutes.

6. Remove beets with slotted spoon and place into sterilzed jars, filling to 1/2 inch from the top.

7. Ladle hot vinegar solution on top to reach 1/2 inch headspace, using a knife to release any air bubbles.

8. Wipe rims and screw on sterlized lids.

9. Place in boiling water bath for 30 minutes.

10. Remove from water and allow to cool for 24 hours.

11.  Remove rims, clean jars, label, and store in cool dark place for up to 1 year.

Cider Press!

Meet the newest tool in the hand-powered arsenal at Hounds in the Kitchen: cider press

A cider press!

Charlie of Windy Hill Apple Farm had this press on display with a for-sale sign the last time we visited.  I immediately recognized it as a well maintained machine for a good price.

We debated for a few days about whether we need a press when: 1) we have no apple tress, 2) even if we moved to a farm tomorrow it would be years before we would have producing apple trees and 3) how exactly do you use a cider press?

The debate ended when casual mentions of the press for sale were greeted with friends and family strongly encouraging us to buy it and offering up apples ready for cider-making this season.

working a hand crank cider press

Today the cider press is ours.  We immediately tested it with some very squishy pears, yielding a quart of juice.  Not enjoying the taste of the overripe fruit, we poured it into a jug with a fermentation lock to make some pear hooch.  We are determined to master the making of hard cider, as any good pioneer would be.

Soon, bags of apples will be turned into gallons of cider by the power of the screw and our very own hands.  We may host a cider-making day once we figure out what we're doing.  We will definitely accept sharing or renting arrangements for those of you with excess fruit.

"Give me yesterday's Bread, this Day's Flesh, and last Year's Cyder." Benjamin Franklin (1706-1790) 'Poor Richard's Almanac'

Added to Hearth and Soul blog hop.

A Day in the Slow Life

tandem bicycle Annette of Sustainable Eats recently shared a day in her life and challenged others in the slow food lifestyle to do the same.

It is an interesting idea to compare our individual days. What chores do we share? What aspects of our routine are unique? What can we learn from each other? Why call it 'slow life' when we are so busy?

At any rate, here's what I did this Tuesday October 19, 2010:

7:45 am Wake up and get dressed with yesterday's clothes 8 Drop off Devie at the vet for surgery to address an eye ulcer 8:15 Return home, shower, dress in clean clothes (Lil and Alex still sleeping) 8:45 Eat half a Pattycake sticky bun and cup of coffee while posting pumpkin seeds recipe 9:15 Drive to Franklin Park Conservatory 9:30 Meet with Julia Hansel, education director, to brainstorm topics of kids and family cooking classes for 2010-2011 11:15 Return home, greet Lil and Alex for the day, start re-arranging basement to make a play area for Lil and better storage of home canned goods 12:15 Reheat homemade macaroni and cheese for lunch, pack Lil's preschool snack with crackers, apple, and kefir 12:45 Preschool drop off 1:15 Come home, begin making pumpkin puree from homegrown pie pumpkins 2:00 Take pictures of our tandem bike for sale 2:15 Finish pureeing and packaging 11 cups of pumpkin puree. 2:30 List Franklin Park events on the events calendar 3:00 Preschool pick up, play/chat with friends at playground 4:15 Return home, stopping at Clintonville Community Market for produce 4:30 Move a few more things in the basement 5:45 Pickup drugged Devie and meds from the vet 6:30 Return home, cook and eat polenta with roasted beets and goat cheese inspired by my friend Vanessa's recipe. Lil cries during dinner because she doesn't want to eat or get herself an alternative 7:30 Bedtime routine, including extra cuddles with healing Devie 8:15 Watch a little TV and drink wine while reading blogs, checking in to facebook and twitter 9:30 Realize I can barely keep my eyes open (seriously, this sinus infection or whatever it is WILL NOT GO AWAY) but continue to surf 10:30 Finally go upstairs, brush teeth, and settle in to bed with a short chapter of The Cook and the Gardener

What goes on in a day of your life?

This post added to Simple Lives Thursday.

Made by Hand, Blueberry Girl, Jamberry & Blueberries for Sal

made by hand book coverPublishers recently sent me a copy of Made by Hand: Searching for Meaning in a Throwaway World.  Written by Mark Frauenfelder, founder of Make magazine, this quick read is an overview of one family's experience with making things by hand.  Organized by the various objects they attempt to create, each chapter is both a tutorial and reflection.  The themes are simple: waste not, want not; creativity and out-of-the-box thinking is fun; mistakes are how we learn; and quality beats quantity.  While some chapters seem to come to pat conclusions, I always enjoy peering into another do-it-yourself-er's life. It's berry picking season in Ohio and we have three berry favorites in heavy rotation for reading to Lillian:

First is an old story I remember my mother reading to me, Blueberries for Sal.  In it, a mother and cub bear and mother and child human both happen upon the same blueberry hill at the same time.  Robert McClosky, author of other classics such as Make Way for Ducklings, spins a tale of what happens when the two children get mixed up in a daze of gobbling berries.  A Caldecott Honor Book with indigo illustrations, Blueberries for Sal is a gentle cautionary tale, perfect for reading aloud to a young child about to pick blueberries for the first time.

Jamberry is a quick silly rhyming book about many kinds of berries, both real and fantastical.  Packed with charming illustrations of a friendly bear and child, this is a favorite read aloud at my Kids Cook classes.

Blueberry Girl is by the poet and author Neil Gaiman.  A gift from Alex and Lil to me for Mother's Day 2008, this poignant book is equally appropriate for adults and children.  It's a love poem from parent to daughter detailing the hopes and dreams held in that relationship.  Whimsical illustrations compliment Gaiman's well metered writing.  Below is a trailer of sorts with Gaiman reading.

A month or so ago I also recommended a few books.  I have an ever present stack of books from the library (you'll Keep CML Strong, right?) and regularly coming across material appropriate for Hounds in the Kitchen readers.  I would like to start a little 'recommended reads' series but am struggling to come up with a catchy title.

So, how about a little giveaway contest?  I'll mail a copy of Made by Hand and jar of my handmade jam to whomever suggests my favorite series moniker.  It has to be relatively short so I can make a little icon and include it as a category.  Something to do with the common subject matter - food - would be good too.

All you have to do is leave a comment with your suggestion(s).  I'll leave the giveaway open for a week and choose a winner next Friday, August 20 at 9 PM.

FTC disclosure: I received Made by Hand for free.  Title links are through the Amazon affiliate program.  I really hope readers will use their libraries before buying!

This post is part of Fight Back Fridays