Rhubarb Shrub, a Drinking Vinegar {Recipe}

rhubarb shrubShrubs, also called drinking vinegars, are the new 'thing' in the drink and DIY field. Shrubs are a way of preserving fruit by making them into a syrup with vinegar that was widely practiced by Colonial Americans. The LA Times wrote this week about using shrubs in cocktails. Studies show that raw vinegar may contribute to weight loss, lowered cholesterol and improved digestion. I discovered last year that apple cider vinegar is a cinch to make at home with a little loving neglect.

Where does this all lead? To my newest obsession: rhubarb shrub.

Before you say "I could never just drink vinegar!", as my sisters recently did,  hear me out. The flavor components of a shrub are acid from the vinegar, sweetness from sugar, and flavor from the fruit. What else relies on acid, sweetness, and fruit to quench thirst? Lemonade, the summer picnic staple. Commercial sodas are also sweet, acidic syrups diluted with fizzy water.

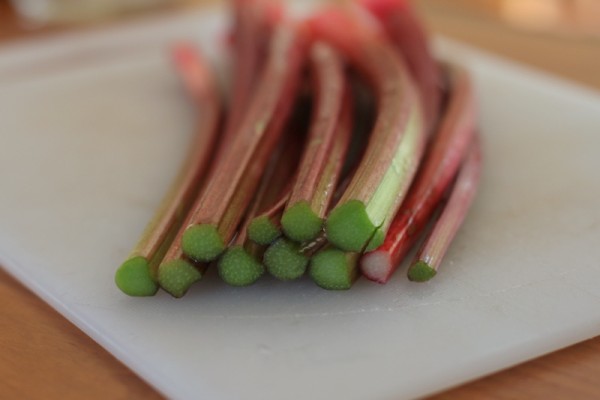
rhubarb stalks

How To Make Shrubs At Home

Because I believe in preserving the potential benefits of the raw cider, I make shrub the 'cold' way. Most recipes call for a 1:1:1 ratio of fruit, sugar, and vinegar but I prefer less sugar. Since vinegar provides the preservative effect, there's no reason not to experiment with small batches and find your own perfect ratio.

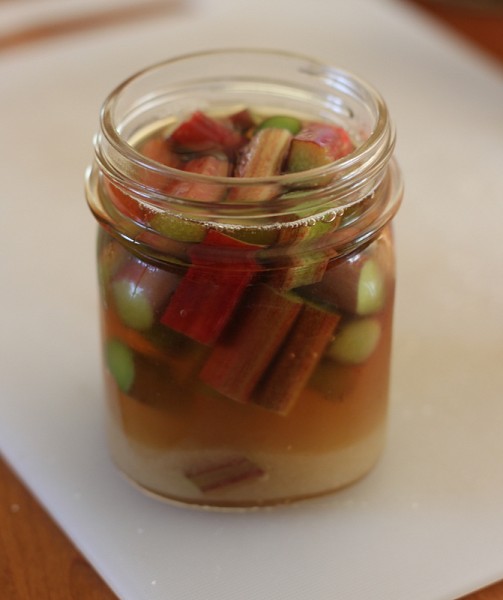
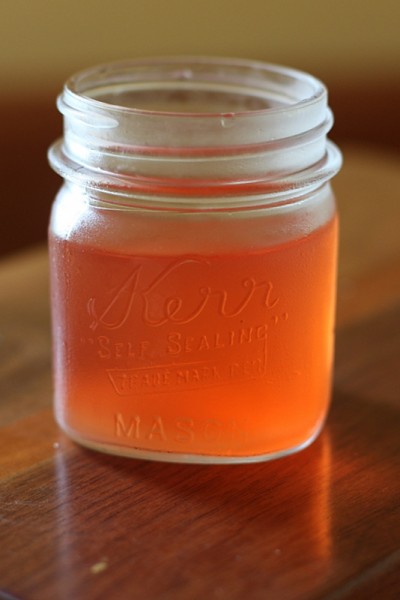
rhubarb shrub before aging

My ideal rhubarb shrub is 1/2 cup chopped rhubarb with 1/3 cup white sugar soaked in 1/2 cup homemade apple cider vinegar. I leave it at room temperature for 2 days and then move it to the fridge. After the taste is full of rhubarb tartness in a few weeks, I strain out the fruit. Serious Eats outlines several other ways to make fruit shrub.

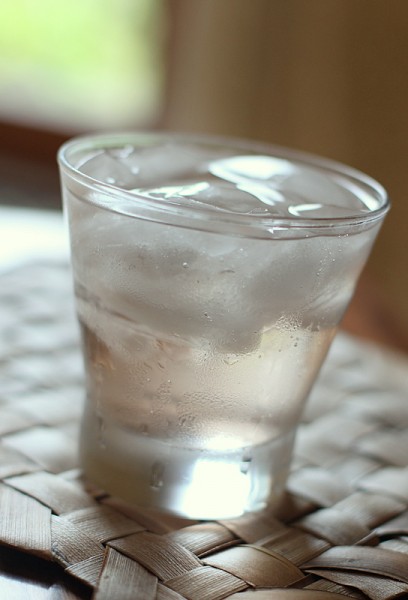
rhubarb shrub with soda

I drink my rhubarb shrub over ice with fizzy water from the Soda Stream. Surprisingly enough for a girl who likes to drink like myself, I have not delved into the world of mixing alcohol with shrubs but you know I will soon.

Are you a fan of drinking vinegars? Have you made a shrub? Tell all in the comments!

Rhubarb Shrub Time: 15 minutes active, 7-14 days aging Makes approximately 1 cup

1/2 cup fresh rhubarb, washed and chopped into one inch pieces 1/3 cup granulated white sugar 1/2 cup raw apple cider vinegar

1. Mix all ingredients in a clean glass jar. 2. Allow to sit at room temperature for 2 days. 3. Move the the fridge and allow to age for an additional 7-14 days until the shrub achieves the taste you want. 4. Strain out and discard the fruit. Keep the shrub in the fridge and enjoy diluted with water, club soda, or in a mixed drink.

Super Mom Makes Homemade Mayo {Video Recipe}

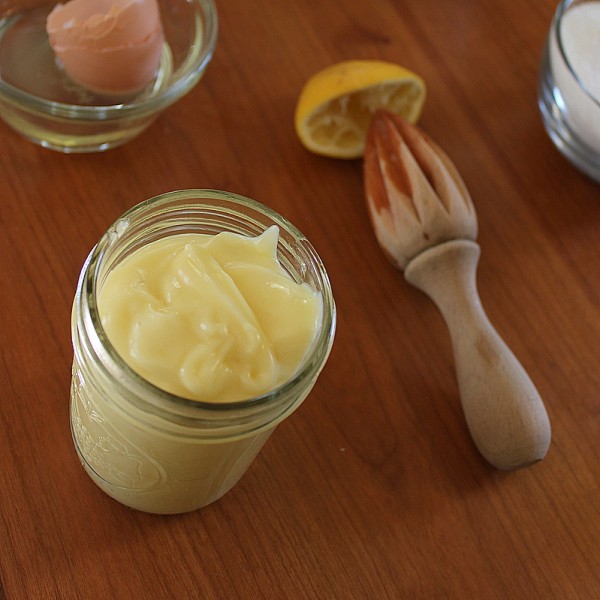
homemade mayonnaise recipe video One dark and stormy night, tragedy struck the Hound household. Sweet Lil wanted to make tuna salad but there was no mayonnaise in the house. "Help!", the selective eater cried out, unable to eat plain tuna or the delicious meal her parents cooked.

Super Mom heard her cries and rushed to the rescue!

With forearms of steel and patience for pouring, Super Mom cracked an egg, squeezed a lemon, and began whisking. Streaming oil into her potion, Super Mom transformed the three liquids into a semi-solid sauce: mayonnaise!

A few days later, Super Mom taught Lil how to make homemade mayo herself so she would never be helpless again. Kudos to intern Cami for capturing and editing the moment.

With a little practice, you too can gain the Mayo Master badge of honor and be able to create the delightful emulsion at a moment's notice! You could employ the use of a blender, but every true super hero knows how to make mayonnaise by hand.

Have you made mayo recently? How did it turn out?

PS. Join Super Mom (that's me) on Mother's Day for a class revealing all my secrets for homemade condiments at Franklin Park Conservatory. Space is limited and every participant goes home with a jar of mayo, mustard, or ketchup!

Handmade Mayonnaise Makes: about one cup Time: 5-10 minutes

1 fresh egg yolk (use a pasteurized egg if you're worried about salmonella) 1/2 fresh lemon 1/2 - 1 cup oil (use any lightly flavored oil) 1/2-1 teaspoon salt

1. Pour egg yolk into a clean medium mixing bowl. 2. Juice lemon into bowl and whisk the yolk and juice together. 3. While continuing to whisk, add one teaspoon (or one slight pour) oil and whisk until incorporated. Repeat with several more teaspoons. 4. Slowly begin increasing the amount of oil, whisking continuously. The mixture will begin to change color towards a lighter yellow and develop a stiffer texture. 5. Continue whisking and adding oil until you reach the texture of mayonnaise. Stir in salt. 6. Store in a clean container in the fridge for 2-3 days.

Feeling Salty? Make Your Own Salt from Seawater

sea salt and flotsam We made our own salt from San Salvador, Bahamas sea water.

This statement usually elicits one of two responses. 1) "Wow! Awesome!" 2) "Why? It's only like $1 a pound at the store!"

We, of course, are of the "Wow, Awesome" mindset. But to answer the why: 1) Because we can. (This reason motivates far too much experimentation at the homestead.) 2) Because we never have before. 3) To bring back a free souvenir. 4) Because we can't in Ohio. 5) What else are you going to do in the middle of a hot afternoon on a remote island?

How to Make Salt from Seawater

Making salt is as easy as you might think. Here's what we did:
catching salt watercollecting sea water for salt got it! seawater for salt

Collect the seawater, avoiding sand. (My awesome photography assistant Lillian took these pictures.) We collected 3/4 gallon after spillage.

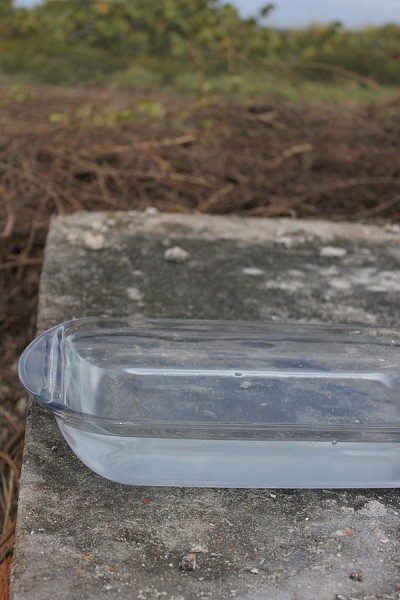
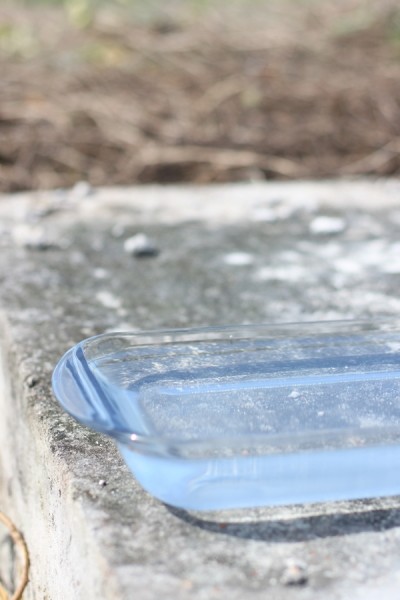
salt water evaporating

Place the water in a shallow pan and put it in the hottest spot you can find to evaporate.

salt water day two

Look the next day and realize that the sun isn't really doing much. Consult the book Salt: A World History you happened to have on vacation and find that evaporation takes a month or so.

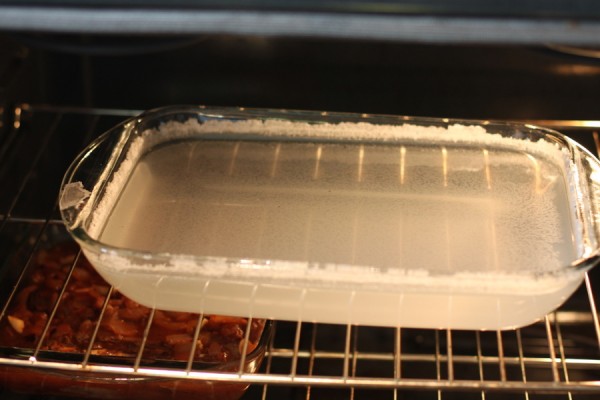
salt water in oven

If you aren't staying a month, heat the salt water. We weren't sure of the metal quality of the rental house pans, so we opted to bake the water in a glass pan in the stove. Boiling would be faster but could easily corrode a low-quality pan.

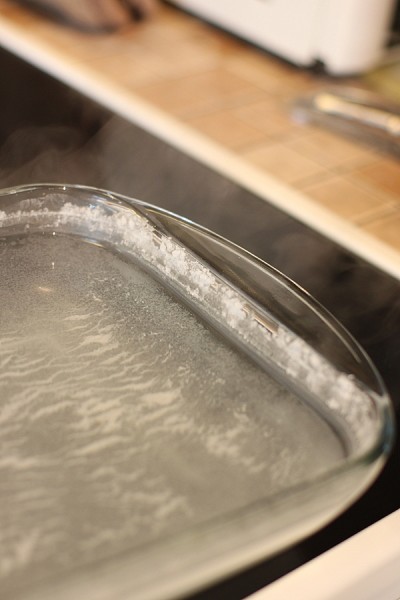
salt forming on sides of pan

Bake for many hours. Wonder if the water will ever leave crystals behind.

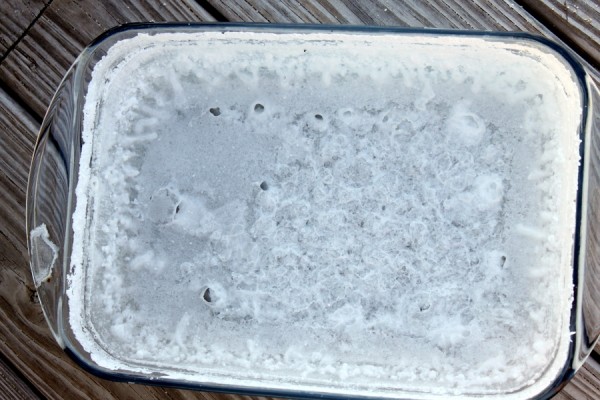
salt crystals on pan

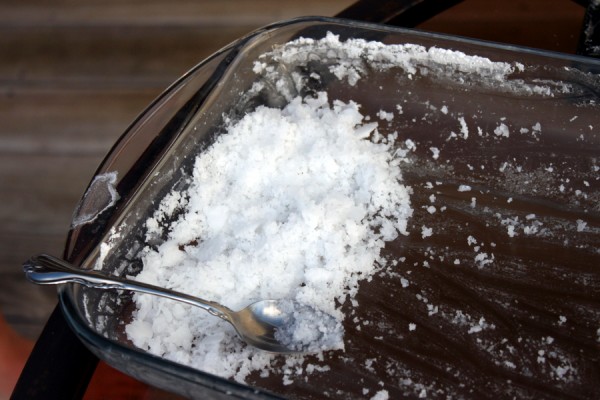
Finally! A salt crusted pan! Marvel.

salt crystals scraped in pan

Scrape the salt crystals into a pile.

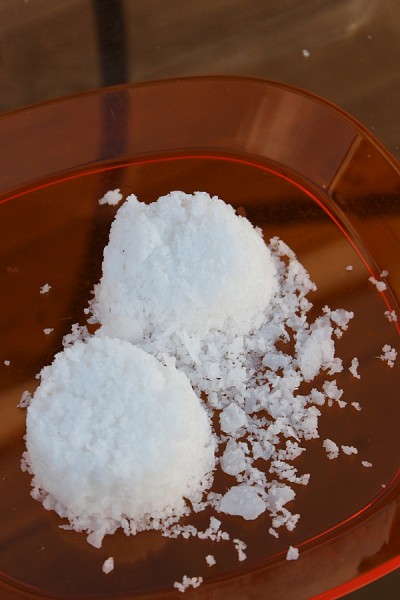
salt from sea water

Measure the volume of the salt for the information of your blog readers. We made about 1 cup from the 3/4 gallon batch.

To appear as though we weren't cocaine smugglers, we stowed the salt in clear plastic containers and baggies clearly labeled salt in our suitcases. That was apparently enough to get through customs just fine.

Will We Make Salt Again?

Making salt was a fun way to get a souvenir from the ocean for free. We know it was only free because we weren't paying the electric bills to keep the oven on for a half a day and simultaneously cool the house with air conditioning. I doubt that it makes economic sense to cook your own salt from seawater unless you have access to a free source of energy (maybe wood?) or time to wait for evaporation.

Yet we will certainly make salt again. We're smitten with the totally local, no cost, easy-to-take-home souvenir.

We also want compare different salts from different oceans. Will Hawaiian salt taste markedly different than San Sal salt? Will it have a different color or crystal structure? Curiosity demands that we experiment a little to find out whether we should start a collection of homemade salts from around the world.

Have you ever made salt? Will you try it next time you're at an ocean?

Making Egg Rolls {Wordless Wednesday}

many hands make light work eggrolls

egg roll with fillinghand rolling eggroll

dad frying eggrollshomemade eggrolls coming out of fryer

gumball eggroll

My family has a winter holiday tradition to make egg rolls from scratch. Usually the lengthy process happens on Christmas Day but this year we made them on New Years Day. We all love to cook and working together makes light work of the tedious rolling.

A corollary tradition is to stuff any remaining wrappers after the filling is gone with random foods. This year, cocktail cherries and chocolate was a hit. Lil's roll with a gumball, seen above? Totally disgusting! Though I love her face and my Mom's smile in the picture.

Does your family have any similar traditions?

How to Cook a Perfect Whole Bird

Thanksgiving is a little over a week away. This week I'll share some of my favorite recipes. Cooking a whole bird is a beautiful thing. The cook has the ability to infuse the meat with distinct flavors and a whole bird can feed a family for many meals. Use these techniques for a perfect Thanksgiving turkey, family style chicken dinner, or delicate individual game hens.

Brine - A sugar/salt brine infuses the bird with flavorful juices. (2-18 hours)

Make one by boiling one half gallon (8 cups) water and adding one cup kosher salt and one half cup sugar, boiled to dissolve and then cool it with one half gallon (8 cups) ice. You can add aromatics such as bay leaf, peppercorns, whole allspice, or orange peels once the brine is made.

Soak the bird in brine for a time appropriate to the thickness of the breast. For a fresh (or thawed frozen) bird, leave the bird in brine for the appropriate length of time: game hen - 2 hours, fryer chicken - 6 hours, roaster chicken - 8 hours, turkey - 12+ hours. Brine is optional but greatly enhances the flavor and juicy-ness of the bird.

Stuff - Add flavor to a bird by stuffing the cavity and skin with aromatics. Stuffing with bread filling is not recommended by the USDA and extends cooking time, which can dry the meat. (10 minutes)

Fill but do not over-stuff the cavity with quartered onions, fresh herbs, or citrus. Slide a finger between the breast and skin and place butter and/or herbs under the skin for a more delicious and juicy bird. Stuffing is totally optional.

Truss - Tie up the bird’s legs to cook evenly and not dry out. (5 minutes)

Using a 2 foot length of butcher’s twine or plain cotton string, tie the feet together. Push the tail fat under the legs inside the cavity. Then, drive a bamboo skewer between the two wings and through the bird so that they are held closely to the rest of the bird.

placing turkey in oven

Roast Hot and Fast - Low and slow methods work well for fat-marbled meats, which turkey, chicken and the like are not. Instead, roast at a high temperature to brown the skin, reduce temperature and do not over-cook. NB: Fatty water fowl should be steamed before roasting. (1-3 hours)

Thaw your bird to room temperature. Place it atop a few chopped vegetables (carrots, celery, onion) or directly in a roasting pan, breast side up. Optionally, rub with olive oil or butter. Sprinkle skin with salt and pepper.

Put the pan in a pre-heated 400 degree oven for 15-25 minutes until skin is browned. Drop the temperature to 350 degrees and continue cooking until the meat reaches 165 degrees F at the thickest part of the breast. Be sure you are not hitting bone when you measure temperature. Do not rely on pop-up gauges.

Rest - Allowing meat to rest is the most overlooked part of cooking. This step is absolutely necessary for the protein to cool and seize up the juices. (5-20 minutes)

A whole turkey should rest for at least 20 minutes, a chicken 10, and a game hen 5. Rest out of the oven on a cutting board.

tom carving tom turkey

Carve - Use a very sharp knife and bold strokes to carve a bird. (10-15 minutes)

First, break shoulder to wing joint. Carve through the wing at the shoulder joint to remove the wing. Split into wing and drum if you wish. Next, cut the breast pieces off, leaving skin in tact. Set aside and slice later. Then, remove the leg and thighs from the hip by breaking and cutting through the joint. If desired cut between leg and thigh at the knee joint.

Savor - The drippings and carcass of a bird can yield several more dishes. (20 minutes - days)

For gravy, skim fat from pan drippings. Heat drippings over medium heat. Add a slurry of water and flour slowly. Cook for 5 minutes, stirring, until sauce thickens.

Pick bits of meat off the carcass for making into salad, soup, or sandwiches.

To make stock, cover the carcass with water in a wide roasting pan with an onion, halved, celery chunks, and carrots. Cook at 200 degrees F in the oven for 8 hours. Strain the resulting stock, skim fat from top, and use in soup, risotto, or sauce. Stock can be frozen for up to one year.

This tutorial was part of the instruction at a recent cooking class. The participants there had plenty of questions. Do you?

Added to Hearth and Soul.

Homemade Biscuits From The Freezer

wwii ending celebrations At the Tayse family Xmas extravaganza, Grandma Joyce, of Rhubarb Crunch and Ginger Snap fame, inquired about freezer biscuits. She is a fantastic biscuit maker, trained by the best I've ever known, her mother (my late great grandmother) Leona.

Now living alone, she would like to have a biscuit or two for dinner but doesn't want to consume a whole batch. She could buy some of those dough boy frozen ones, but she is too thrifty (like all good Tayses) to spend more than a dollar a dozen. What's more, she suspects they don't taste as good as her own.

Always up for a challenge, I set out to find out the best way to store homemade biscuits in the freezer. The next time I made biscuits, I froze two before baking (raw) and two after baking just before they were browned. Holler in the comments if you want the recipe I use - it's a standard from Betty Crocker.

This weekend, I took all four biscuits out of the freezer. I immediately put one raw and one baked in the toaster oven, preheated to 350 degrees F. The baked one I pulled after about five minutes when the top browned; the raw baked for about 25 minutes until the top was brown. The other two were allowed to thaw in room temperature, and then I baked the thawed raw dough for 20 minutes until brown.

homemade freezer biscuit comparison

Both frozen-raw biscuits had less than desirable texture, though the rich buttery taste remained. Neither rose to the height of the pre-baked biscuits. You can see that in the biscuit pictured below and to the right, the raw frozen one, the fat pooled in pockets rather than lofted the flour into flaky layers as usual.

pre baked biscuit texturefrozen raw biscuit texture

The pre-baked biscuits held their flaky texture and tasted great. Lil judged the one reheated in the oven as the very best and I agree. The thawed and not re-baked biscuit was perfectly passable.

My advice to Grandma and any person wanting to save the trouble of baking a mess of biscuits for a small gathering is this: bake a large batch of biscuits, removing what you wish to save for later just a minute or two before they are fully 'done'. Freeze these on a cookie sheet and then pop into a freezer safe bag, squeezing out the air. When you later wish to eat a biscuit, cook one in a 350 degree oven for 5-10 minutes, or until brown on top.

Added to Simple Lives Thursday 46.

Make Your Own Pie Crust

perfect homemade pie crustWhen I wanted to make a derby pie for the Kentucky Derby over the weekend, every recipe I could find included a store bought pie crust. Crazy! Pie crust isn't hard, folks. Why shell out a few bucks for an over-processed, floury, off-tasting crust when you likely have the ingredients right at hand? With the fresh fruit pie season approaching, now is a great time perfect your pie crust.

Anyone can make a crust as good as store bought in fifteen minutes at home. With some practice, home cooks can make an outstandingly flaky and tasty pie crust. The techniques are few but important.

Science Behind the Perfect Crust

Whenever I struggle with something in the kitchen, I attempt to find out the scientific methods behind the results I want. In the case of pie crust, we're talking about melting temperature and mixtures.

An ideal fluffy and tender crust contains hundreds of tiny pockets of air. These are made by tiny bits fat that melt and poof up layers of flour. To get tiny bits of fat into flour layers, a pie maker cuts cool fat into flour. Chilled water is added to hold the dough together. Everything must be cool so the fat stays as whole pieces trapped in the flour. When baked in a hot oven, the fat melts and creates the pockets of air that result in a flaky texture.

If a crust is overworked or the fat is too warm, the flour absorbs the fat before baking. This creates a dense crust.

pie crust mise en place

Ingredients and Techniques

The perfect crust, in my opinion, has a delightful texture and subtle flavor. The baker can change the flavor by changing the fats used. I use mostly vegetable shortening with a few tablespoons of cultured butter.

Flour should be unbleached all purpose or pastry. While I have made pie with whole wheat flour, the bran in the flour weigh down the crust and add a nuttier flavor.

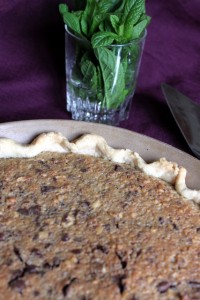
My favorite pie pan is the pictured Hartstone Pottery pie plate baking stone made in Zanesville Ohio. It evenly holds and distributes heat, creating a crisp bottom to the crust. A glass pan is the next best choice. Avoid metal pans as they tend to not heat as evenly.

Because all pie crust ingredients must remain cold and be brought together quickly, mise en place is important. Measure the flour and set aside. Measure the fat and chill. Put aside a glass of water with ice, along with some excess flour in case the dough sticks. Lay out a pastry cloth pin, and your pie pan of choice.

The final trick is to remember that there's nothing better than a rustic pie. Little hiccups in the appearance are the delightful reminders that your pie was made with love.

The Recipe (for a single 9 inch crust)

Using knives or a pastry cutter, cut 1/3 cup plus 1 tablespoon fat into 1 cup flour plus 1/2 teaspoon salt. Keep working until the mixture is in the size of small peas.

Add two tablespoons of icy cold water and stir just until combined, adding more water if necessary.


rolled out piecrust moving pie crust to panpie crust in pan

Turn out the dough on a floured cloth. Quickly form into a thick round with your hands. Handle as little as necessary to keep the dough cool.

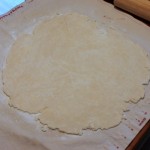
Gently but swiftly roll into a bigger circle. Turn the dough regularly to be sure it is not sticking to the cloth. Stop rolling when the dough is 4 inches bigger than the size of your pie plate.

Carefully fold the dough into quarters. Line up the center with the center of the pie plate and unfold.


how to finish a pie crustfolding pie crust edgesmaking fluted pie crust edges finished pie crust edges

Trim the edges to the height of the pie plate. Fold the edges under and then press between your fingers or use a fork to decorate the crust.

If at any time you must attend to something else, place the crust in the fridge to stay cool. Before filling or baking, I recommend chilling the crust for 15-20 minutes.

Homemade pie crust is more delicious, more fresh, and less costly than buying from a store. Will you try to make your own?


Added to Hearth and Soul blog hop 47.

Making and Using Natural Egg Dyes

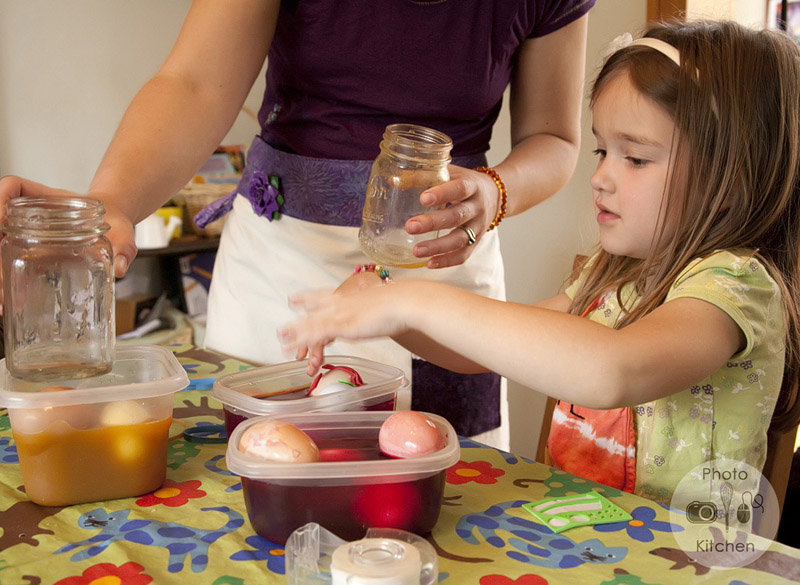
The lovely Catherine of Photo Kitchen came over last week to take photographs for Hounds in the Kitchen Egg Week 2011. Yesterday, I shared how to blow out eggshells. Continue reading for recipes, tips, and even an eggshell planting project. eggs in natural dye

Encouraged by my friend Vanessa Prentice, I made egg dyes from edible materials this year. I was surprised to find that natural dyes are easy to make, completely safe to consume, and don't stain your fingertips.

I made dyes from purple cabbage, red beet, and ground tumeric, pictured left to right above. Other edibles that Vanessa recommends include blueberries (purple color), tea (light brown), and coffee (dark brown). Green is a particularly difficult color to achieve, she says.

I boiled the edible materials in water with a splash of vinegar to act as a mordant. A mordant is a chemical that encourages dye to attach to a surface. These mixes simmered until the colorful edible until the liquid was brightly colored, about an hour.

I strained out the solids and poured the liquids into jars. Because I was using them the next day, I stored the dye in the refrigerator overnight.

Next, I gathered the prepared the eggs for decorating. Some were boiled and most were blown out for a more permanent canvass.

Lil wrapped the eggs in string, tape, or rubber bands for patterns. Shaped stickers also make white space on the shells.

eggs wrapped in rubber bands for resist dying

Finally, it was time to dunk the eggs. I should have predicted that the hollow eggs would float, but I didn't until we actually observed them. Because we wanted solid colored eggs, I gently weighed them down with glass jars on top of the dye.

weighing down blown out easter eggs with jars

The hardest part came next: waiting. Natural dyes make the deep rich colors if left in the dye bath for 24 hours. The blue egg in the picture on left was in the bath for about 2 hours; the one on the right soaked for 24 hours.

blue easter egg dyed with red cabbage leavesblue egg dyed with red cabbage

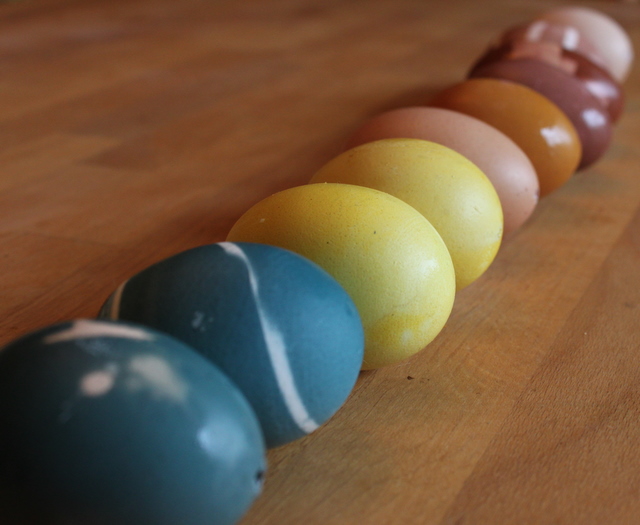
Finally we had a rainbow of dyed eggs with fun patterns! Are you dying eggs this year? Will you experiment with natural dyes?

rainbow of naturally dyed eggs

All photos with the Photo Kitchen watermark belong to Catherine and were generously shared with me. You may purchase copies and view the whole set of photographs in the online gallery. Use the coupon code houndscrossover to receive 25% off prices until May 15.

Added to Hearth and Soul Volume 44.