 I ate spaghetti with steamed garden dragon tongue beans, olive oil, pepper, chili flakes, and Parmesean cheese for dinner.
I miss Alex who is in California on business. He is the reason we eat things other than pasta.
Your Custom Text Here
 I ate spaghetti with steamed garden dragon tongue beans, olive oil, pepper, chili flakes, and Parmesean cheese for dinner.
I miss Alex who is in California on business. He is the reason we eat things other than pasta.
We're dealing with some health issues, hence posting is light. I'll fill y'all in when there is some resolution. In the meantime, find some sour cherries.
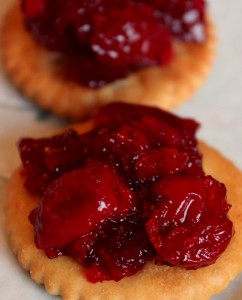 These are the best preserves ever.
If I could only eat one jam for the rest of my life, this would be it.
Sour cherry preserves kick the lid off all other preserves.
<insert your favorite superlative here>
I rarely make such declarations and in fact poke fun at Alex who overuses superlatives. But seriously folks, I love sour cherry preserves.
The luminescent crimson cherries yields a rich yet adaptable flavor. Sugar mellows the tart just enough to not cause a pucker but a piquant zap to the tongue.
Tart cherry jam is as at home in a crepe as on a charcuterie plate. A schmear on cheese sandwich elevates the everyday to the remarkable. On a buttermilk biscuit? Oh my...
The sour cherry season in central Ohio is nearly over but don't dismay. Our friends to the north are just beginning their harvest. Lisa the Waitress, in her sorely missed blog, suggests ordering cherries from Michigan through Jacquemin or Yutzy's Farm. The most recent Yutzy's newsletter said "SOUR CHERRIES. ARRIVING IN 2 SHIPMENTS 2nd AND 3rd WEEKS OF JULY. PLEASE CALL TO ORDER AND FOR PRICING. 614-873-3815"
[print_this]
Sour Cherry Preserves
makes 6-7 half pints
7 cups sour cherries, pitted and crushed 4 teaspoons calcium water (comes with Pamona's pectin) 2 cups sugar (add more or substitute honey as your taste dictates) 4 teaspoons Pamona's pectin
1. Stew sour cherries in their juice over medium heat in a heavy bottomed pan for 5-10 minutes.
2. Meanwhile, sterilize jars, lids, and rings. I like to heat clean jars in boiling water in my canning pot and put lids and rings in a smaller pot of boiling water.
3. Stir calcium water into cherries.
4. Measure sugar in a bowl. Stir pectin into sugar.
5. Add sugar/pectin mixture to the cherries. Stir and heat to boiling.
6. Once at a boil, turn off the heat. Put a teaspoon of jam in a bowl and place in freezer for 1 minute to test for the set. If it gels, proceed with water bath canning. If it does not set, stir one half cup sugar, 1 teaspoon pectin, and 1 teaspoon calcium water into hot cherries. Return to boil and test again.
7. To can, ladle hot jam into hot jars, leaving a quarter inch head space. Place lids and rings on jars and tighten to finger tight. Return jars to the hot water bath and process at boiling for ten minutes.
8. Remove jars from boiling water and allow to cool on a dishcloth covered counter for 24 hours. Remove rings, wipe away leaks, and store in a cool dry place for up to two years.
[/print_this]
Related notes:
Added to Hearth & Soul 54.
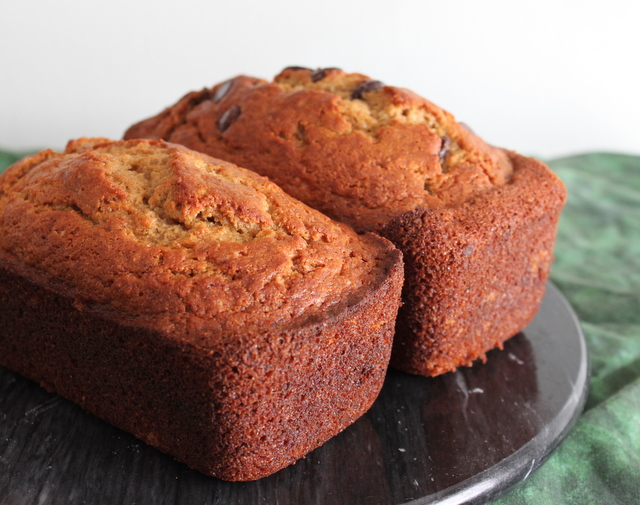 We are all out of bulk flour so we are offering a group buy again.
We order fifty pound bags of King Arthur brand flours through a wholesale company. The flour is high quality and manufactured in an employee owned co-operative business. This time around, we are able to get organic bread flour. Yay!
Group Buy Details
Please fill out the King Arthur Flours June 2011 Form to place your order. Email me with any questions or concerns.
About the Flours
BAKERS ORGANIC CLASSIC 50# $43.22 Milled from 100% certified organic hard red spring wheat, with similar characteristics to the King Arthur Special. The result is a flour suitable for a wide range of baked goods with excellent mixing and baking characteristics.
FLOUR SPECIAL MALTED ENRICHED 50# $27.74 Special Malted Enriched is a medium protein general purpose wheat flour.
FLOUR WHEAT WHOLE WHITE 50# $32.81 Wheat whole white is 100% whole wheat ground as white and substituted up to 100% in most recipes. I use this for everything except pie crust, roux, and 50% bread flour in sandwich bread.
HARVEST FLOUR SIR GALAHAD 50# $25.39 Sir Galahad is an enriched flour from hard red winter wheat.
HARVEST FLOUR SIR LANCELOT 50# $35.64 Sir Lancelot is enriched hi-gluten bread flour. Necessary for high quality bread.
King Arthur offers more detailed descriptions of the conventional and organic flours.
Order with the form or send questions my way. Happy baking!
PS. I also organize a monthly group buy of herbs and toiletries from Frontier Co-op with pickup at Sprout Soup. Email me if you are interested.
Related: How to Store Bulk Flour
On a picturesque 65 acres in east central Ohio, there lies Jorgensen Farms, a biodynamic animal and vegetable operation. Proprietor Val (pictured below in blue) works the land guided by her distinguishing palette and eye for pleasing design. She builds vibrant soil through careful crop rotation and pasturing. Perhaps the most recognized crop is her mint grown especially for central Ohio based Jeni's Splendid Ice Cream's Backyard Mint flavor.


 You may click on pictures to enlarge them.
I attended the Ohio Lamb Chef's Day at Jorgensen Farms one cold and rainy day this May. The event included tours and tastings aimed at educating restaurant chefs. We walked through herb gardens near the farm houses and viewed sheep out to pasture on rolling hills. Two chilly day-old lambs visited in the arms of flower grower and livestock helper Roger Genter.
The meat of the event was a fascinating demonstration by Dr. Paul Kuber, associate professor of Animal Sciences at Ohio State University. He expertly butchered a lamb into cuts usable by restaurants and home cooks, sharing anatomy and culinary tidbits throughout. A six course sampling meal followed, using some of the cuts demonstrated.
At the end of the lamb cutting, a large bowl of scraps was left. Kuber shared that these could be used for sausage or other charcuterie. When the June Charcutepalooza challenge, stuffing, was announced, I knew what I had to make: mint lamb sausage, inspired by Jorgensen Farms.
Lamb mint sausage makes good use of the abundant mint and garlic scapes in our own backyard. We chose Ohio lamb and pork to keep the recipe local. The binding liquid included some of our own apple cider vinegar made last autumn.


As we have been stuffing sausage for a few years, the process runs quickly and smoothly now. Alex and Lil do most of the meat handling while I clean up behind them. From grind to bind to stuffing, a batch only takes about thirty minutes.
I served the sausage tonight with barley risotto and wilted homegrown greens. I highly recommend this hearty and healthy combination. It warmed us on a unseasonably cool evening, reminiscent of the chilly day I spent at the lovely Jorgensen Farms.
Mint Lamb Sausage
Makes 10 7 inch links
2 pounds lamb shoulder, boned 1 pound pork shoulder, boned 0.9 oz kosher salt (a hair less than 2 tablespoons) 1/3 cup finely chopped fresh mint 1 1/2 tablespoons finely chopped fresh young garlic scapes 1/4 cup apple cider vinegar 1/4 cup water hog casings
1. Grind lamb and pork with a large die. 2. Transfer to a mixing bowl. Add salt, mint, and scapes. Mix with batter paddle to combine. 3. Slowly pour in apple cider vinegar and water while mixing on low speed. Continue mixing until sausage binds or becomes very sticky, approximately 5 minutes. 4. Stuff into hog casings and make links.
[/print_this]
 What is it?
Garlic scapes are the magical-wand-like flower shoots of the garlic plant. They emerge in late spring and contain a small bud that will become a flower if left on the plant.
Many farmers, including me, prefer to cut the scapes away. The theory is that instead of the garlic spending energy growing the allium blossom, it will focus on the bulb.
The scape is edible at this early age. Many farmers include them in June CSA shares. Others sell them at the farmer's markets.
Eating Garlic Scapes
As with all vegetables, I encourage cooks to taste the garlic scape raw as a first step to using it in recipes. I find it has a mild garlic and onion flavor. The texture is dense and stringy in wider parts of the scape but palatable raw in the thin ends.
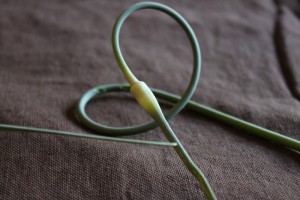 Young scapes are very curly. Choose these for the most tender bite. The flower bud can also be eaten and tastes like the rest of the scape with a hint of bitterness.
If you enjoy the scape raw, toss it in salads or use as a garnish. You can also blend it with basil, olive oil, salt, and pepper to make a delightful pesto sauce. We'll be eating scapes that way at least once this week.
If you aren't a fan of raw garlic flavor, try cooking with the scapes. Chop finely and use as you would use garlic or chives. In larger chunks, a garlic scape is a savory addition to stir fry, frittata, or quiche. They can flavor rice or quinoa dishes.
If you find yourself unable to fit them into your menu, freeze the scapes whole with the rest of your vegetable scraps for the next time you make stock.
Our family <3s garlic scapes, does yours?
PS. I asked Lil to arrange the scapes for me to photograph and she came up with the heart. How cute!
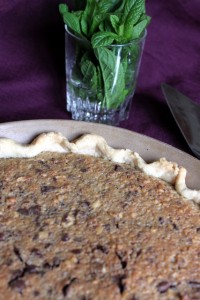 When I wanted to make a derby pie for the Kentucky Derby over the weekend, every recipe I could find included a store bought pie crust. Crazy!
Pie crust isn't hard, folks. Why shell out a few bucks for an over-processed, floury, off-tasting crust when you likely have the ingredients right at hand? With the fresh fruit pie season approaching, now is a great time perfect your pie crust.
Anyone can make a crust as good as store bought in fifteen minutes at home. With some practice, home cooks can make an outstandingly flaky and tasty pie crust. The techniques are few but important.
Science Behind the Perfect Crust
Whenever I struggle with something in the kitchen, I attempt to find out the scientific methods behind the results I want. In the case of pie crust, we're talking about melting temperature and mixtures.
An ideal fluffy and tender crust contains hundreds of tiny pockets of air. These are made by tiny bits fat that melt and poof up layers of flour. To get tiny bits of fat into flour layers, a pie maker cuts cool fat into flour. Chilled water is added to hold the dough together. Everything must be cool so the fat stays as whole pieces trapped in the flour. When baked in a hot oven, the fat melts and creates the pockets of air that result in a flaky texture.
If a crust is overworked or the fat is too warm, the flour absorbs the fat before baking. This creates a dense crust.
Ingredients and Techniques
The perfect crust, in my opinion, has a delightful texture and subtle flavor. The baker can change the flavor by changing the fats used. I use mostly vegetable shortening with a few tablespoons of cultured butter.
Flour should be unbleached all purpose or pastry. While I have made pie with whole wheat flour, the bran in the flour weigh down the crust and add a nuttier flavor.
My favorite pie pan is the pictured Hartstone Pottery pie plate baking stone made in Zanesville Ohio. It evenly holds and distributes heat, creating a crisp bottom to the crust. A glass pan is the next best choice. Avoid metal pans as they tend to not heat as evenly.
Because all pie crust ingredients must remain cold and be brought together quickly, mise en place is important. Measure the flour and set aside. Measure the fat and chill. Put aside a glass of water with ice, along with some excess flour in case the dough sticks. Lay out a pastry cloth pin, and your pie pan of choice.
The final trick is to remember that there's nothing better than a rustic pie. Little hiccups in the appearance are the delightful reminders that your pie was made with love.
The Recipe (for a single 9 inch crust)
Using knives or a pastry cutter, cut 1/3 cup plus 1 tablespoon fat into 1 cup flour plus 1/2 teaspoon salt. Keep working until the mixture is in the size of small peas.
Add two tablespoons of icy cold water and stir just until combined, adding more water if necessary.
Turn out the dough on a floured cloth. Quickly form into a thick round with your hands. Handle as little as necessary to keep the dough cool.
Gently but swiftly roll into a bigger circle. Turn the dough regularly to be sure it is not sticking to the cloth. Stop rolling when the dough is 4 inches bigger than the size of your pie plate.
Carefully fold the dough into quarters. Line up the center with the center of the pie plate and unfold.
Trim the edges to the height of the pie plate. Fold the edges under and then press between your fingers or use a fork to decorate the crust.
If at any time you must attend to something else, place the crust in the fridge to stay cool. Before filling or baking, I recommend chilling the crust for 15-20 minutes.
Homemade pie crust is more delicious, more fresh, and less costly than buying from a store. Will you try to make your own?
Added to Hearth and Soul blog hop 47.
 I have resisted written journals forever because writing about just anything seemed to open for me.
When I came upon the idea I could track activities around the homestead in a journal, I was excited. I challenged myself to write a little something every day in March. Meeting the challenge was a cinch because there's nothing I love more than being productive and writing about it.
Each evening, I organize the day's record with a title line that includes the date, temperature, weather, and location. Underneath, I note accomplishments and challenges, such as 'moved the chicken coop', 'Lil coughing all night', 'cooked for family', or 'started tomato seedlings'. This is the same format I use for my field log that I've kept since high school to record birds and significant natural sightings on hikes and vacations.
Here's what I love about the log:
Do you keep a journal or log? How do you keep track of gardening and cooking activities?
Added to Simple Lives Thursday 38th Edition.
A few weeks ago I was approached by Lil's teacher at school about having an intern. Her step-daughter was looking for a cooking-related internship. Other small business owner friends have had great experiences with interns, so I agreed! Keara will be assisting around the homestead and at cooking classes for the next two months. She might appear in blog posts too. Below she introduces herself and the internship program.
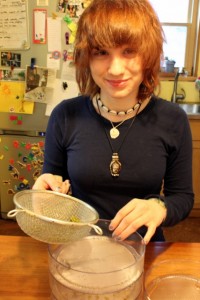 "Hey there everyone, it's Keara. I'm a senior at Linworth AP and have the chance to do something called a walkabout. At the end of January all the seniors go out into the 'real' world of adults and pursue their hobbies or career paths. Some people stay here in Ohio, while others may travel all the way to Mexico to volunteer in an orphanage. There are two walkabouts, one starting in January and ending in March, the second from April to May.
My current passion is life is cooking, and for my first walkabout I interned at the lovely Worthington Inn and worked in the kitchen. The Worthington Inn buys everything that they can locally and fresh. I'm interested in buying local organic, along with gardening and using what I plant in the foods I eat. This is what brought me to Rachel, I'm really interested in how she goes about making her food and hoping once I leave her to be able to use what knowledge I've gained in the kitchen at home. Thanks for reading!"