Friday Five: Firsts and a Last

I intended to post this for Friday Five but didn't hit the publish button. Oh well, pretend it's yesterday again. This week was full of milestones at Hound Central. lambs at jorgensen farm 1) First time the three of us have slept under different roofs. On Wednesday night, Alex was in Fort Lauderdale for work, Lil was at my parents', and I was sleeping at home before waking up early for a flight to BlogHer Food '11.

2) First lamb tartar. On Tuesday I had the pleasure of visiting Jorgensen Farm for an Ohio Lamb media event. It was inspiring to tour the farm, sample six dishes created with lamb, and see an amazingly detailed butchering demonstration. I will share more about the farm and lamb recipes soon.

3) Rachel's first ipod. The smart and generous people at Moe's Southwest Grill emailed me a few weeks ago to offer a ride from the airport to the conference hotel. The convenience and company were gifts enough, I thought. I was shocked to find that the swag bag included an ipod shuffle. Wow!

4) Lil's last day of preschool. After four years at the School for Young Children, Lil will be an alumna after Friday's class. We love this play based pre-school; Alex and I are presidents of the advisory committee. There are still a few spots available for children who are 3-5 years old. See their enrollment page to give your child and family a strong emotional foundation.

5) First moments of our homeschooling. After weighing options for Lil's education, we settled on homeschooling. We look forward to continuing our flexible, adventurous lifestyle while learning as a family.

Saucy Mama Asparagus Potato Salad

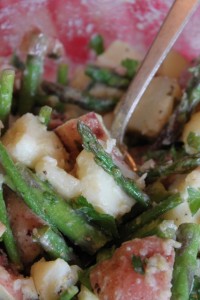
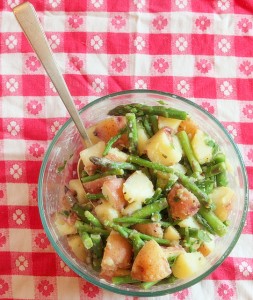
Another Saucy Mama Fabulous with Five recipe is coming at you today. There are twelve hours left to enter the Saucy Mama giveaway on my Egg Cups post! saucy mama potato salad recipe Last week, when it was sunny and warm, we fired up the grill for our first cookout of the year. I created this potato salad featuring local and seasonal asparagus to serve with Ohio bison burgers on homemade buns.

This salad is perfect for picnics or potlucks because with no eggs or mayonnaise, it can safely be served at room temperature. If asparagus are not in season when you make this, blanched sugar snap peas, green beans, or broccoli would be a great substitute.

I chose parsley as a fresh flavoring agent because it is growing wildly in my backyard garden. If you prefer another taste or have an abundance of a different herb in season, substitute at will.

potato salad ingredients

asparagus potato salad recipeThe trick to a great potato salad is properly blanching the potatoes and vegetables. Here's how:

Trim each vegetable to size and heat two large pots of water to boiling. Salt the water heavily and toss the vegetables in their respective pots. When tender, remove from the boiling water and dunk in a bath of ice water. This will rapidly cool the vegetable, preserving the crisp texture and appealing color.

To make the vinaigrette, mix the mustard, vinegar, salt and pepper in a bowl. While whisking, slowly drizzle in olive oil to make an emulsion. The oil will be held in suspension by the mustard to create a uniform tasty coating for all the vegetables.

I like this dish best after resting in the fridge for 12-24 hours. All the flavors have mingled by then. It is best served at or near room temperature.

[print_this]

Picnic Asparagus Potato Salad

serves eight

1 pound red skin potatoes (about nine small), cut in eighths 1/2 pound asparagus, chopped into 2 inch lengths 3 tablespoons fresh flat leaf parsley, chopped 2 tablespoons Saucy Mama Lemon Tarragon Mustard 1 tablespoon white wine vinegar 1 teaspoon salt (plus additional for blanching) 1 teaspoon ground black pepper 3 tablespoons olive oil

1. Blanch the potatoes and asparagus: Heat two pots of water to boiling over high heat. Salt water with 2-3 heavy pinches of kosher salt. Add potatoes to one pot and asparagus to another. When vegetables are tender (10-15 minutes for potatoes, 3-5 minutes for asparagus), remove from boiling water and dunk in an ice water bath until cooled to room temperature. Transfer to a serving bowl.

2. Make the vinaigrette: Whisk together mustard, vinegar, salt and pepper in a medium mixing bowl. Slowly drizzle olive oil into the mustard mixture while whisking. Continue to add olive oil slowly until all is emulsified.

3. Pour the vinaigrette over the potatoes and asparagus. Add the chopped parsley. Stir gently to coat the vegetables evenly with the sauce.

4. Serve at room temperature. Store before and after service in a cooler or refrigerator for up to four days.[/print_this]

Flowers That Stink Like Death and Taste Like Spring

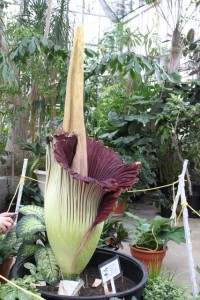
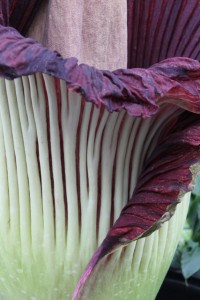
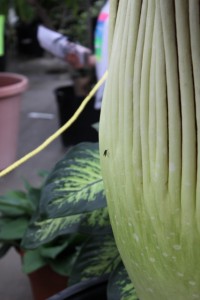
This week has been all about flowers here. When we returned to Ohio, everything was in bloom! corpse flower at Ohio Statefolds of the corpse flower bloomfly on a titan arum

Along with all others who marvel at plants and science, we had to trek to the Ohio State University campus to view the largest flower in the world. Rarely coaxed to bloom in a greenhouse, a Titan Arum, aka corpse flower, bloomed last weekend in the Biological Sciences greenhouse. It attracts flies with a scent that reminds many of rotting flesh or food. Fortunately by the time we visited, two days after bloom, the smell had largely dissipated.

Nicknamed Woody, this is the first known instance of a Titan Arum grown from seed to bloom in Ohio. The beautifully undulating petals are quickly fading but visitors are welcome at the greenhouse. The greenhouse link also includes frequently asked questions and a webcam of the flower.

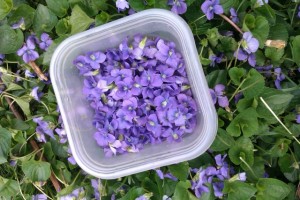
collecting edible violetsOn the way home, and at every available instance, we dine on flowers. We snack on redbuds and add dandelion greens to our salads. Lil also likes to eat the young dandelion flowers.

Last night, Lil and I filled a container with edible purple violets from a neighbor's yard to exchange with another friend for morel mushrooms. We will collect more sweet violets to decorate Alex's brother's wedding cake on Saturday.

It's a great time to enjoy and eat the wild flowers around us!

P.S. I shared a guest blog post, Any Kinda Chowda, at The Lean Green Bean today. Hop over for two recipes and a ratio for chowder!

This post added to Simple Lives Thursday, 41st Edition.

Edible Foraged Flowers: Red Buds

edible redbud tree just before blossom The magenta pink flowerlets of the Red Bud Cercis canadensis tree are popping out everywhere these days. You can find the trees in parks (like this specimen at Franklin Park conservatory), in naturalized areas, and maybe even your own yard.

Did you know that they are edible? The buds taste best just before the petals open and can be consumed with the flowers slightly open as in these pictures.

edible red bud flowers

The bright pink buds can be picked and eaten out of hand, tossed into salad, or baked into eggs or pancakes. They are tender to the bite with a slightly sweet, slightly tangy flavor. While I have not tried this myself, I believe red buds would flavor and color vinegar beautifully.

edible red bud flowers in hand

Whenever you are foraging edibles, I recommend the following:

  • ask for permission if there is an obvious owner to the tree
  • in a park or natural space, leave enough behind for other foragers
  • leave enough material for the tree to produce seeds and feed bees and other insects
  • wash the edibles or inspect carefully as many creatures may have crawled on your food

Go forth and eat Red Buds!

Friday Five: Facts about Backyard Chicken Eggs

The talented Catherine of Photo Kitchen came over last week to take photographs for Hounds in the Kitchen Egg Week. Today's conclusion follows tutorials for blowing out eggs, making natural dyes, baking a dutch baby, and creating eggshell seedling cups. child holding a backyard eggA year and a month after collecting our first pullet egg, we have learned a few things. Today we share our top five facts about backyard eggs.

1) Eggs are laid with a special impermeable coating that keeps them fresh at room temperature. So long as we have space, we still refrigerate ours, but it's nice to know that they are edible for weeks if we want to store them on the counter.

2) Fresh eggs, hard boiled, are difficult to peel. As eggs age, they lose moisture and naturally detract from the shell. Very fresh eggs are so full of moisture that the white sticks to the shell like it is hanging on for dear life. Adding a few tablespoons of white vinegar to the boiling water increases 'peelability'.

3) Hens lay eggs without a rooster. Eggs are the product of a hen's menstural-like cycle, one which goes on whether a rooster is around or not. Conversely, eggs will not develop into chicks unless a rooster fertilizes them. Children are usually sad to learn that our eggs will not turn into baby chicks.

4) Each breed has a uniquely colored and shaped egg. We can identify who is laying and who is not simply by the color and shape of the eggshells collected. Some breeds, like the Aracuana and Barnevelder, are recognized for the unusual color of their eggshells.

child collecting eggs in a backyard coop

5) Collecting eggs is a treasure hunt for the most versatile ingredient we can raise ourselves. Whether Lil up-ends herself into the coop or Alex and I reach into the nest box, we are delighted on a daily basis at the golden jewels we find.

All photos with the Photo Kitchen watermark belong to Catherine and were generously shared with me. You may purchase copies and view the whole set of photographs in the online gallery. Use the coupon code houndscrossover to receive 25% off prices until May 15.

P.S. Happy Earth Day! May you challenge yourself to a greener lifestyle, enjoy America's natural resources, and perhaps even procure some free earth-friendly goodies like a Northstar veggie burger.


Added to Fight Back Friday April 22.

How to Blow Out Eggs with Photo Kitchen

The lovely Catherine of Photo Kitchen came over last week to take photographs. We ended up doing so many fun things with eggs, including decorating and eating them, that will be sharing them for the next five days during Hounds in the Kitchen Egg Week. Inspired by Vanessa Prentice's workshop at the Ohio Ecological Food and Farm Association annual conference, I wanted to try my hand at making natural egg dyes this year. I suspected they might be really cool and wanted to create eggs that would last for years. A boiled egg in shell wasn't going to cut it and, besides, there are only so many boiled eggs our family wants to eat.

So I blew out some eggs. Removing the raw yolk and white from the shell to preserve the shell is relatively simple and allows the eggshell to be decorated and displayed for years to come. Here's how I do it:

making hole in egg for blowing out First, create a small hole in each end of the egg. I find that a sharp short nail (this one came from a picture hanging kit) works well. I grasp it and the egg firmly and tap gently until a hole is started. I try to punch through the hole so that it takes the round shape of the nail.

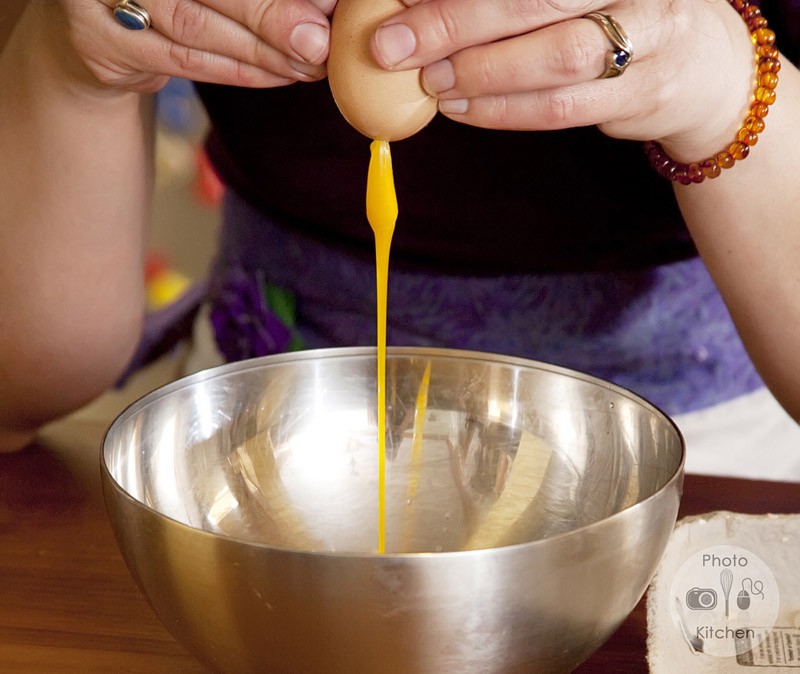
Gently shake the egg to break the yolk. Then, place your lips over one hole and blow with pressure over a bowl. To be sure you aren't going to contract salmonella, use a fresh egg from a known source and try not to ingest the raw contents. The white and yolk will slowly drip into the reservoir.

blowing out egg yolk

When the white and yolk have totally escaped, rinse the egg. Put it somewhere safe to dry thoroughly before decorating. You can use the egg contents for cooking. They keep in the refrigerator for a few days.

Come back tomorrow to see how we made and used natural dyes from edible materials.

All photos with the Photo Kitchen watermark were taken by Catherine and generously shared here. You may purchase copies and view the whole set of photographs in the online gallery with password lileaster. Use the coupon code houndscrossover to receive 25% off prices until May 15.

How An Ohioan Forages for Clams in Massachusetts

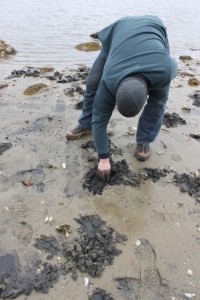
Foraging for shellfish is one of Alex's great pleasures of vacationing oceanside. It's always happenstance when he comes across a bed of something tasty, so the method for digging is a bit untraditional. Here's how Alex, and later me, dug for clams yesterday on Planting Island causeway near Marion, Massachusetts.

1) Negotiate with the five year old for the use of her green plastic shovel. digging for clams in massachusetts

click pictures for bigger images

2) Look for the telltale bubbles in sand that indicate something is breathing under the sand. Abandon the shovel and dig your fingers into the cold black muck. silty sand digging for clams

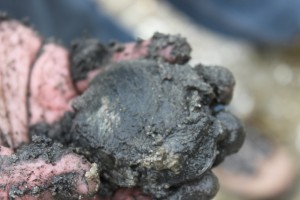
3) Cheer when you pull up a quahog. freshly foraged quahog clam

4) Be distracted when you find a whole conch, with dead animal inside. Try to remove animal because it reeks. whole conch welk found on beach

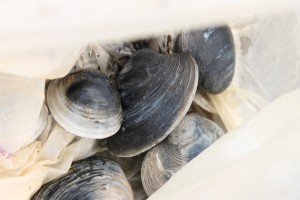
5) When your fingers are frozen, find a plastic sack in the car to hold your bounty. Make plans to cook chowder. bag of clams

Kefir from the Land of B

Today is my final guest post as my time as a teacher at Franklin Park is winding down. Fellow chicken-lover and charcutier Rachell Bernhardt from Land of B contributes a post today about kefir. Kefir is one food we have never made for ourselves but I am inspired by her words to get started soon! kefir grains and kefirCliff and I have a variety of things bubbling on the counter and in the fridge. One of those things is kefir. I took a yogurt, kefir, and butter class at Whole Foods offered by Snowville Creamery. We had already taken a great butter making class at The North Market offered by Snowville. Warren who teaches the classes has business cards that say he's a dairy evangelist and he truly is. We had a thorough lecture on milk and milk fat, patuerization, and homogenzation.

Kefir is a fermented milk drink loaded with probiotics and other great stuff for your insides. It is made from what are called grains, that really look like cauliflower. The grains are cultured at room temperature in fresh milk for 24-36 hours. Then the grains are strained from the kefir. The kefir goes in the fridge and the grains get more fresh milk to start the process over.

One of the cool things about kefir is that the grains grow each time they are cultured. So, there's always some to share with friends! The grains we got from Snowville have been in use since 1978. If you are interested in getting some grains comment below to let me know and I'll contact you when we have more. View the picture slide show with descriptions.