Eggshell Seedlings

The lovely Catherine of Photo Kitchen came over last week to take photographs for Hounds in the Kitchen Egg Week. After blowing out eggs, dying with natural dyes, and baking a dutch baby, we were left with an excess of shells.

empty eggshells for seedlings

We could have tossed the shells in the compost. Instead, we aimed to recreate some easter eggshell planters Lil has been coveting at the big box home improvement store.

dirt in eggshells

All we did was fill an eggshell with potting material and a few seeds for Lil's favorite herb, chives. Then we watered the shells and placed them under lights with the rest of our seedlings.

planting seeds in eggshells

After the frost free date, we will transplant the whole set up into a bed outside. The calcium rich shell with break apart and dissolve in the soil, giving nutrients to the plant.

I would not advise planting carrots or other root vegetables in eggshells because they need unencumbered space to grow straight down. Most other seeds are fair game for starting in shells.

If you don't have a grow light, try planting a few dry beans in shells in a sunny window. Though beans don't need to be started indoors, they are very quick to sprout and grow fast enough to satisfy even the most impatient child.

All photos with the Photo Kitchen watermark belong to Catherine and were generously shared with me. You may purchase copies and view the whole set of photographs in the online gallery. Use the coupon code houndscrossover to receive 25% off prices until May 15.


Added to Simple Lives Thursday 40th Edition.

Road Trip Treats: Grandma's Ginger Snaps

We are leaving for a road trip vacation to Massachusetts on Thursday. One way we conserve money and stay away from overly processed food is to make our own treats for the trip. Stay tuned for several homespun road trip ideas over the next two weeks.grandma's ginger snaps recipe

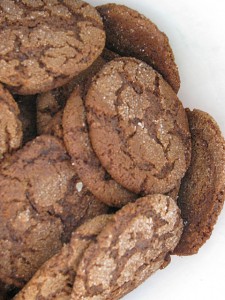
My grandmother makes Ginger Crinkles, aka ginger snaps, for family gatherings. My dad, his siblings, and their kids (that is, myself, my sisters, and cousins) all love these cookies and have been known to hoard them from each other.

Ginger snaps are the favorite of Dad's side of the family with good reason: they are perfectly spiced, have a delightfully crispy texture, and pair easily with hot coffee, milk or beer.

Making Ginger Snaps

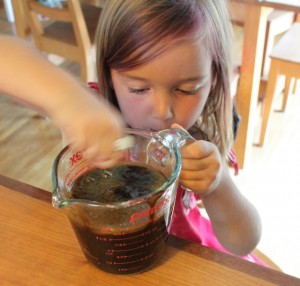
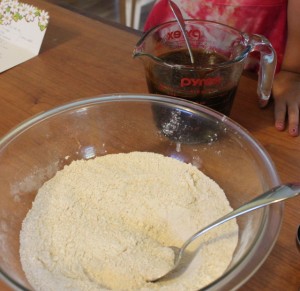
These cookies cook up easily and travel well. Lil and I make them with a single bowl and only dirty a one cup dry and 2 cup liquid measure. No mixer is required. The hardest part of the recipe is getting the sticky molasses out of the measure into the mixing bowl! My trick for this is to measure the oil into a liquid measure and pour the molasses in next so the oil acts as a nonstick barrier.

After they are baked and cooled, I store ginger snaps in a wide mouthed half gallon canning jar or plastic container. They keep this way for...well, I'm not sure. They disappear in a few days around my family!


child mixing gingersnaps recipechild mixing gingersnap cookies recipe Substitutions


This recipe is originally dairy free and can be made vegan by substituting flaxseed meal and water for the egg. Follow the link for a thorough post about making and using this substitute by GNOWFGLINS.

I have made this recipe substituting white whole wheat flour for the all-purpose flour. It bakes up fine but the texture and taste is noticeably different. A 50/50 mix of white whole wheat and white is almost imperceptible.

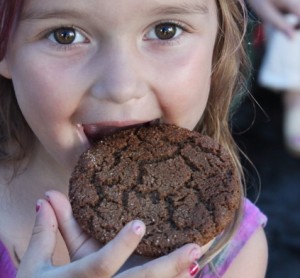
child friendly gingersnap recipesisters enjoying gingersnap cookiesmunching on gingersnap Goofy Tayse girls enjoying gingersnaps at a rainy tie dye party last summer.

[print_this]

Grandma's Ginger Crinkles, aka Ginger Snaps

2/3 cup vegetable oil 1 cup sugar + 2 tablespoons sugar for rolling 1 egg (or 1 tablespoon flaxseed meal and 3 tablespoons water, whisk and let stand for 5 minutes) 4 tablespoons molasses 2 cups flour 2 teaspoons baking soda 1/2 teaspoon salt 1 teaspoon ground ginger 1 teaspoon ground cinnamon

1. Heat oven to 350 degrees F.

2. Measure flour, soda, salt, ginger, and cinnamon into a mixing bowl. Stir together.

3. Measure vegetable oil, sugar, egg, and molasses into a glass liquid measure. Whisk together until thoroughly combined.

4. Pour the liquid into the dry ingredients and stir together until mixed completely.

5. Drop by teaspoonfuls into a small bowl that contains the 2 tablespoons sugar. Form into balls and coat with sugar.

6. Place on a silpat lined cookie sheet 2 inches apart. Bake for 15 minutes. Cool on a rack.

[/print_this]


My grandmother is a great cook. You may also enjoy Grandma's Rhubarb Crunch recipe.

Added to Hearth and Soul Volume 43.

Real Mom Nutrition Weighs In On Fat

I am delighted to publish this guest post from Sally Kuzemchak, the registered dietitian behind Real Mom Nutrition. When she asked if I had anything specific in mind, I pounced with my standard question to nutritionists: 'What do you think about fat?' what follows is her reasoned and helpful response. An occupational hazard of being a dietitian is that people love to tell us we’re wrong. Anytime a research finding flies in the face of conventional nutrition wisdom—Beer is good for you! You can eat Twinkies all day and still lose weight!—we’re on the receiving end of a certain amount of “gotcha!”

And a report last year seemed to do just that: After analyzing 21 studies involving nearly 350,000 people, researchers concluded there was no proof that saturated fat raises the risk for heart disease or stroke.

So everything we’ve been telling people—buy low-fat milk, eat leaner cuts of meat, lay off the butter—is way off base? And the Wise Traditions folks (and even the Atkins dieters) are right on target? Well, at last year’s national meeting of the American Dietetic Association, even a panel of heavy hitters from Tufts University and Harvard Medical School couldn’t reach a conclusion.

But I can tell you this much: Most people’s fat intake isn’t coming from a grass-fed steak with a side of kale. It’s coming from McDonald’s cheeseburgers and DQ Blizzards and Olive Garden Alfredo sauce. And this highly processed diet also happens to be crammed full of sodium, nutrient-poor white flour, added sugar, food dyes, and preservatives. So could a higher-fat diet without all this extra junk be good you? Maybe, but I’m not ready to start drinking tall glasses of full-fat raw milk just yet.

While the research is still evolving—and the major players in the field are still fighting it out—here’s what I’ve settled on for myself and my family when it comes to fat:

*I buy local, organic eggs and wouldn’t dream of throwing the yolks down the drain to save fat grams (the yolk contains nutrients you won’t find in the white).

*I cook beef every week, from a share we bought of a grass-fed cow.

*I buy full-fat cheese because it tastes better. I bake with real butter.

*I buy conventional, skim milk because I like the taste (and because frankly, I’m not ready to make the financial leap to organic yet since we drink three gallons a week). If I did buy organic, I’d choose one or two-percent since it contains omega-3 fatty acids.

*I use liberal amounts of olive oil in cooking and eat nuts or nut butter every day.

*I limit processed meats. I love wonderful, delicious bacon as much as the next person, but it doesn’t have much nutritional value—and the American Institute for Cancer Research says any amount of processed meat raises cancer risk—so it’s an occasional splurge around here.

*I’m trying to cook more meatless meals. I’m convinced that eating a plant-based diet is important for health and the planet. Plus, it’s more economical. And my Paleo Diet-following friends will have to pry the (whole wheat) pasta out of my cold, dead hands.

I’d love to hear your thoughts on the topic.

Talking to Children about the Japan Earthquake

Article first posted as 'Guiding Children Through Tragedy' on Technorati, where it made the Thursday front page! japan statue how to talk to kids about disasterNews of the Japan earthquake and resulting tsunami and nuclear disasters is hard to stomach as an adult. Around the world, people are struggling with their feelings of helplessness, insecurity, and anxiety.

In this information age, children are often witness to images from a disaster. Even if parents manage to keep them sheltered from media, kids can sense when their mothers or fathers are worried about something big.

Andy Newman in the New York Times tells of his wife assuring their six-year-old daughter that the photograph she saw of rescue workers helping a Japanese person in visible distress was, "a movie for grown-ups."

This type of shielding does little to actually protect children; it instead can lead to misinterpretations and confusing feelings that the child cannot process alone.

To find another way, I sought out the wisdom of the late Mr. Fred Rogers. He advises parents to explain disasters in an age-appropriate fashion, focusing on the helpers like rescue and hospital workers. Being naturally self-centered, children need to be reassured that they are safe and their feelings are accepted.

On the day of the Japan earthquake, my personal world was rocked. We have very good friends in Japan, including my 'sister' Miyuki who was a bridesmaid in my wedding. I immediately shared with my five-year-old daughter Lil, "There's been a big earthquake in Japan where the ground shook for a really long time. I'm worried about our friends there." Just like Mr. Rogers said she would, Lil asked about herself. "We are safe here in Ohio," I explained, continuing with a little description of plate tectonics.

My husband, a nuclear engineer by trade, and I continue to read the news. We save talking to each other about the tragedy for after our daughter's bedtime.

What I do share with Lil, who visited our friends in Japan at age 1 1/2, are our tangible actions. I reached out by email to our Japanese friends Naoko and Miyuki. When Naoko responded, I read the important parts to Lil to let her know that our friend is safe. I made several paper cranes and they will sit by our dinner candle until I have confirmed that Miyuki too is well. We are deciding as a family whether, where, and how much to donate to relief organizations.

Knowing that natural disasters will continue throughout my life and my daughter's, I wish to give her tools to process her feelings and be safe. Mr. Rogers says it best, "if we can bring our children understanding, comfort, and hopefulness when they need this kind of support, then they are more likely to grow into adults who can find these resources within themselves later on."

------

Update #1: Miyuki emailed us on Thursday. She wrote "Everyday all of the Japanese TV program shows only earthquake news now, and I can’t believe this very worst event…

I’m assailed by a feeling of seeing a fiction move…

Anyway, my family is fine, so don’t worry about us, and please pray for all the sufferers."

We are, of course, very relieved to know that our friend is well. Certainly we are thinking of all in Japan and around the world affected by natural and human disasters.

Update #2: The Japanese exchange program I volunteer with is still looking for host families for this summer. If you want to do more than donate to Japanese relief services, consider opening your home to a student. Read about how my family benefits from hosting exchange students or jump to the Ohio 4-H International host family application. Keep in mind that your home must have a student aged 11-17 to be a host sibling for this program.

Friday Five: Inspirations and a Video

Here are five cooking thoughts trolling through my taste buds: 1) Lil ate root vegetables! - I agreed to make a video featuring Newman's Own ingredients in exchange for a video camera and some of their products. I do honestly purchase Newman's Own products and genuinely like the brand, so this was an easy video to kick out. What surprised me was that my co-star, picky daughter Lil, actually ate the sweet potatoes and beets in the recipe I prepared! She hasn't willingly eaten either ingredient in years! Watch our goofy video if you want and I'll share the recipe Tuesday for what I made.

2) Brined green peppercorns - This ingredient was used by Del Sroufe at his recent Hills Market cooking class. I was fascinated as I've never heard of or tasted Brined Green Peppercorns. They packed a big flavor punch into the pasta dish he made. I want to make them myself (of course) and figure it can't be that hard with only four ingredients listed on the bottle: vinegar, water, salt and peppercorns.

3) Smoked fried chicken - I am reading Ideas in Food: Great Recipes and Why They Work, a cook book for true food nerds. It details the scientific reasons behind the way food behaves. I have been obsessed with the idea of their cold-smoked then fried chicken even though I don't have a cold-smoker.

4) Alpaca - I was browsing Dine Originals Restaurant Week menus online. There are so many great ones but I was truly surprised by the Ohio alpaca terrine offered by The Refectory Restaurant and Bistro. What I know of the alpaca industry is that the animals are most often raised for fiber. I'm curious where the chef is finding meat alpacas and what in the world they taste like.

5) Cooking to make an emotional experience - Yesterday, I listened to Fresh Air featuring Alinea chef Grant Achatz. He described that in designing his highly creative meals, he aims to affect a person emotionally. I've never deliberately tried to affect others' feelings with my cooking, but I certainly do address my own emotions in what I cook.

Practicing Homeschooling

homeschool making flashcardsI mentioned awhile ago that we are considering homeschooling Lillian. In order to get a feel for the experience, Alex and I began 'practicing' in December. Because I am home most often, I am largely in charge of creating activities and guiding Lil, though Alex is supportive and participates when he can. I started by intentionally changing my attitude. I re-framed our activities together as potential teachable moments. I began asking more questions of Lil and challenging her to read and use math in our daily lives. I try to do this in a natural way, leaving plenty of time for free play.

I gathered educational tools including writing paper, pencils with erasers, dice, cards, and other math manipulatives from Lil's existing art supplies and my former teaching materials. I organized these on a shelf in our dining room.

We decided together that it would be best to practice writing, reading, math, and exercise every day. Usually we sit together after breakfast when we are both in our best moods for a fifteen minute writing and math practice session. Later, we choose our daily exercise, be it walking, doing yoga, lifting weights, or working in the house or yard.

I organize writing practice loosely to include spelling, grammar, sentence structure, and handwriting. Activities may be free writing, dictation, copying, and writing letters.

Math includes learning facts, measuring, area, counting, patterns, and sorting. I use a workbook, worksheets, dice and cards to drill facts. We made a number line and flashcards together. I write area problems and patterns for her to solve. Her favorite math activity is making tests for me and checking my work.

Science, social studies, music, and art are covered in our everyday life. We explore biology in the garden, chemistry in the kitchen, history via the news, music and art at the library, geography through our travels, etc. We are being more intentional about investigating things as Lil desires.

The surprising result of practicing homeschooling has been that our family loves it more than we imagined. Given a small amount of direction and practice, Lil's math, writing, and reading skills have improved dramatically. We keep some of her work in a portfolio to track progress. Lil is publishing about homeschooling on her blog.

We sent in our application to the Columbus Public School lottery. We live a block away from an informal alternative K-8 school that receives a large number of applications for about seventy full day kindergarten spots. We are still unsure whether we would accept a position if we are offered one.

I'm curious: What do you think about homeschooling? Do you want to read about our educational philosophy and activities on Hounds in the Kitchen?

Added to Simple Lives Thursday.

Holla Challah!

challah braided loaf recipeChallah is said with a 'holla!' attitude in this house. I apologize to Jewish families who eat challah as a sabbath bread, but I really can't even think of this bread without the tune of Hollaback Girl rising in my mind. It doesn't matter how you say it or whether you think of the song: challah is a rich beautiful bread worthy of baking and eating regularly.

If I am working alone, I form the dough into a double braid as is traditional.

If Lil is hosting a play date, I often make a batch of challah dough, let it rise and then divide into four or six pieces. I help the children shape braids, spirals, letters, or 'rocks'. They rise a second time while the kids play. We bake their creations and watch the shapes change. Finally, we eat the delicately crumbed breads together, sharing for some kids their first yeast bread baking experience.

[print_this]

Holla Challah makes one large loaf or four-six smaller loaves

adapted from the The Book of Bread

1 1/4 tablespoons active dry yeast 3/4 cup warm water 1 tablespoon sugar or honey 2 teaspoons kosher salt 2 eggs, lightly beaten 2 tablespoons vegetable oil 1 1/2 cups white whole wheat flour 1 1/2 - 2 cups bread flour

optional glazes: 1 egg yolk mixed with 1/2 teaspoon water, poppy seeds

1. Stir yeast and sugar into warm water in a mixing bowl. Allow to proof for five minutes.

2. Add eggs, salt, vegetable oil, and white whole wheat flour. Begin stirring, or start KitchenAid /stand mixer with dough hook if you have one.

3. Add bread flour until the dough pulls away from the sides of the bowl cleanly.

4. Turn onto a floured board and knead at least ten minutes until dough is smooth and elastic. (Alternately, use dough hook of stand mixer to knead for 5 minutes.)

5. Put in an oiled bowl, cover with a towel and allow to rise in a warm place until double in bulk, approximately 1 hour.

6. Punch down dough and allow to rest for a few minutes.

7. Divide dough into portions for kids to shape. Help them make shapes and place on a Silpat lined cookie sheet with plenty of space between creations.

8. For a double braid, divide into two portions, one approximately a third of the dough and the other two thirds. Further subdivide each part into three equal parts. Roll each into a rope. Braid the larger three ropes, tucking ends under the braid, and place on a Silpat lined cookie sheet. Braid the smaller ropes, tuck in ends, and settle on top of the bigger braid.

9. Cover and allow to rise again until double in bulk, approximately forty five minutes. Meanwhile, preheat oven to 400 degrees F.

10. Brush risen dough with egg wash and sprinkle with poppy seeds if desired.

11. Bake ten minutes at 400 degrees F. Reduce temperature to 350 degrees F and continue baking 35-40 minutes longer. Cool on a rack.

[/print_this]

Get ready for some meat curing posts - I'm participating in Charcutepalooza. Read my article about the year of meat project on Technorati.

Challah recipe added to Hearth and Soul blog hop.

We Killed and Ate a Backyard Chicken Today

Some may find pictures in this post graphic. Sometimes you have one idea in mind and the day takes a totally different direction. Today was such a day.

A fellow chicken-keeping family called around 10 in the morning and said this was the day they wanted to kill one of their hens. Speckles, a Speckled Sussex like our Sussey, wasn't laying eggs and wasn't following the flock. They invited us to participate. After a quick read of the Hip Chick Digs method for slaughtering a backyard bird, we headed out for our first chicken kill.

saying goodbye to a backyard chickencutting head off the chicken for slaughter

Alex held Speckles and we all said goodbye to her. Hanging her upside down by the feet and covering her eyes, Alex yanked the neck to break it. She was dead in less than five seconds.

Our friend cut the head off and Alex held the bird as about a quarter cup of blood drained away. The chicken's body seized and wings flapped, natural post mortem movements.

dunking a slaughtered chicken in boiling water

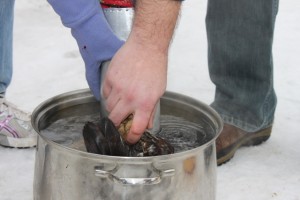
A large pot of sub-boiling (140 degree) water was brought outside and Alex dunked the body in for twelve seconds to loosen the feathers. A stench not unlike singed hair filled the air.

removing chicken feathers by hand

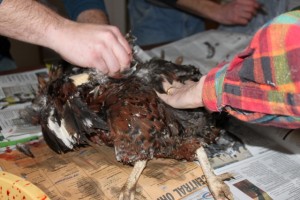
We carried the body inside and everyone went to work removing feathers. This job was less tedious than we expected, though many hands contributed. Many feathers were saved for the kids to explore and craft with.

chicken before butcheringremoving entrails from chicken

Alex started the butchering by removed the neck bones. Then, he carefully cut a 'Y' shape on the lower abdomen, cut between the cloacha (anus) and tail and pulled out the entrails. We were all fascinated with the chicken anatomy.

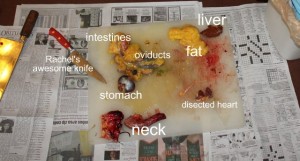
chicken entrails labeled

The two children were interested in all the body parts so while two adults rinsed and chilled the bird, others dissected the heart, observed the intestines, cleaned the liver, and cut open the stomach. Later Alex found the crop, the stone filled sack chickens use to partially digest their food.

Already we would sense that this bird would be different than any we had tasted. Under the skin and around the organs were huge masses of yellow fat. The leg muscles (drumsticks in culinary terminology) were small in comparison to the body size.

backyard chicken in ovenbackyard chicken and vegetable lunch

Once fully cleaned, our friends invited us to share a lunch of roasted Speckles with them. Alex trussed the bird with skewers and we surrounded her with onions, carrots, celery, and potatoes, all covered with salt and lemon pepper.

The bird cooked quickly. The flesh was chewier than a broiler bird but very mildly flavored. We did not consume the copious fat, leaving most on the carcass to roast with the bones and make stock.chicken feet

For some reason, the kids attached to the feet. Each wanted one to preserve for 'making into a tree for the train set' and 'making into a halloween decoration'. We are salt curing ours to draw out moisture and then we'll dry it. Even these oft-discarded parts are finding uses.

Like when we slaughtered the pig, I feel like this was an honest end to this chicken. We killed her humanely. Her flesh fed six for lunch and will provide at least one if not two meals for our three friends. Dissecting her body provided an anatomy education for all of us. The children experienced empathy towards animals, one of many lessons to be learned by witnessing an animal slaughter. Once again I conclude that to know a meal from backyard to plate is immensely satisfying.